
One of our TTAgents has something for you all to see.
TTAgent Bart D has put together his own demo board for events and will be at Warcon February 8th in Ghent, Belgium. If you are going, keep an eye out for him as he will be running demos all day. The article ahead was written by him and he would love to show you what he has built.
“Beato quelo che impara a spese dei altri”
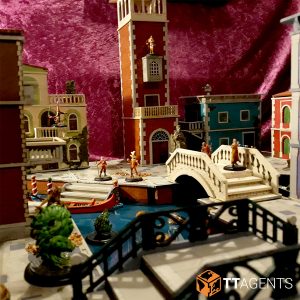
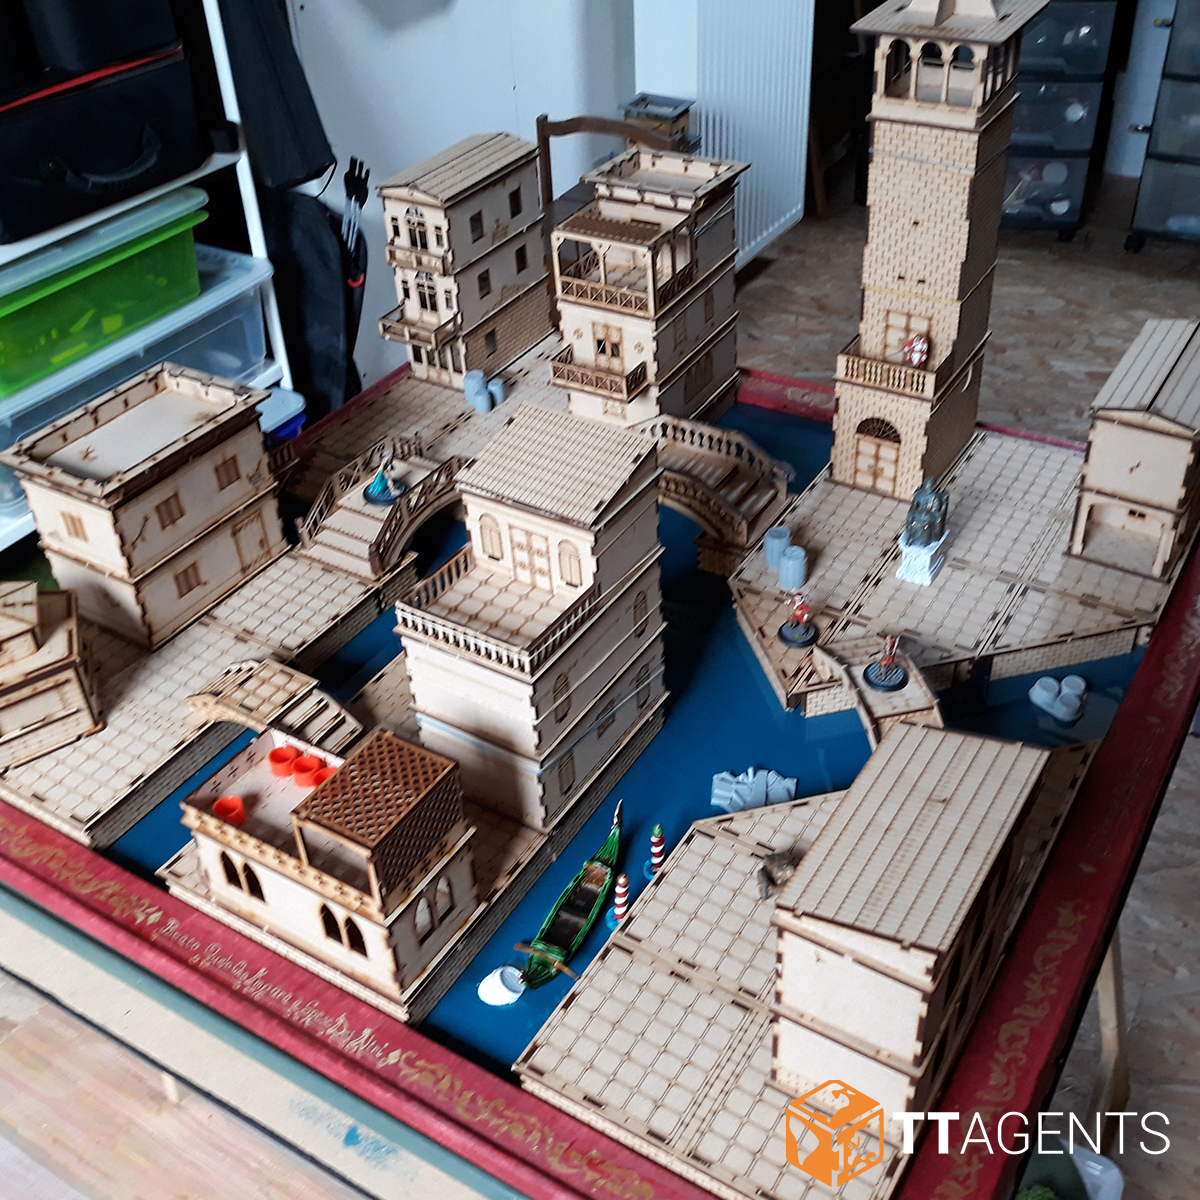
One of my most favorite things in the hobby is making scenery, and when I saw the Venetian Quarter for the first time at Crisis last November, I knew it would make a perfect project. My intention was to make a demo board first, to get the hang of the materials and try my hand at painting MDF, a material I wasn’t really familiar with. I set my deadline at the beginning of February, so I could get everything ready for Warcon.
This did leave me with a limited amount of time, So I started on the board itself while my stuff was being cut.
The board:
I chose an 80x80cm/2.5×2.5ft mdf sheet as a base board, and made a quick trip to the art store. I wanted to make a nice border for the board and the stretching boards most art stores have in stock are perfect for this. They’re cheap, come pre-cut in a plethora of sizes and are easy to paint or decorate. Just make sure you have a tape measure on hand when buying.
For decoration I went by the scrapbooking section for some stencils. I went for something properly rococo-looking, and looked up some Venetian proverbs to intersperse with the decorations (I chose a few that were semi-gaming related). I glued some metal decorations on the corners for added sturdiness as well.
I first made a base for the water by adding different greens and blacks to a base of blue. I then covered those up with another layer or two of the blue to blend this in, and the result added some depth to the board.
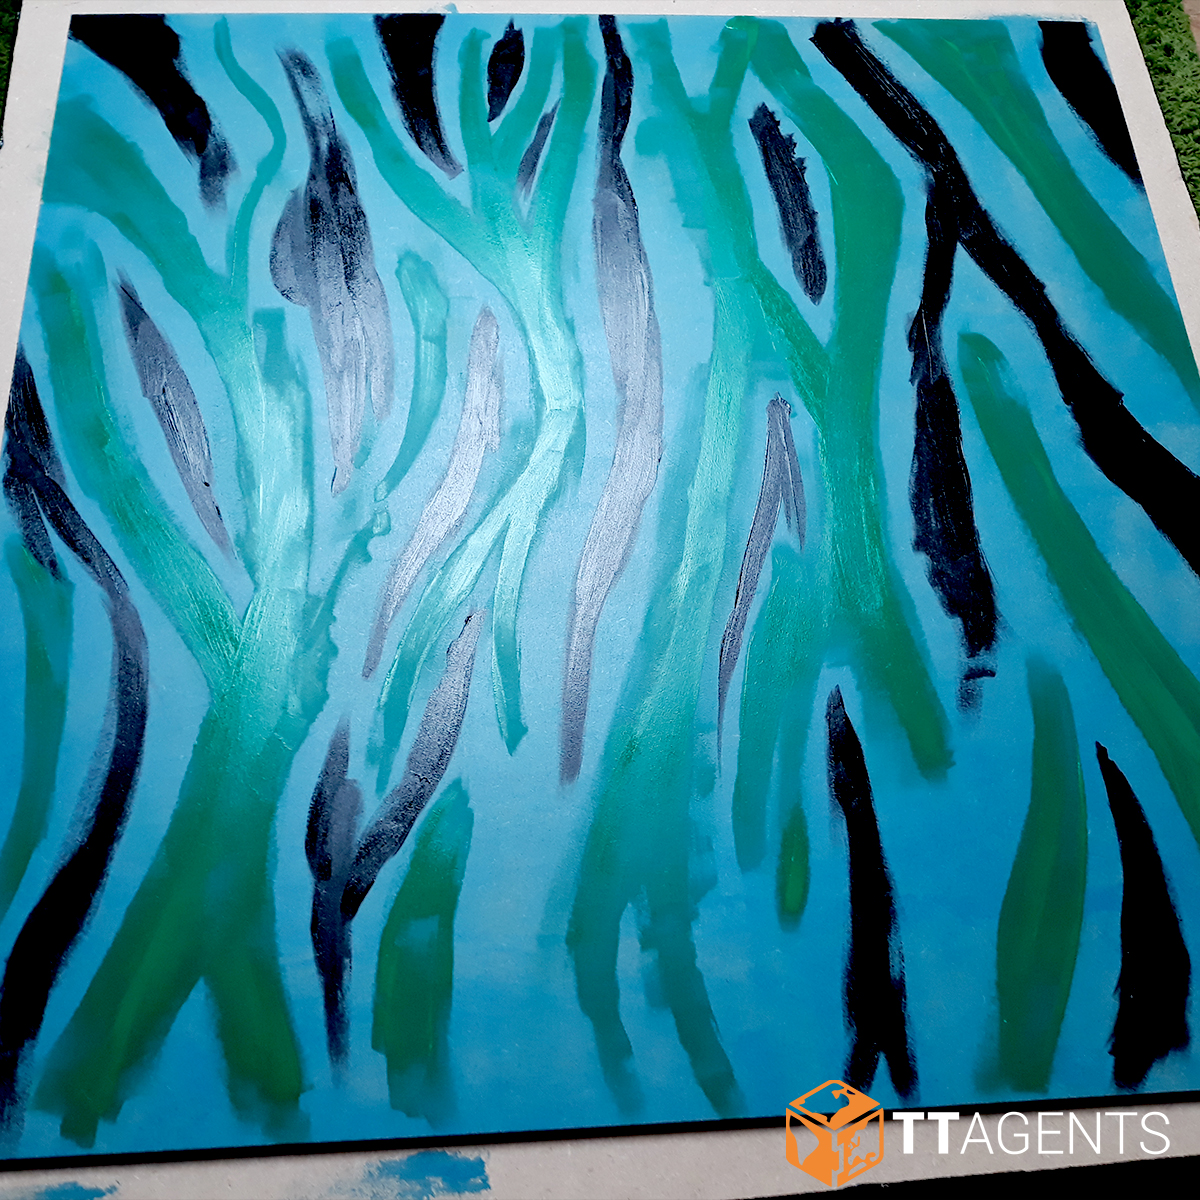
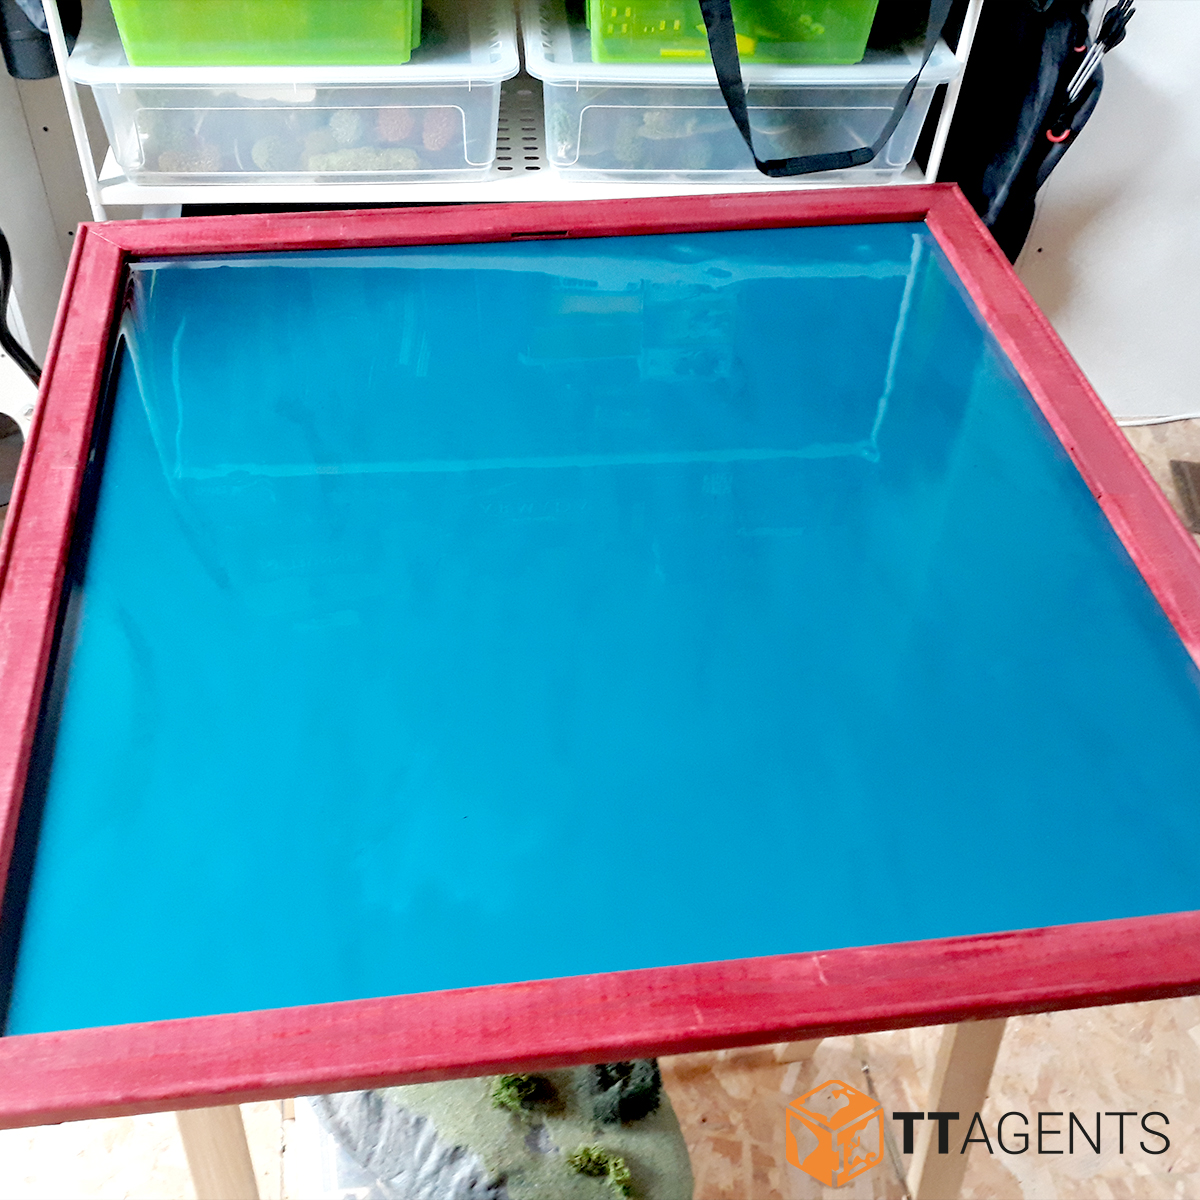
The border itself was glued and painted a deep red, and I freehanded the Carnevale logo and added the decorations. I decided to go for a nice bright blue for the lagoon colours, as I was inspired by Le Cinque Terre for my overall colour scheme. Nice and bright pastel colours, we’re dealing with pseudo-history and fantasy here, so I didn’t want to go too realistic.
After using wood glue to fix the border in place, I was ready to start pouring the resin. There are a couple of ways to get a water effect, but I’ve used two-part epoxy resin from Craft Emotions before, and was always happy with the result. It takes ink well if you like to add a splash of colour (or pollution), the air bubbles dissipate naturally after a while and it doesn’t shrink or turn yellow over time. It’s used for making plastic jewelry, but is perfect for rivers, pools and the haunted streets of Carnevale. I decided against Mod Podge for adding currents or waves, as that would limit the modularity of the board.
The Buildings:
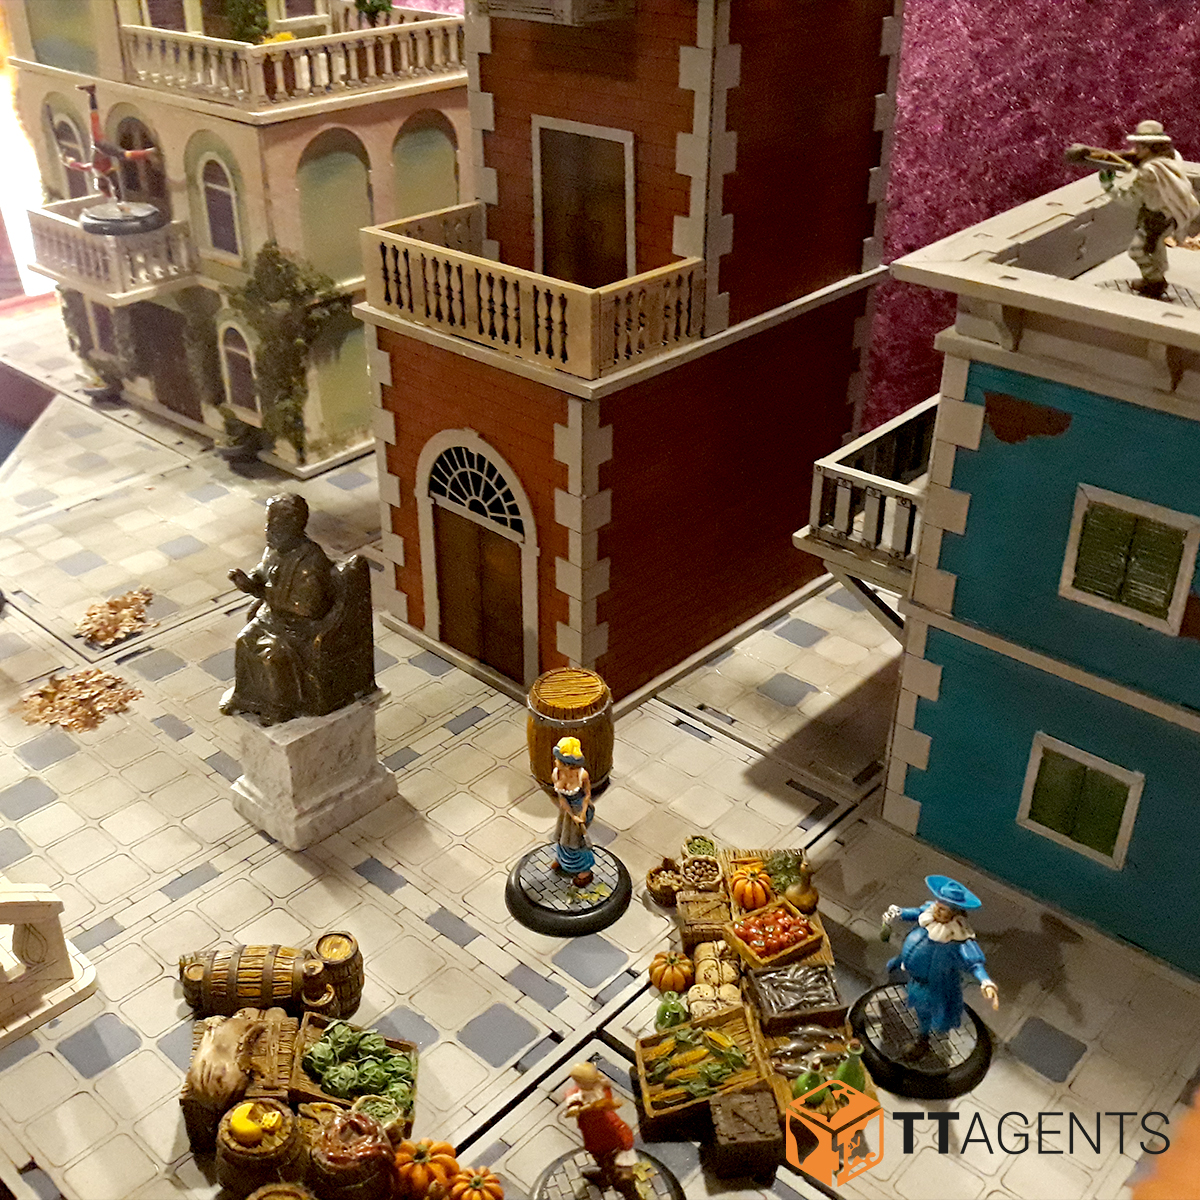
Come Christmas I received a sizeable package in the mail with a good chunk of scenery. I decided to build just enough stuff to fill out the board, so the workload would be manageable (so the two palazzi will have to wait a bit). What I noticed when constructing my test building is that it’s best to leave off the smaller details like windows, decoration and corner stones (yeah I don’t know the word for that). This makes it possible to prime and paint in different colours, and you can dry brush without worrying too much about going outside of the lines.
Before priming I sealed the buildings with hairspray, this isn’t 100% foolproof, but it does help prevent the paint soaking in on the larger surfaces. I used a combination of GW Grey Seer and Wraith Bone as primer, as I found that those give the best coverage and take paint really well. This is an expensive option, but the cheap grey stuff I used before soaks in too much. The next step I started by dry brushing in different acrylic colours, which I have amassed over the years but can be easily found in art & craft stores. I used a round make up brush for this, as those are incredibly hard wearing and dry brushing is pretty rough on your brushes.
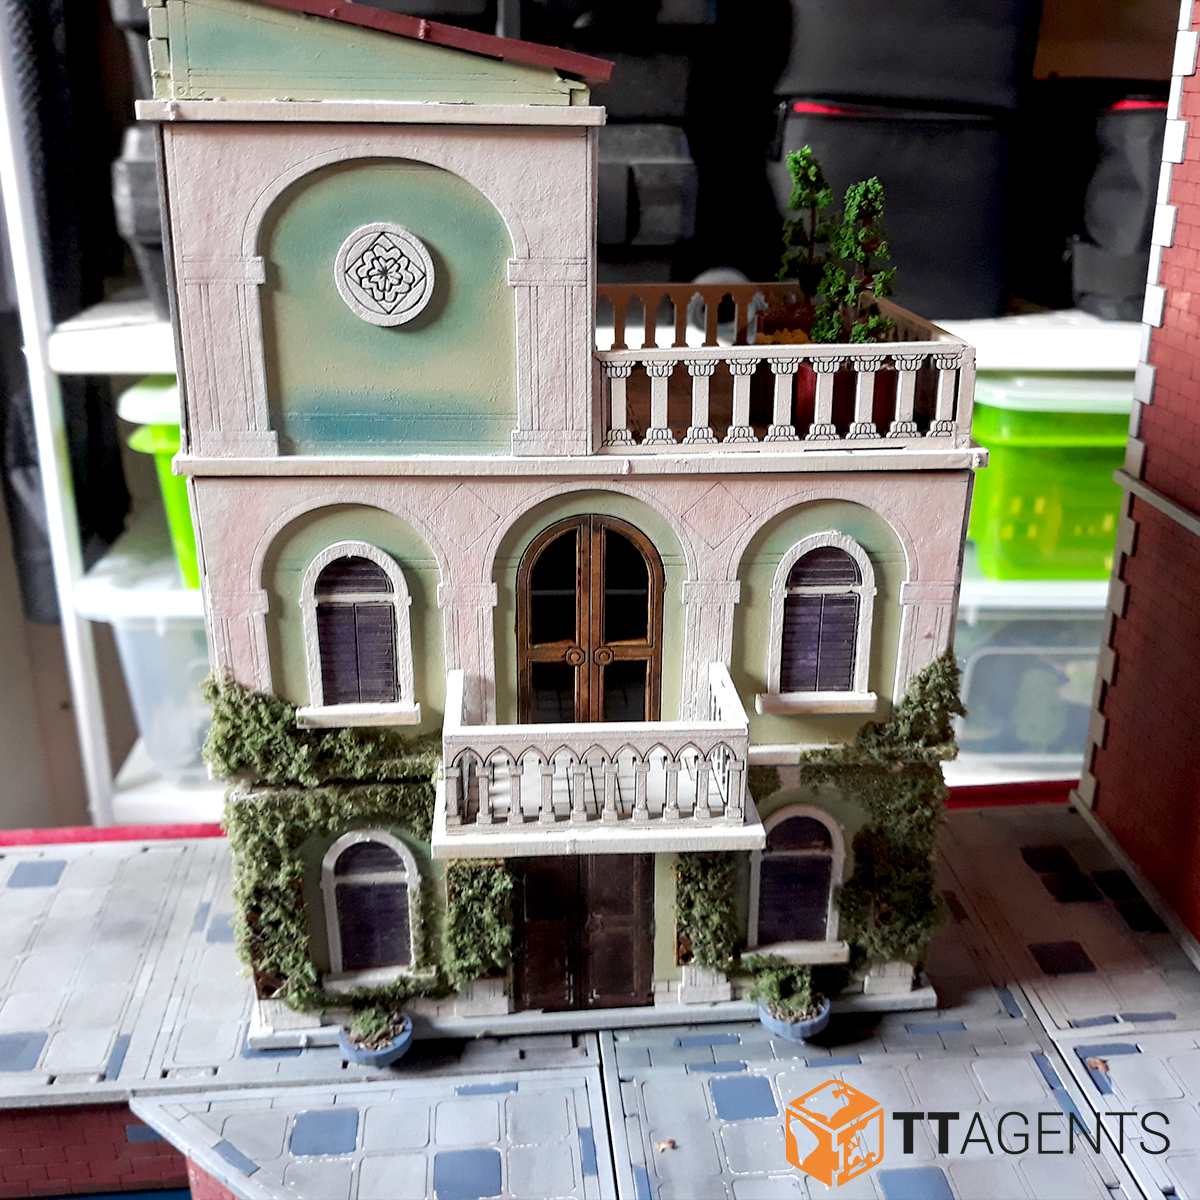
This gives it a nice effect, and it’s better to work in thin layers than piling it on. It also adds depth and gives a nice natural effect. I added pastel chalk, which you can brush on like a weathering powder for a more lived-in look. The street tiles got the same treatment as well
Last step: adding a bit of foliage, fallen leaves etc. This is the fun bit where you can really make the buildings your own. Raid the bits box for scatter, add some opera posters from the period or add some planters to the terraced buildings and balconies. When that’s all done, seal with a varnish to protect your hard work and get to playing!

I still have to finish the bridges and some details I missed, but building this board has been a lot of fun (and a learning experience). If you want to see it in person, visit Warcon on the 8th of February for a chat, a demo (tutto Il giorno!) and a ton of other games you can check out.
I hope describing the process inspires or gives some nice ideas on how to build your own board, let the people at TTCombat know, as they (and I) are interested on what you’re building and how you’re going about it!
Thanks Bart for the amazing board and write up, we look forward to seeing you at Warcon. Hopefully this inspires others and we look forward to seeing more from the TTAgents soon.
Thats perfect! When Carnevale game in spanish?