


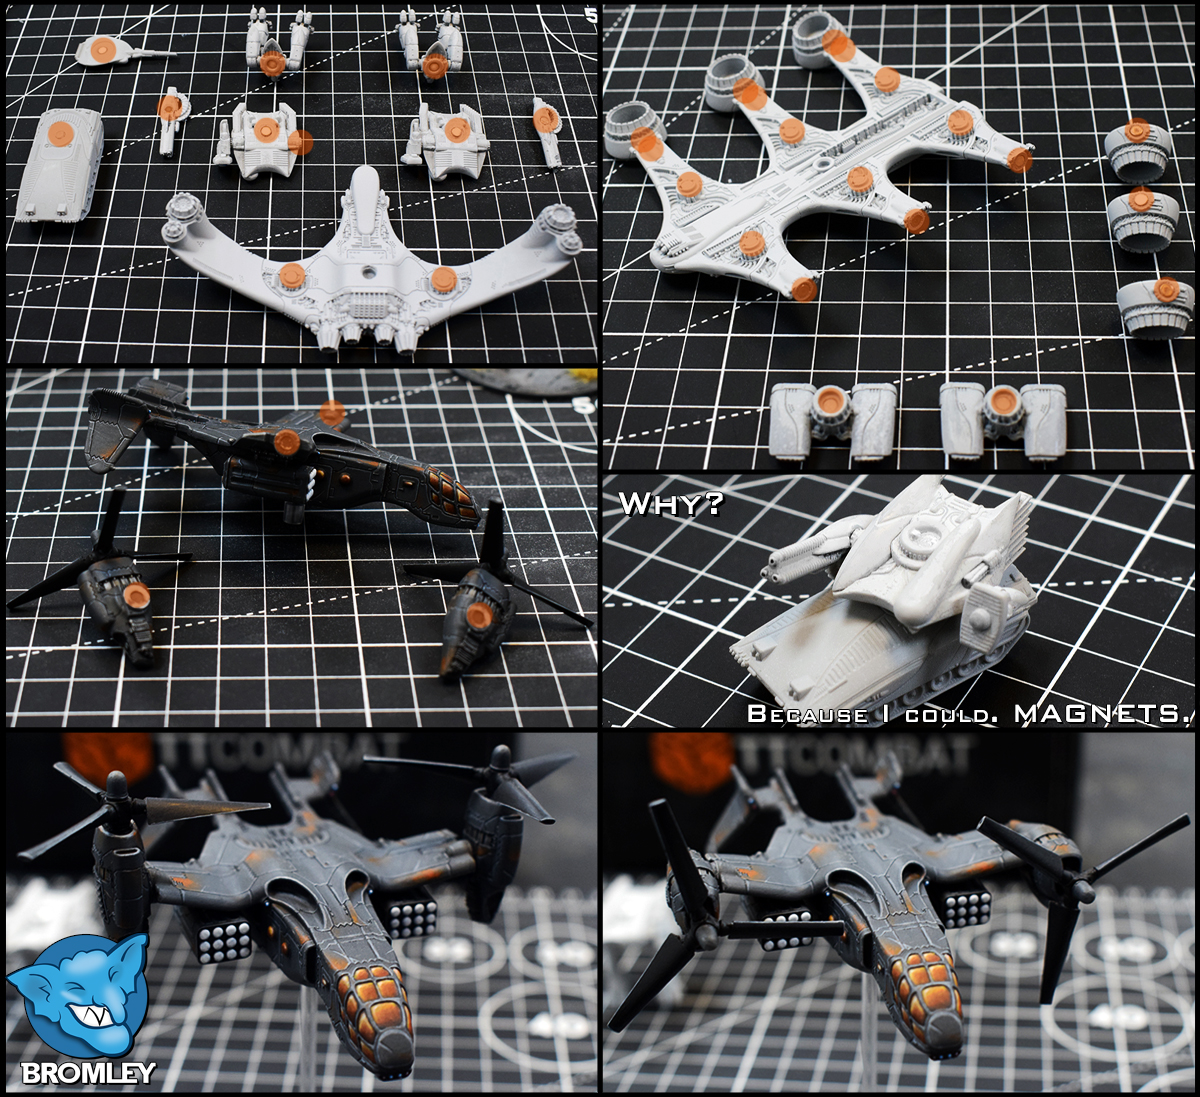
We are returning to the workbench once more as we arm our Resistance Dreadnought. Using MAGNETS!
Glue is a great way to put your models together. However, sometimes you may want add a little flair, or exchangeable elements to them. Magnets is a great way to do so and that is exactly what we will be doing today. Additionally, we will be showcasing a few other examples for inspiration.
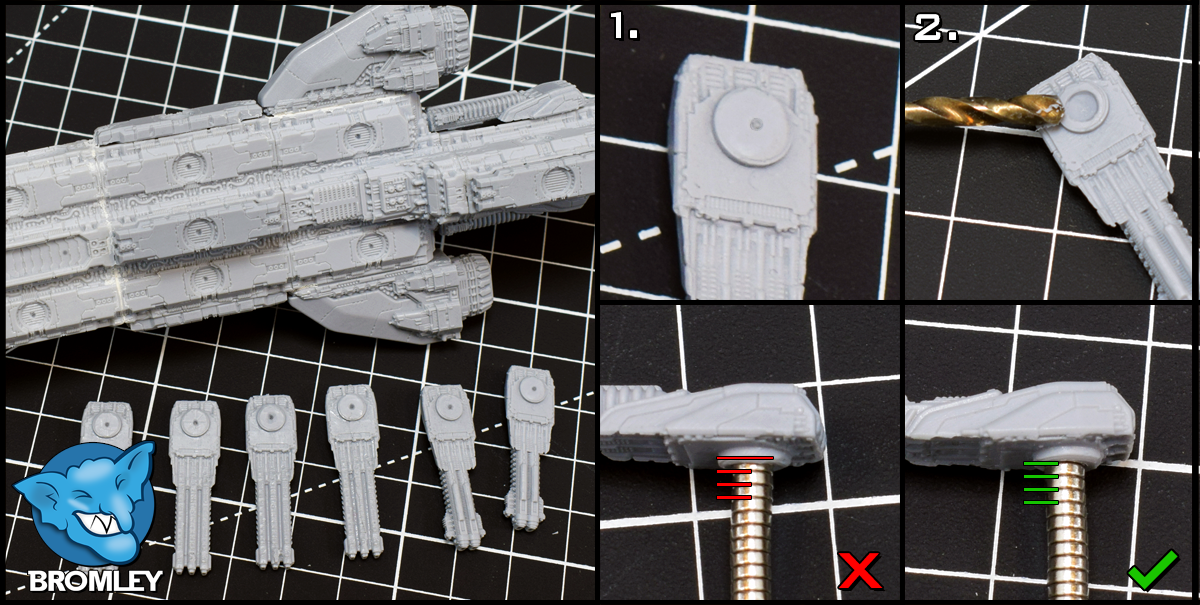
Drilling
Resin is a soft material that is easy to work with. As a result it is important to use a hand drill and take slow turns to avoid going too deep. First, I mark all the places I to drill by making a cut using a craft knife (1). I guide the drill bit using the mark and make a single turn applying light pressure (2). You can check that the hole is ending up in the intended place before committing. Finally, drill down a single turn at a time using a stack of magnets to check the hole’s depth until it’s just right. Using a stack of the intended magnets you can easily check the depth. We then keep repeating the drilling process for each of the marks we made previously (3, see next image).
Adhesive and Polarity
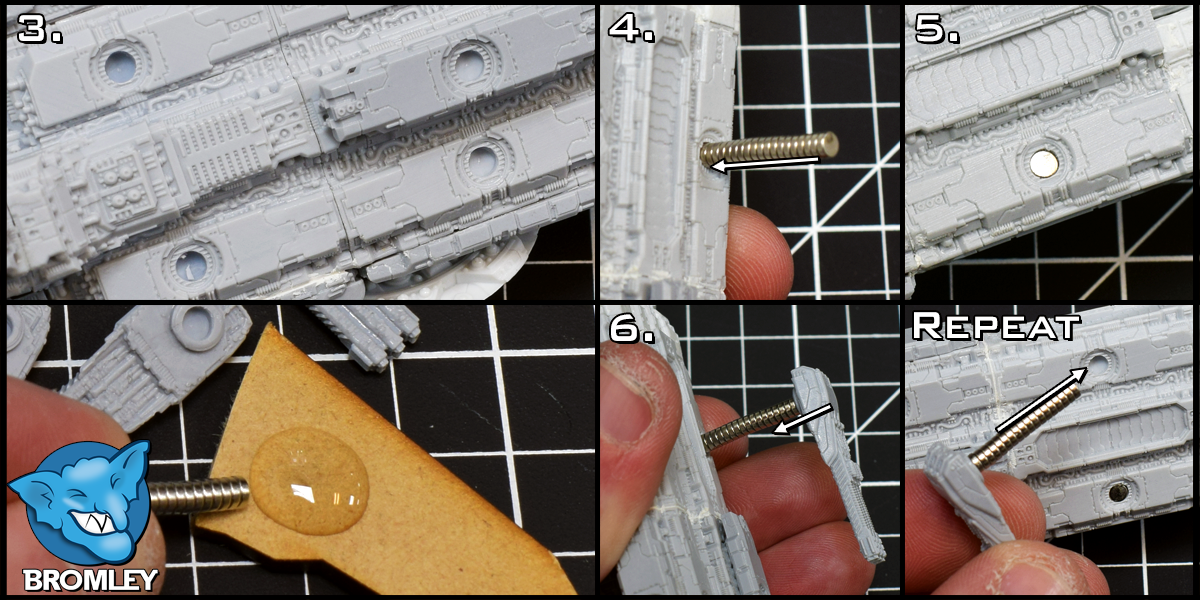
It is important to ensure your magnets are glued down with the correct polarity. Some prefer to use a permanent pen and marking their magnets as they work. However, I prefer the method of working with a stack of magnets, alternating glueing one to the dreadnought and then one to a turret. When applying glue to magnets, I like to use a scrap piece of MDF with a pool of super glue to dip my magnets into.
MAGNETS!
Apply glue to the bottom magnet in the stack (4) and push it into one of the holes drilled in the dreadnought and let dry for a few moments. Then, detach the stack and let it dry properly (5). Connect the stack of magnets again and this time, apply glue to the top magnet and push one of the turrets onto it and let dry (6). Finally, detach the magnets and go back to step 4, but this time there’s a turret on the top of the stack. Using this method, going back and fourth, there’s zero risk of glueing the magnets the wrong way around!
Spin that Turret!
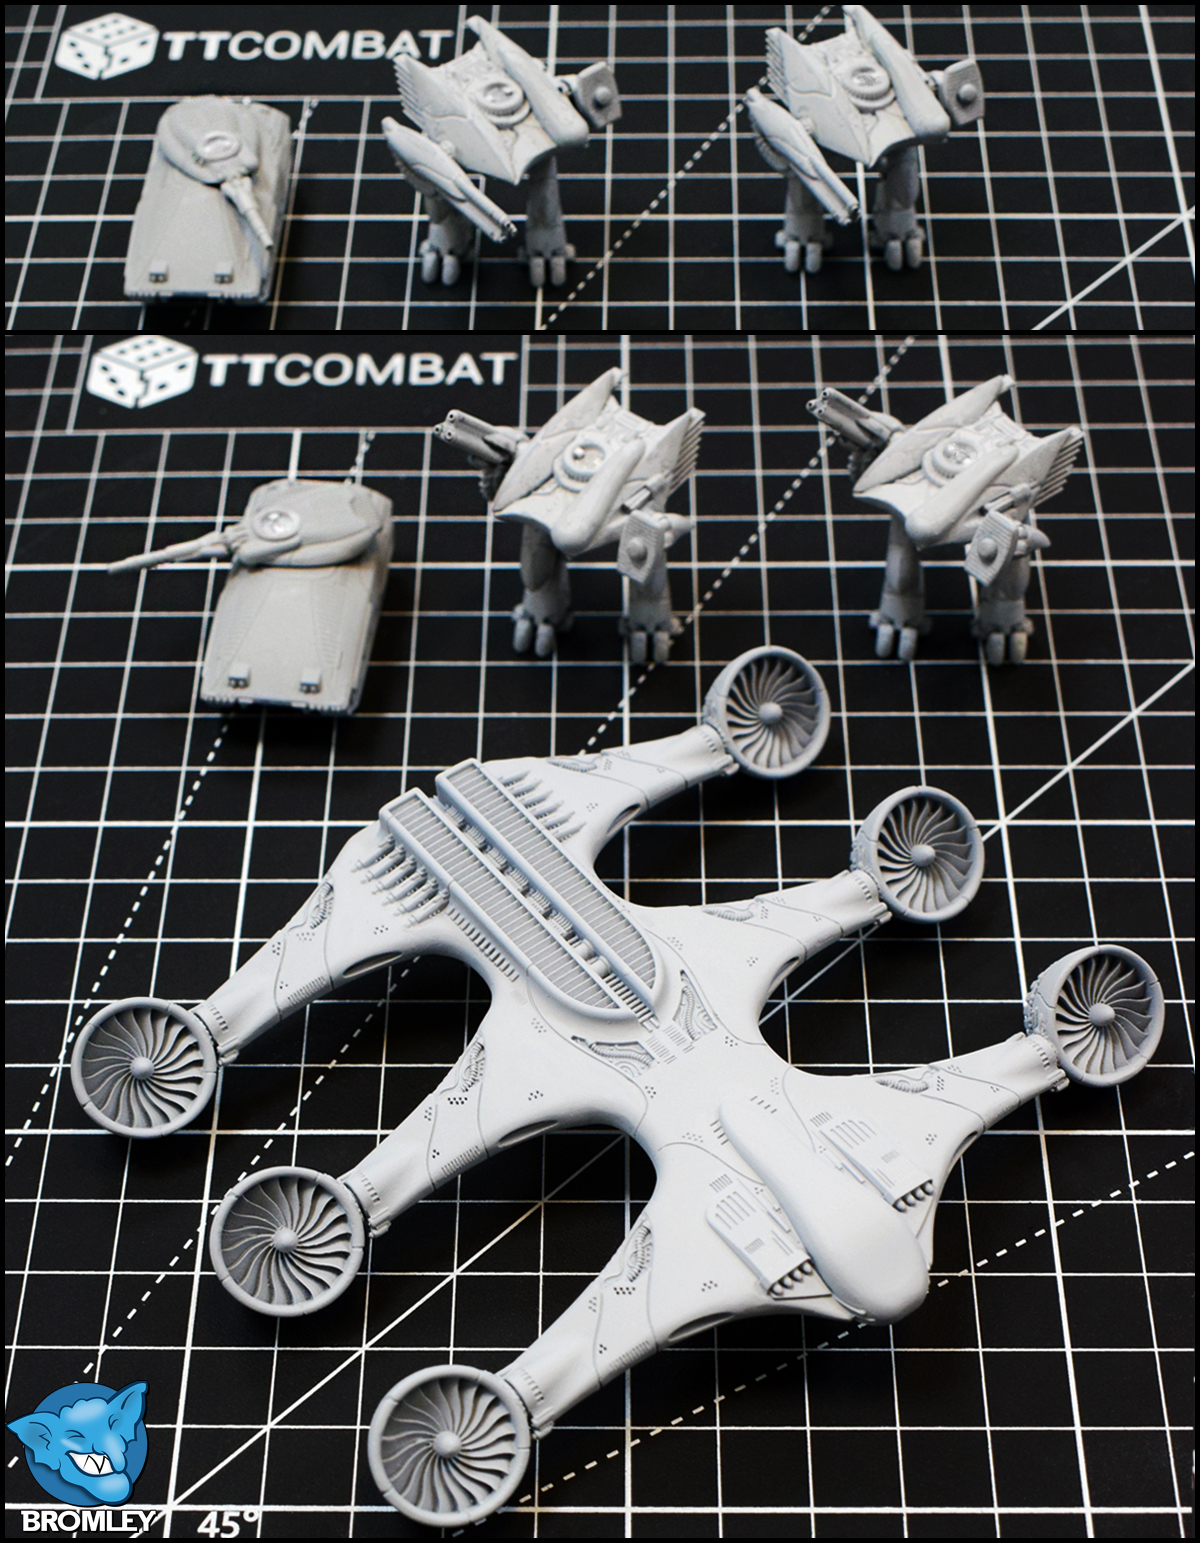
Once you get into the groove it is a rather quick job to repeat the process back and fourth. Eventually, once all your magnets has been put in place, it will look a little like this.
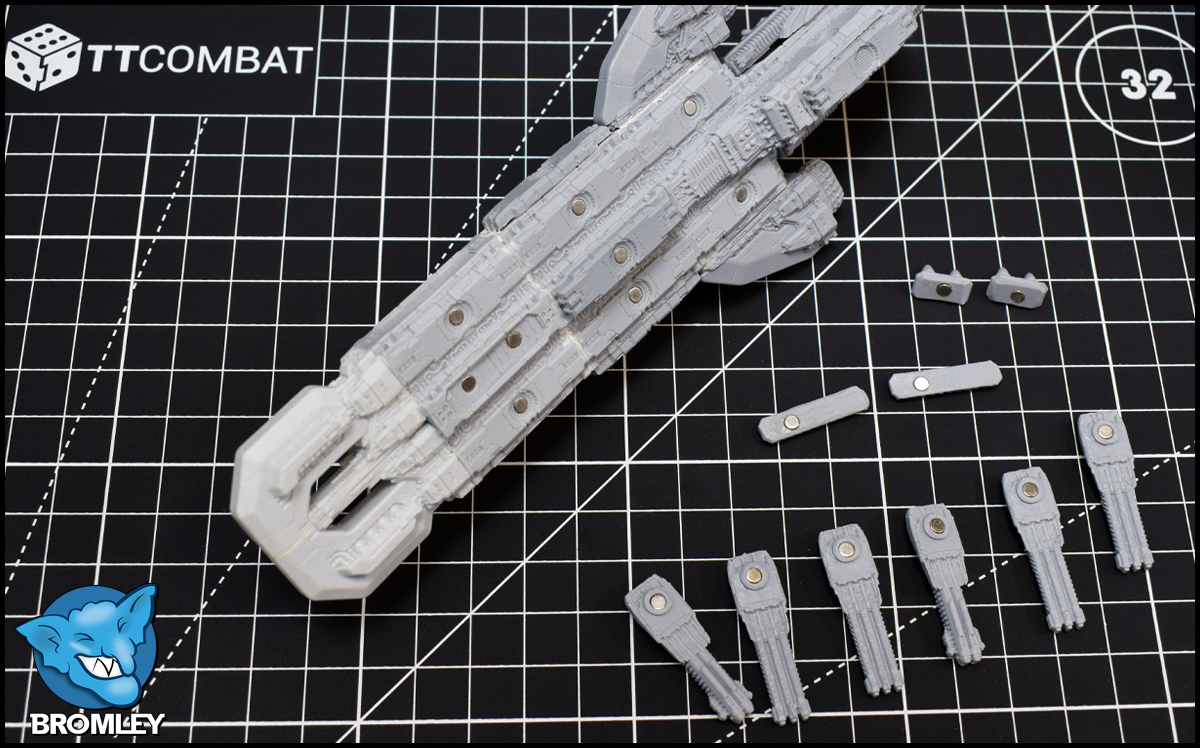
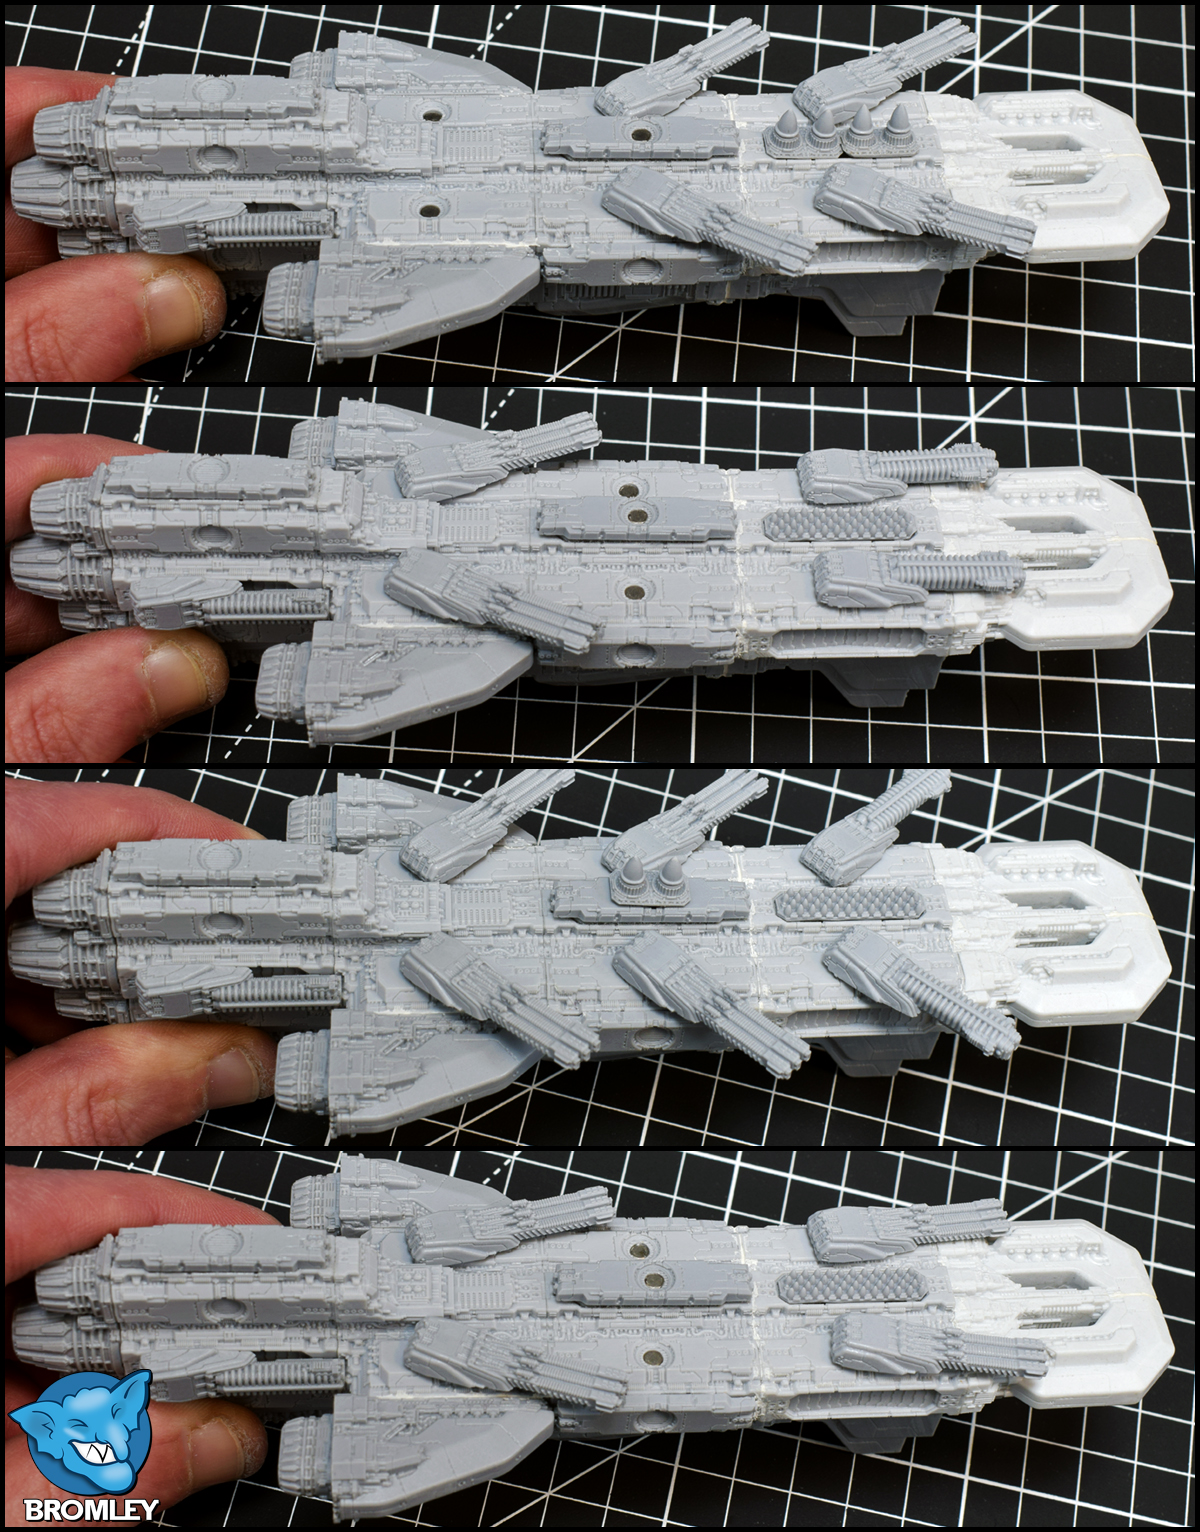
Magnetising all the weapons and their mounting points allow us to swap load outs as we please. Additionally, we can pivot and pose the turrets to add to the cool-factor! (Very important). However, exercise some patient and let all the magnets dry properly before starting to play around with your loud outs.
The many uses of Attraction
I am a big fan of using magnets in my armies and hobby projects. It allows me a lot of modularity. Many of our Dropzone Commander kits come with extra turrets and guns for their different variants and choosing one can be a bit tricky. Using magnets you no longer need to make that decision. Admittedly, many of my applications of magnets is solely for that cool-factor… Let us have a peek at some!
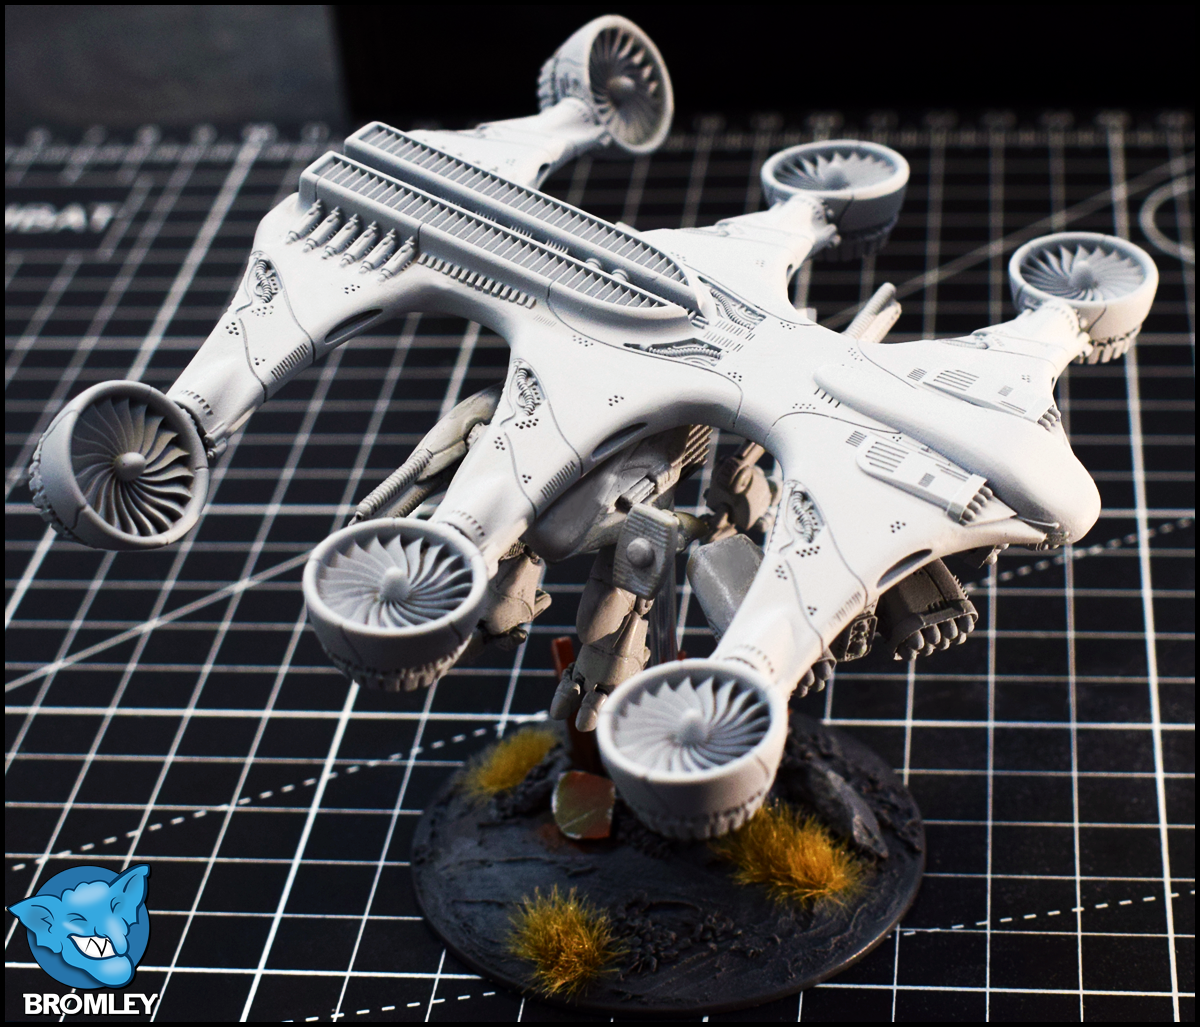
Next time we return to the Dreadnought it will be time for paint! Note however, that will be in the new year. Oh, and in case you now feel the urge to add coolness factor to your own miniatures, you can now find neodymium magnets in handy 50 packs in our online store on ttcombat.com