
One of our TTAgents has built a Demo Board for Dropzone Commander for use at events, and he has very kindly sent us a load of pictures and how to guide to help inspire player to make their own boards.
Almost anyone who is part of the Dropzone or Dropfleet Commander community will know of Michel Goulmy. He is extremely passionate about those games. When he said he was building a board for use at events we were excited to see what he came up with. He also sent us a guide to making the board with some excellent pictures. So let’s take a look:
So I had fun at PolderCon, https://www.poldercon.nl/ on 2nd of February!
My table was done, but only just. Something to do with kids, a wife and priorities. You know, the little big stuff in life. Some people wanted to know how I made it so here goes.
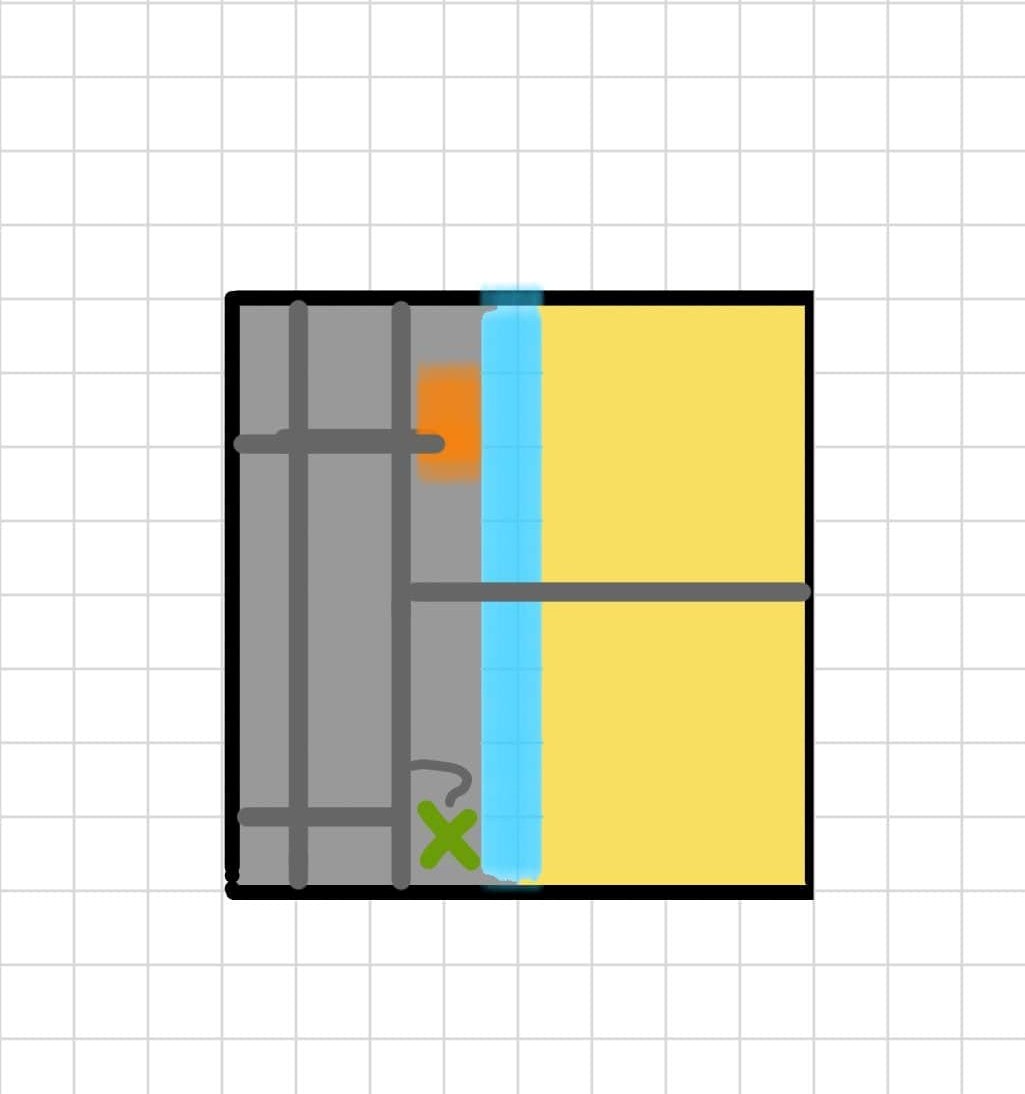
I didn’t want to just show a city fight table and also not just a green earth looking one either. So I mixed it up; part city, part Mars-like desert divided by a river to cover the gap. So a few sketches where made.
I wanted to do something a little different, not just show off a city fight table or the usual green earth either. So I decided to mix it up with half city half Mars-like desert divided by a river to cover the gap.
Well the first sketches was good in theory, when put to scale it turned out roads take up a lot of space, space needed to put buildings in! So instead of 2 parallel roads in the city I went with 1.
This also opened up more space to put down the Orbital Defence Laser model. Giving us this drawing.
So that was the plan! Now I needed to check what materials I had to use.
Of course a big sheet of MDF 4”x 8” with 1 side coated in plastic. That will be cut in two 4”x2”, several road sections and a river. Roads being 2 laned same as the cityscape card terrain, roughly 4 inches. Go print one here on the TTC page: https://ttcombat.com/pages/dropzone-commander-resources
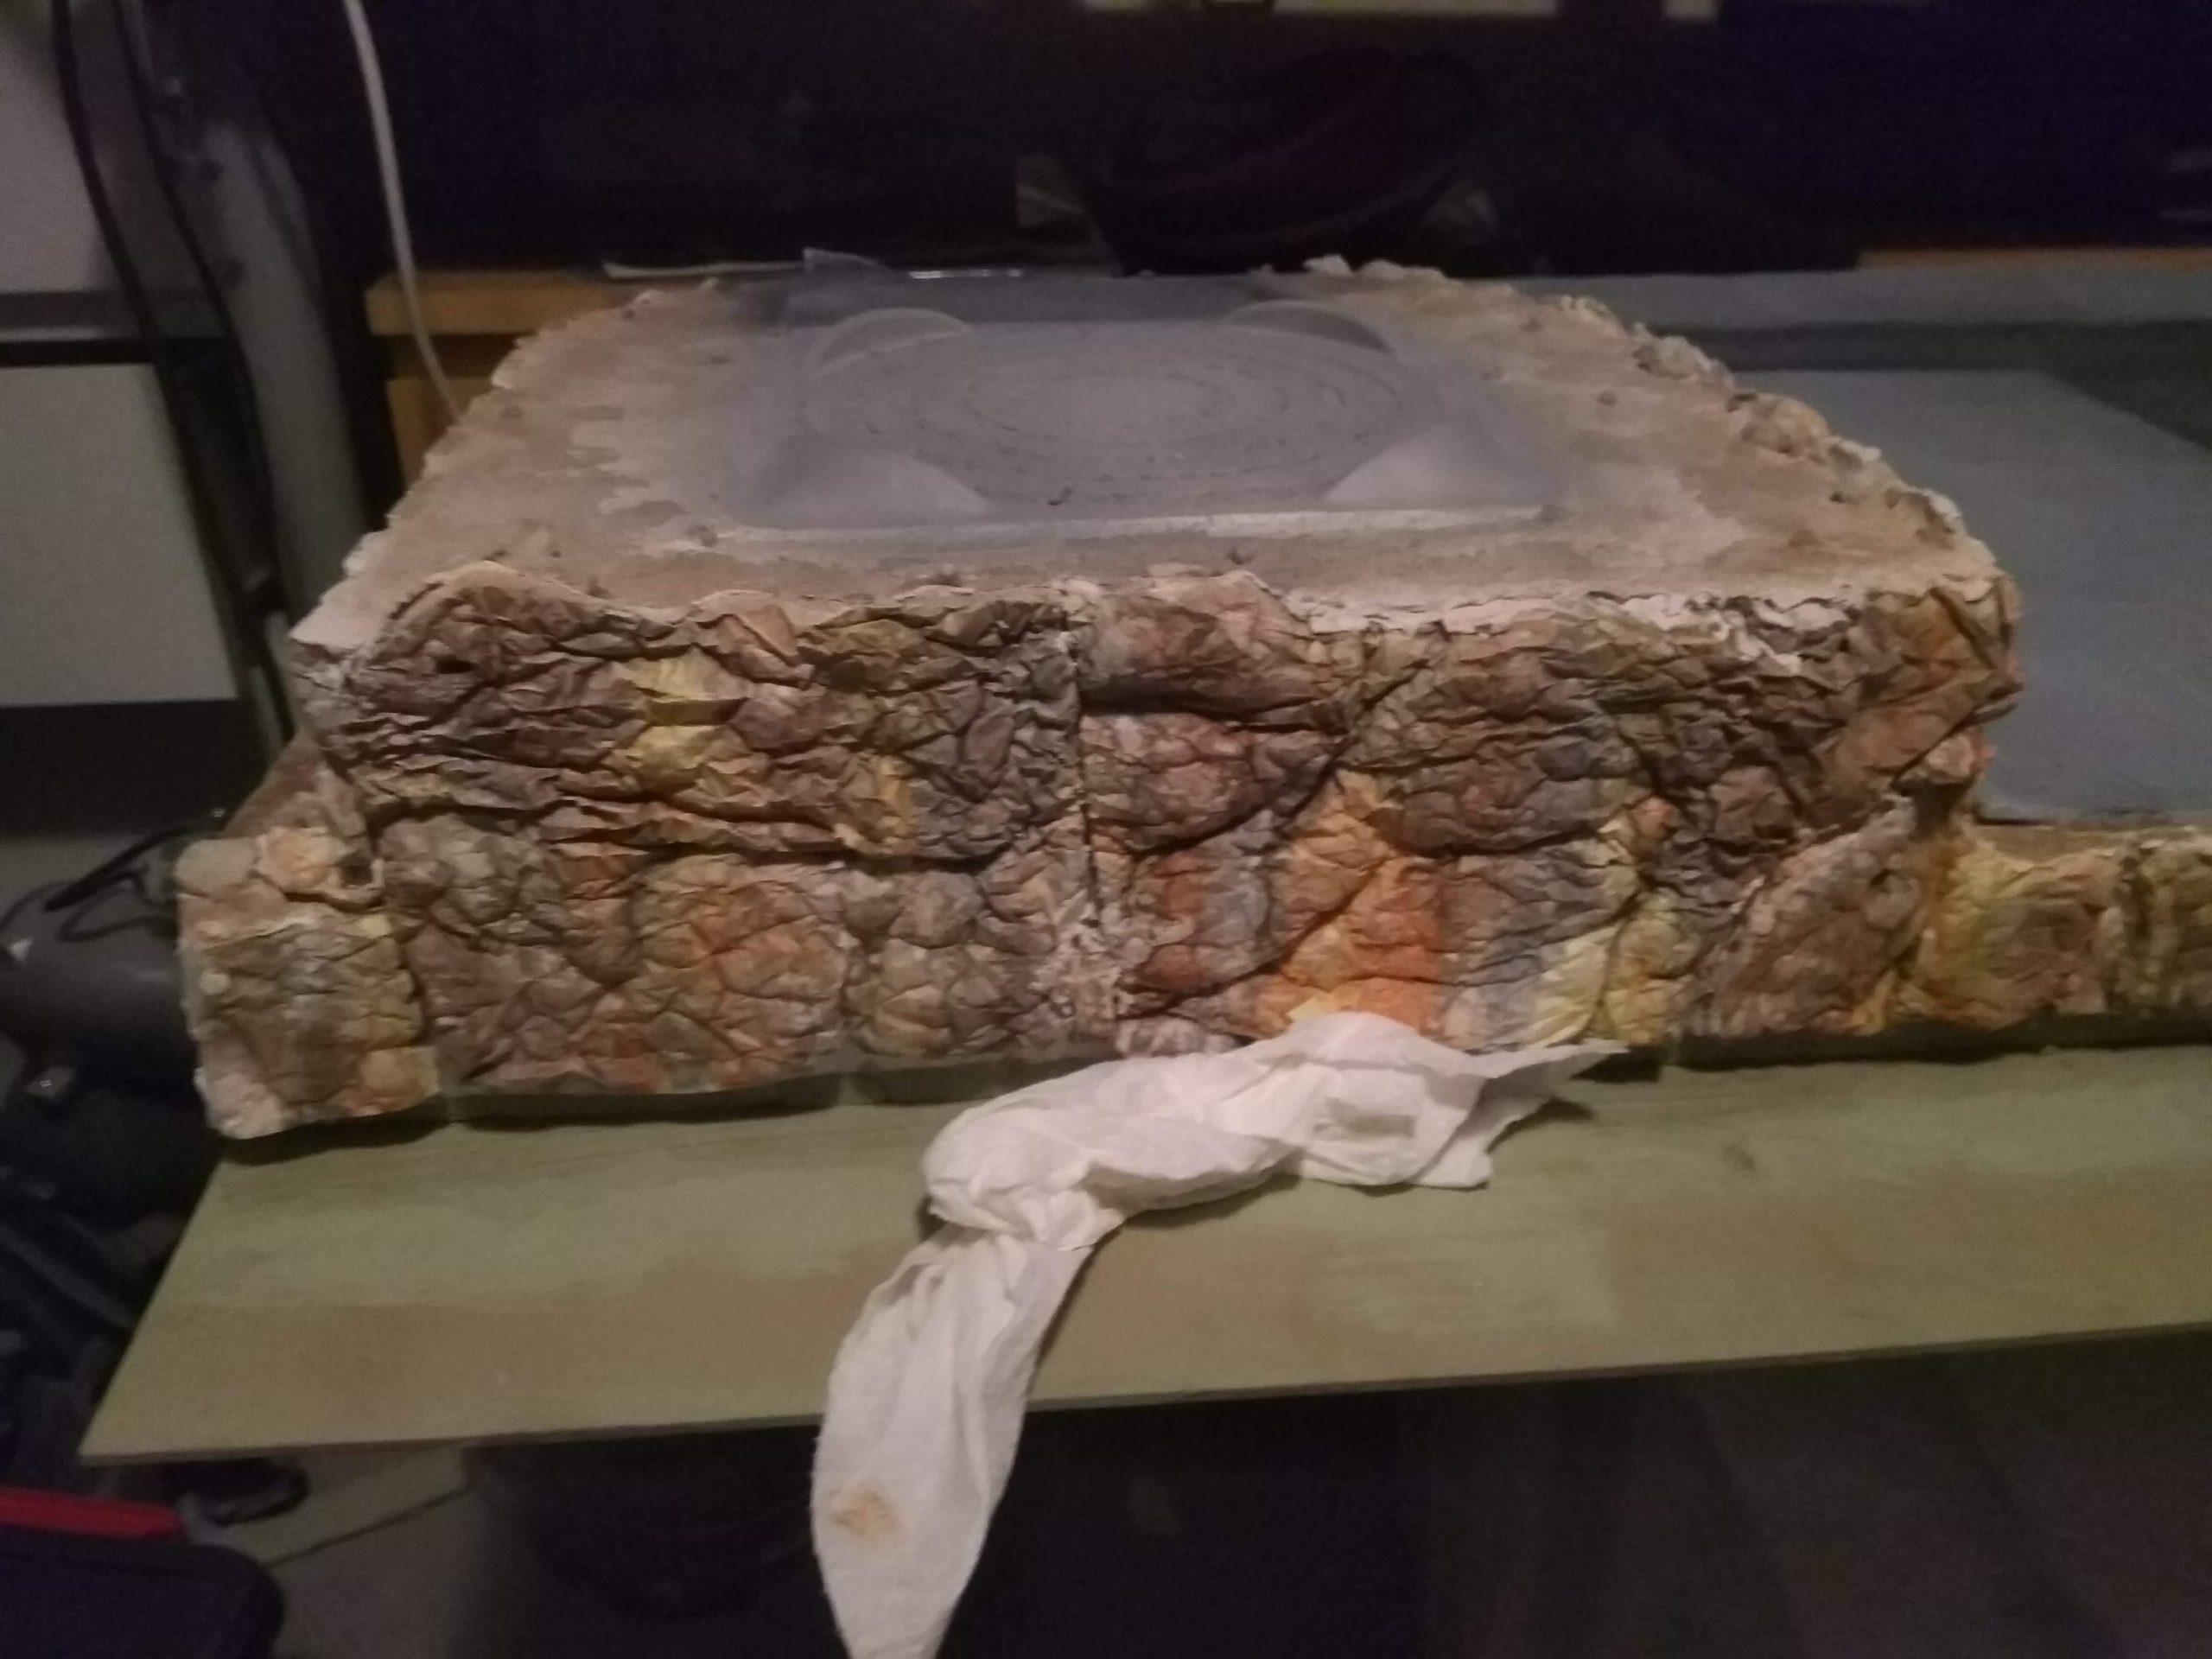
Styrofoam is used to give height. I had 2x 6cm high x 50cm wide x 100cm long blocks from another project still laying around. Did the math and came up short for the board to do the complete city + edge of the desert at that height. So I needed to cut blocks, which gave me the great idea of underground monorails. (Thank you command cards!)
The gap would be covered by the road. And the river could be widened a bit to adjust for the cutting loses.
I also had sheets of Styrofoam of 2.5 cm high x 50cm wide x 100cm long that would be my desert and harbour floor and back up for any gaps.
Went to the DIY store had the cut of MDF cut up, also picked up 240 grid sanding belt paper to put use as the roads.
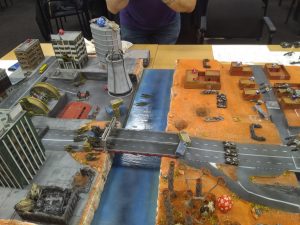
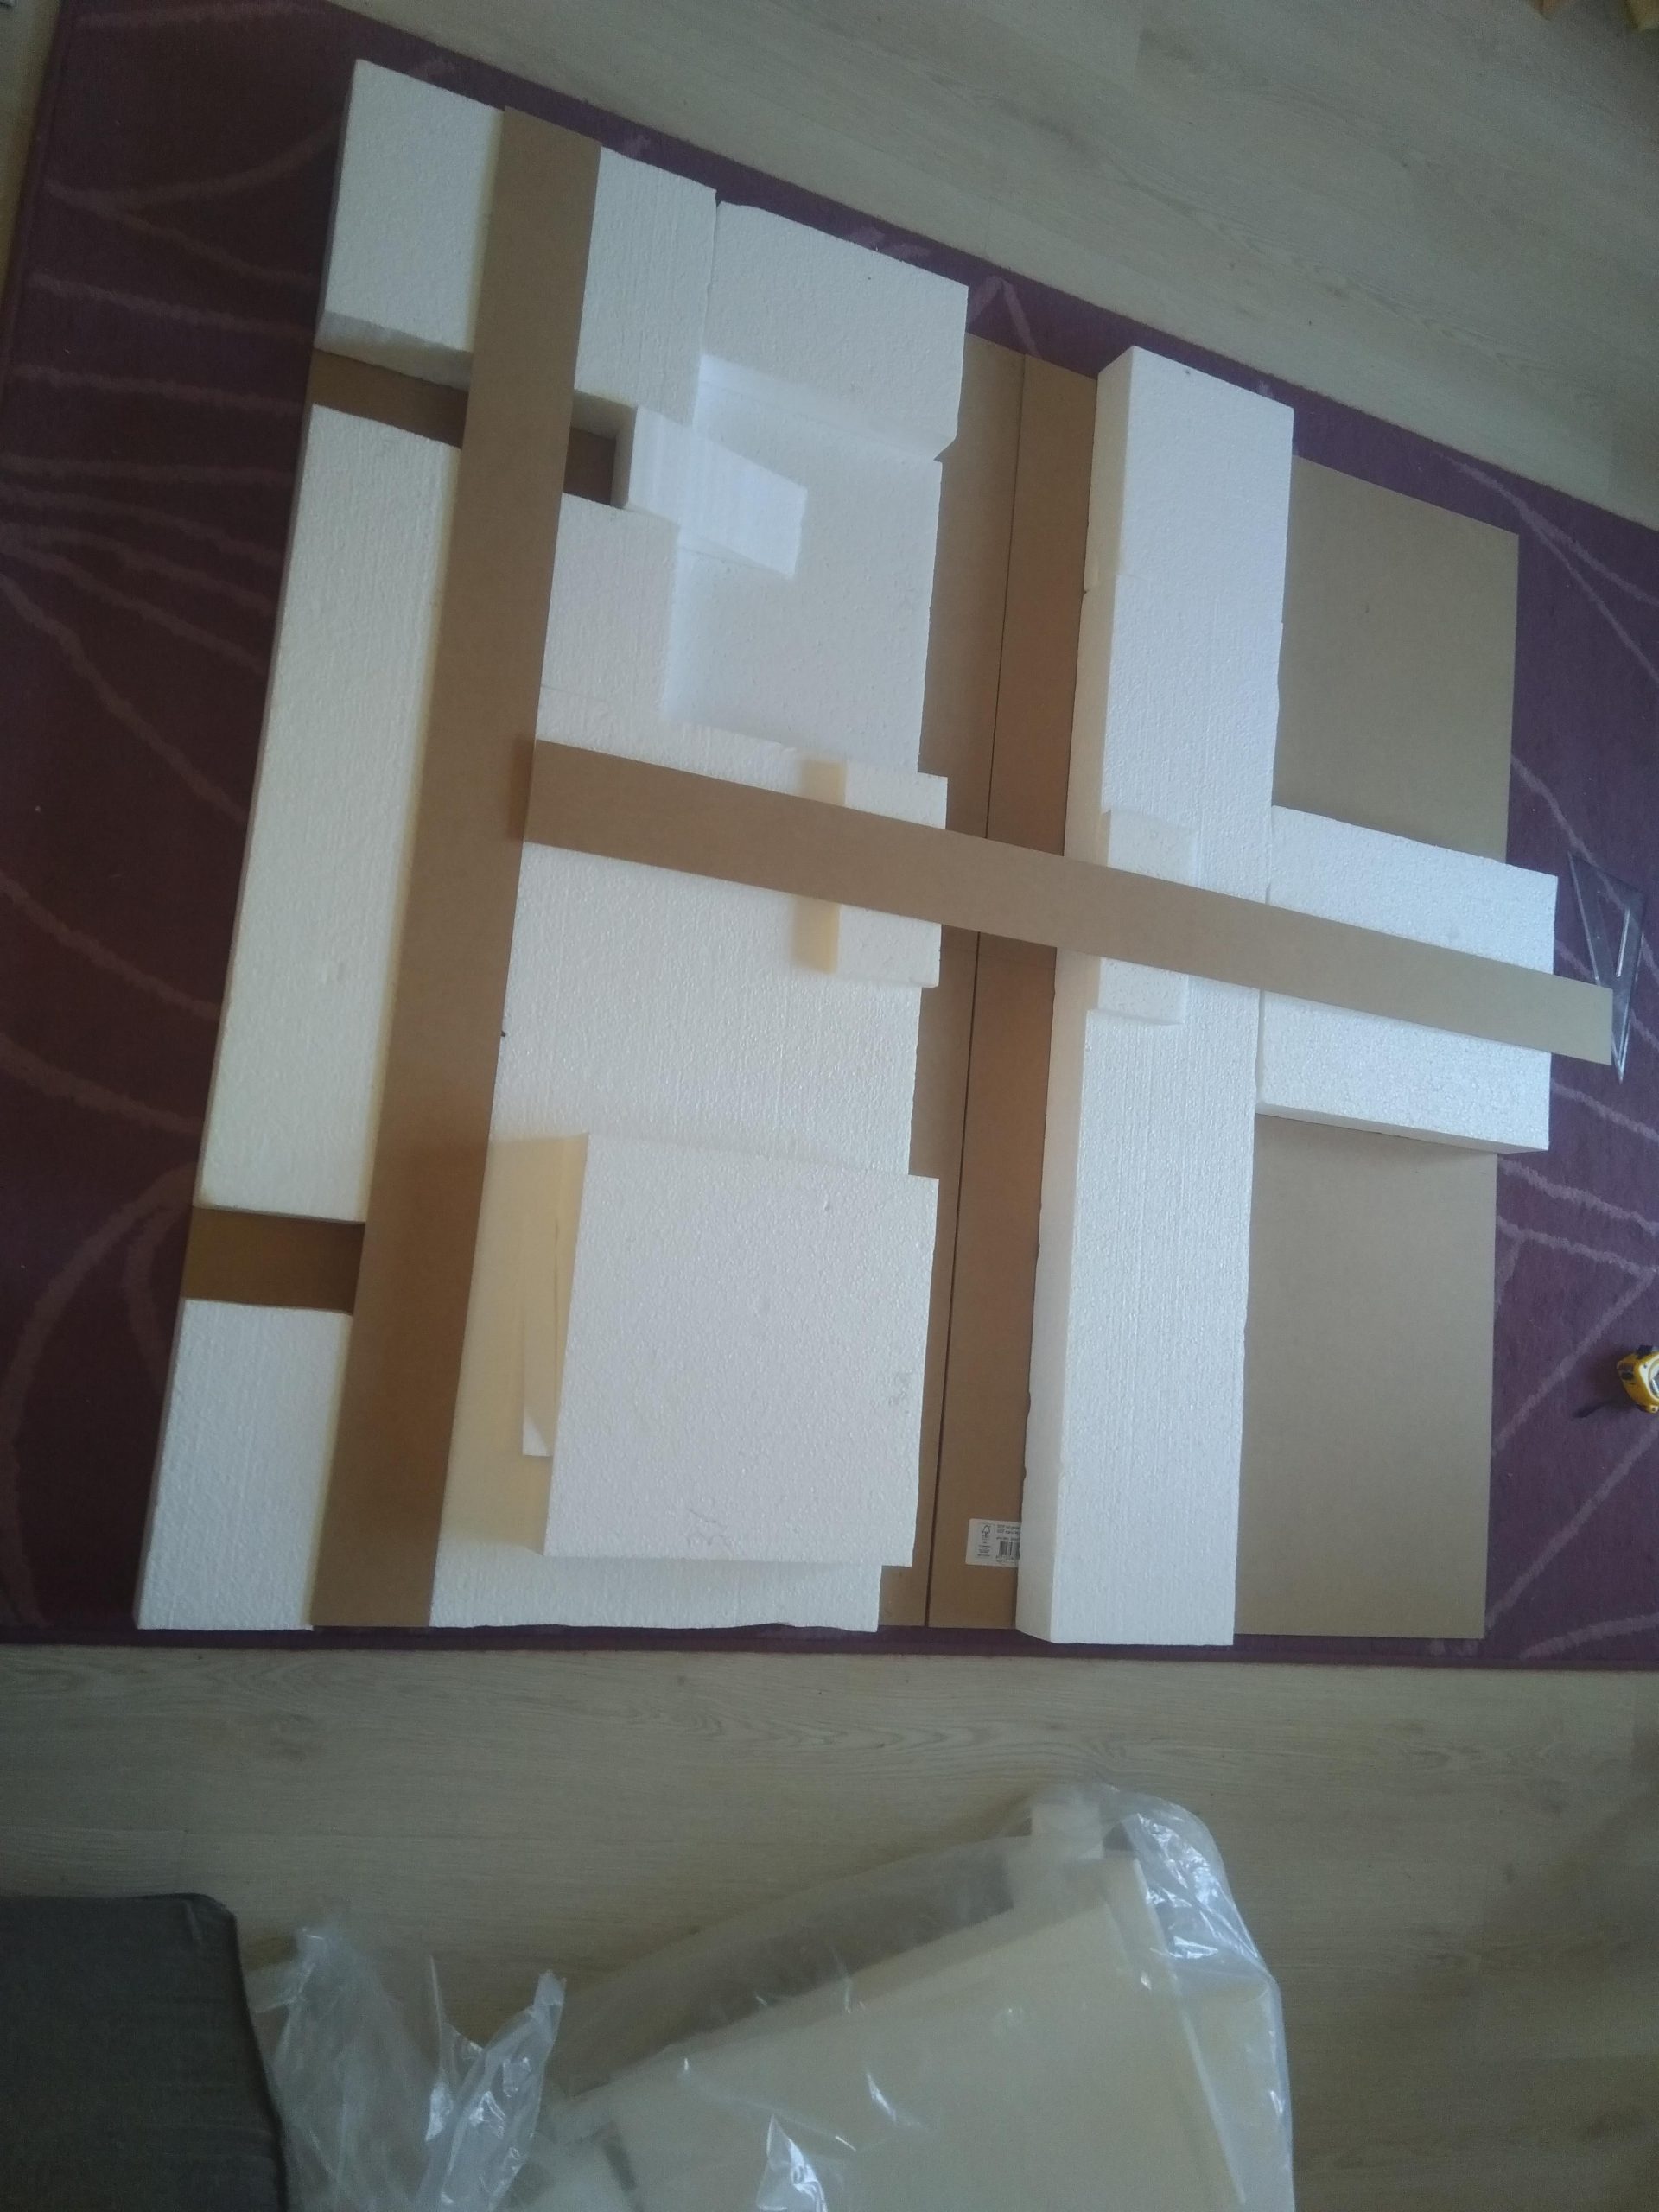
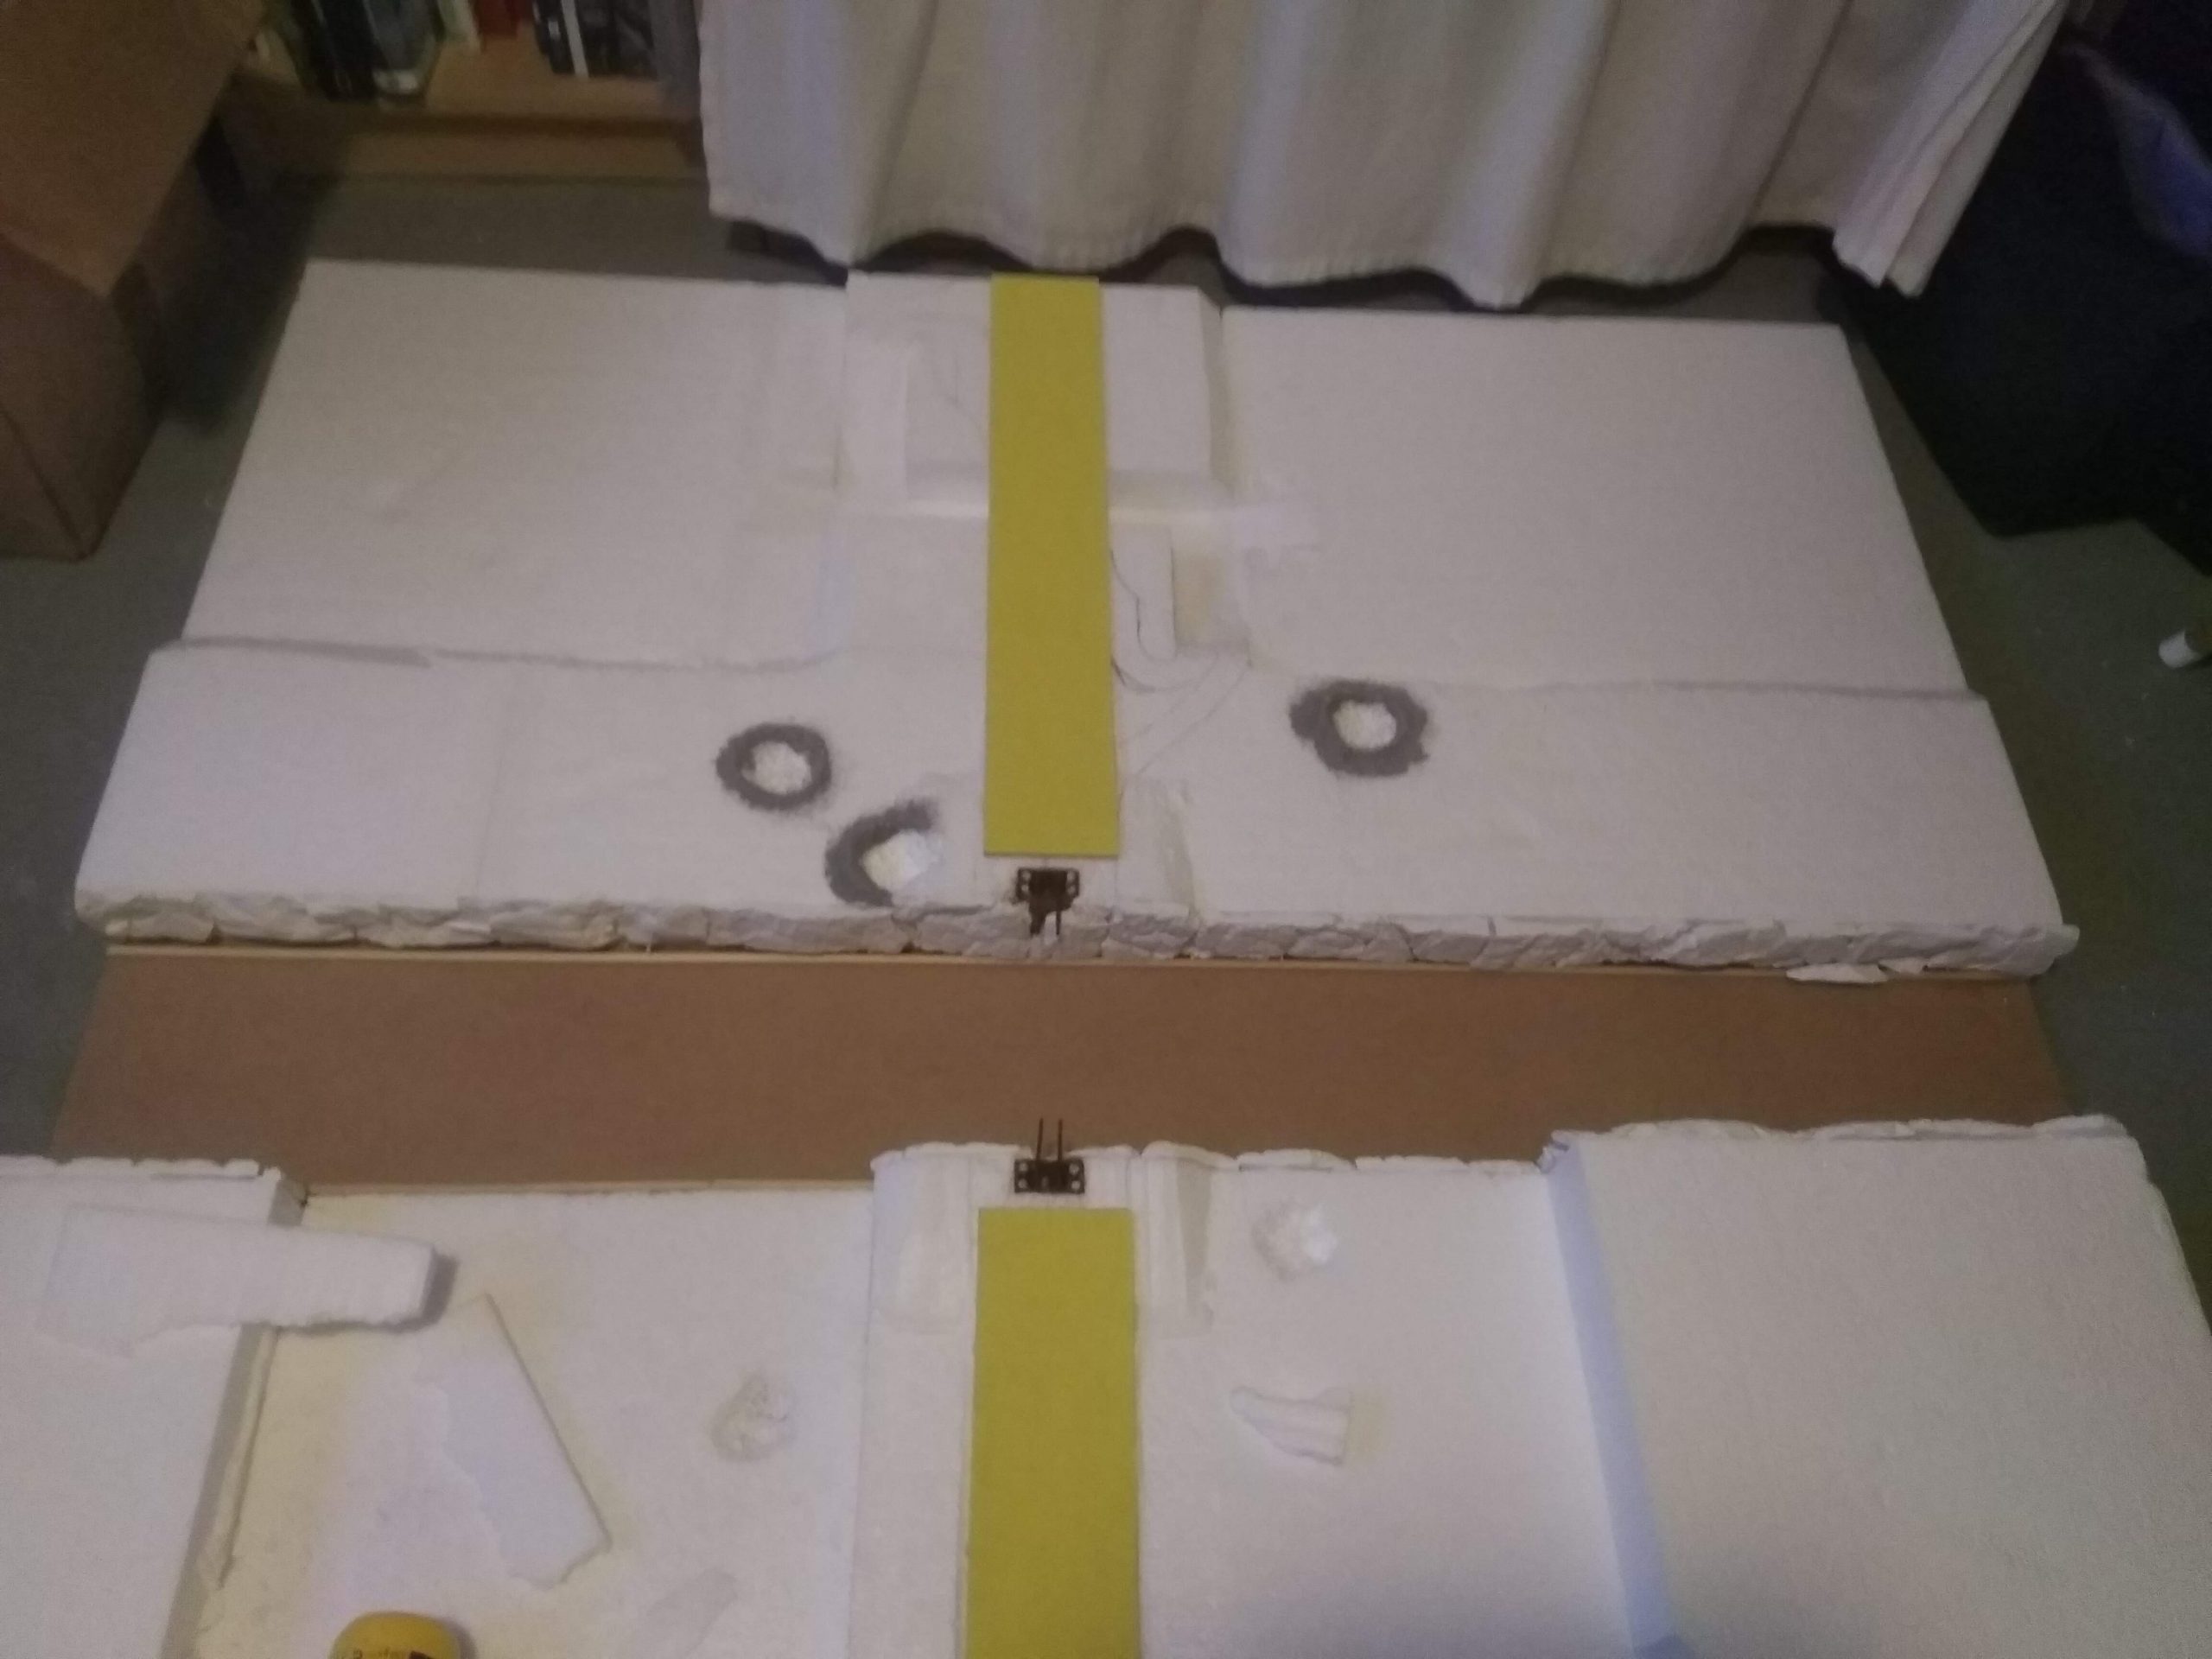
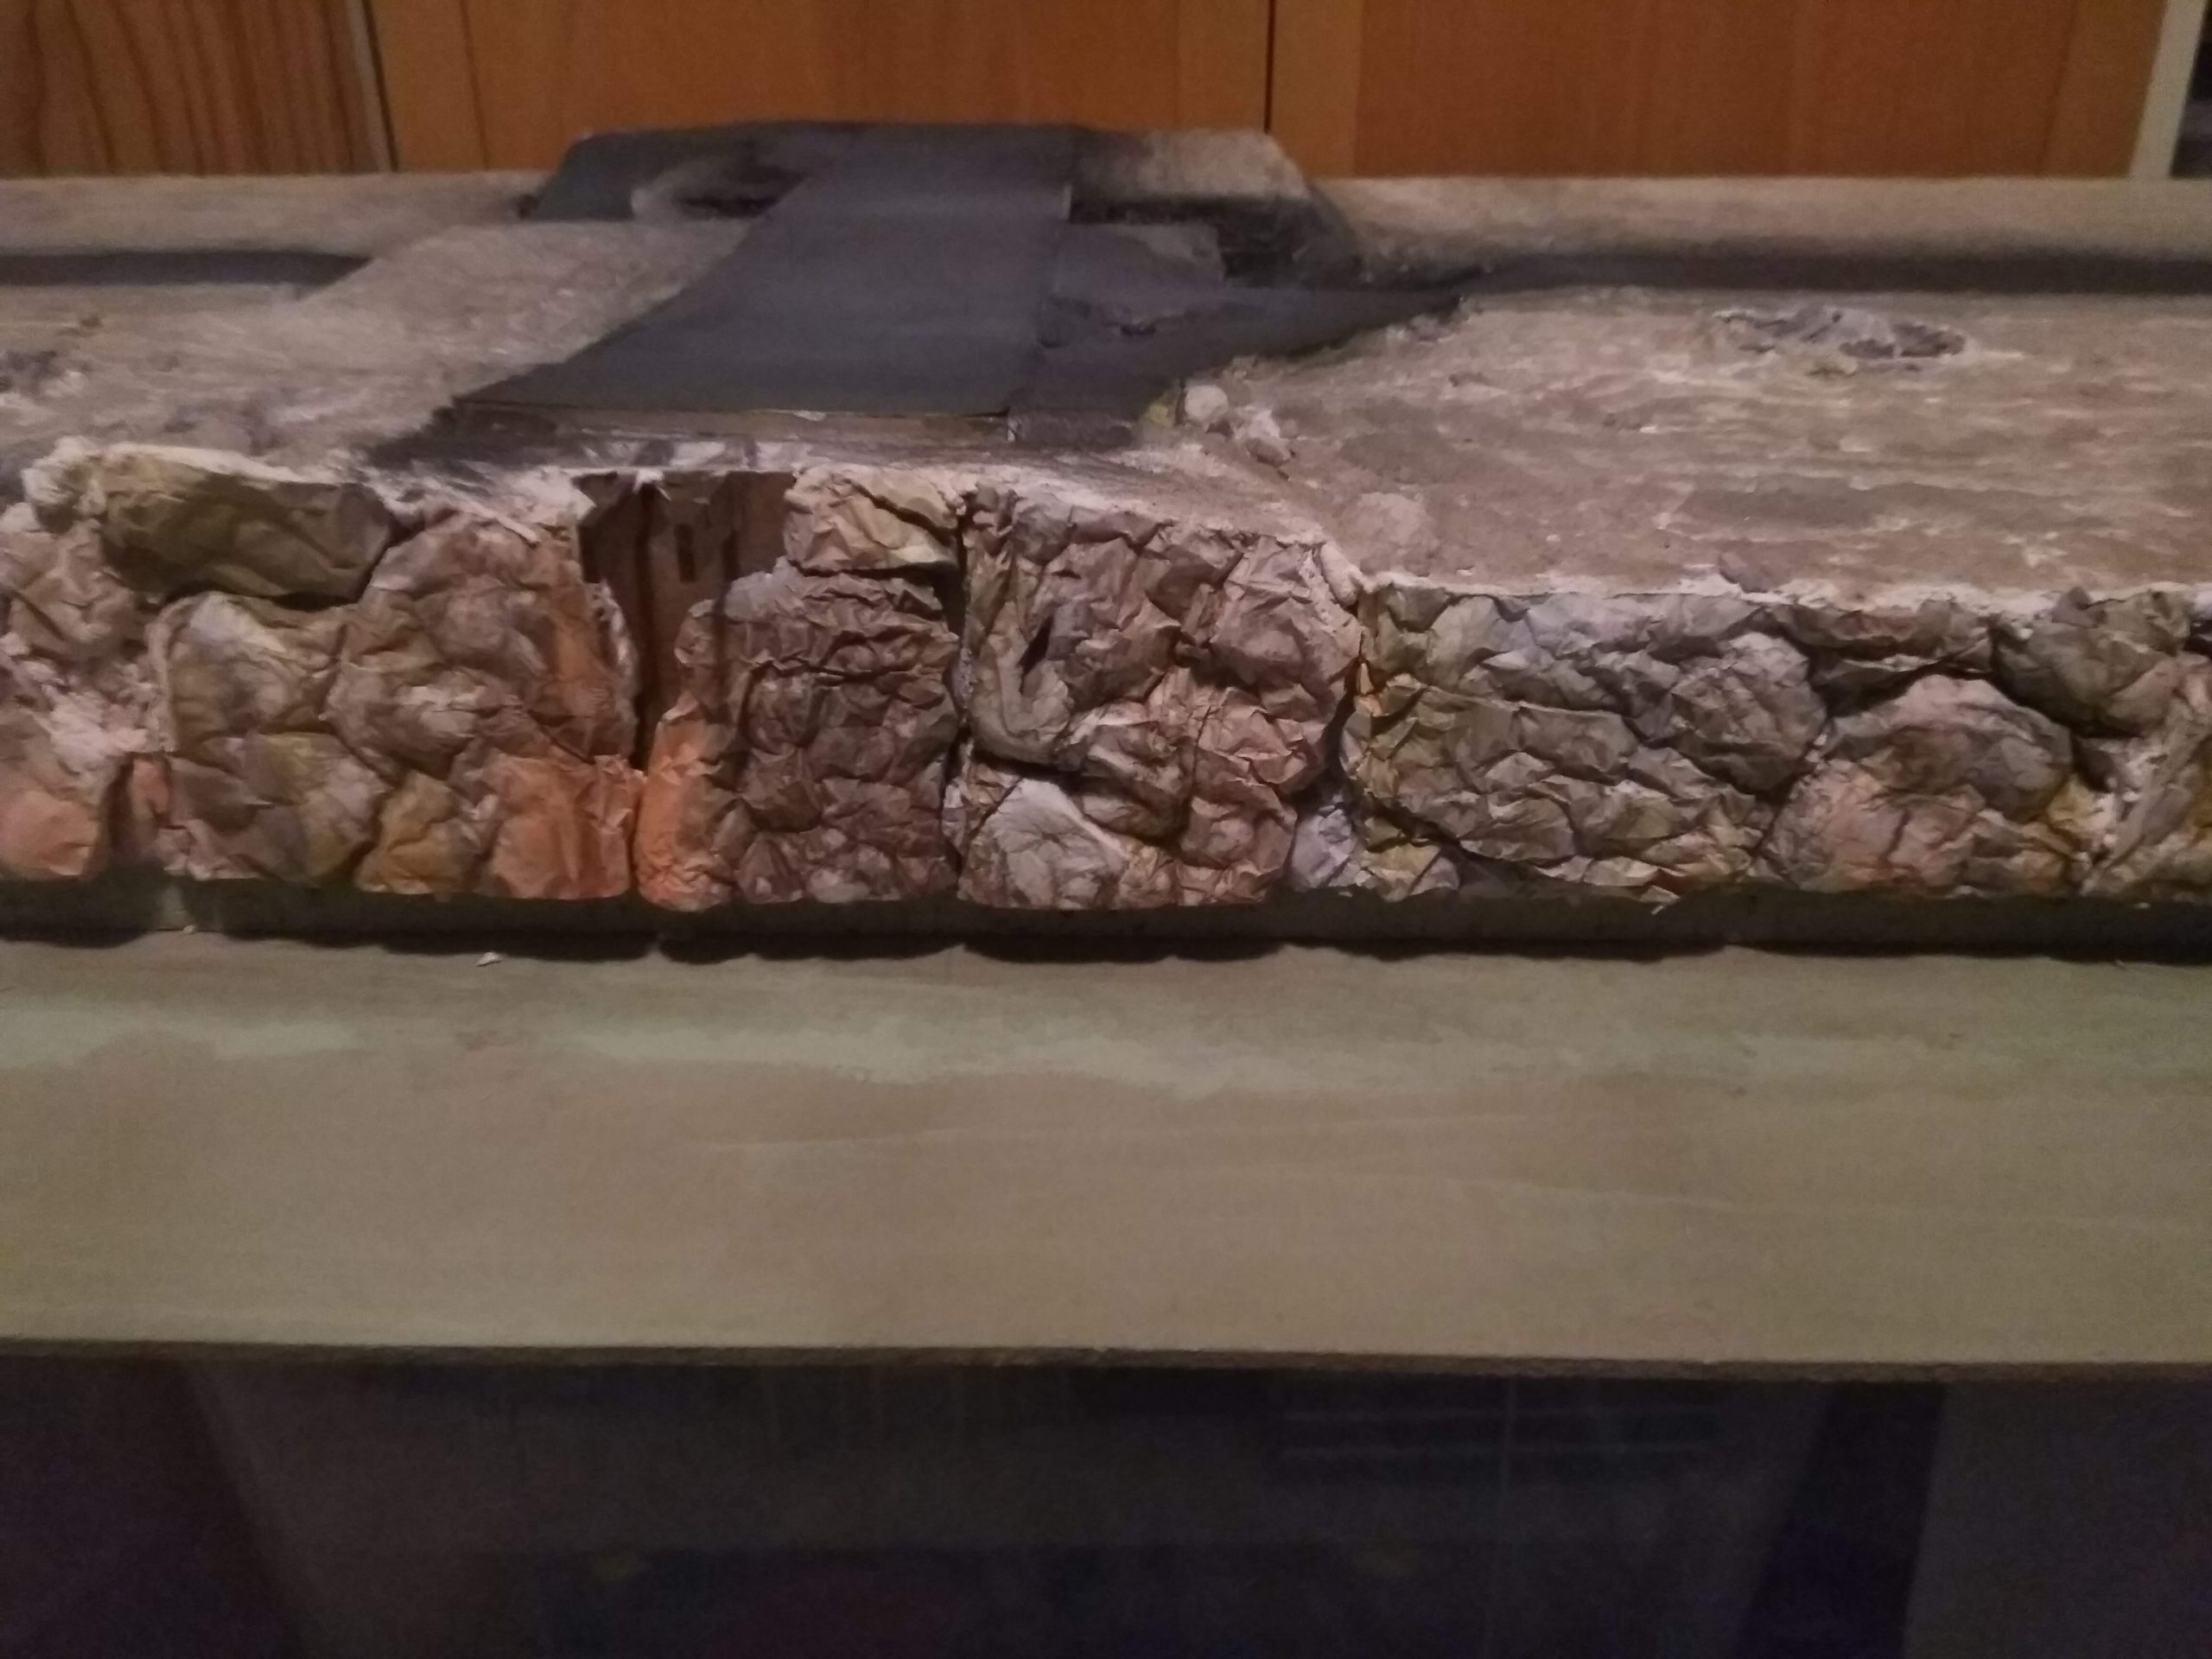
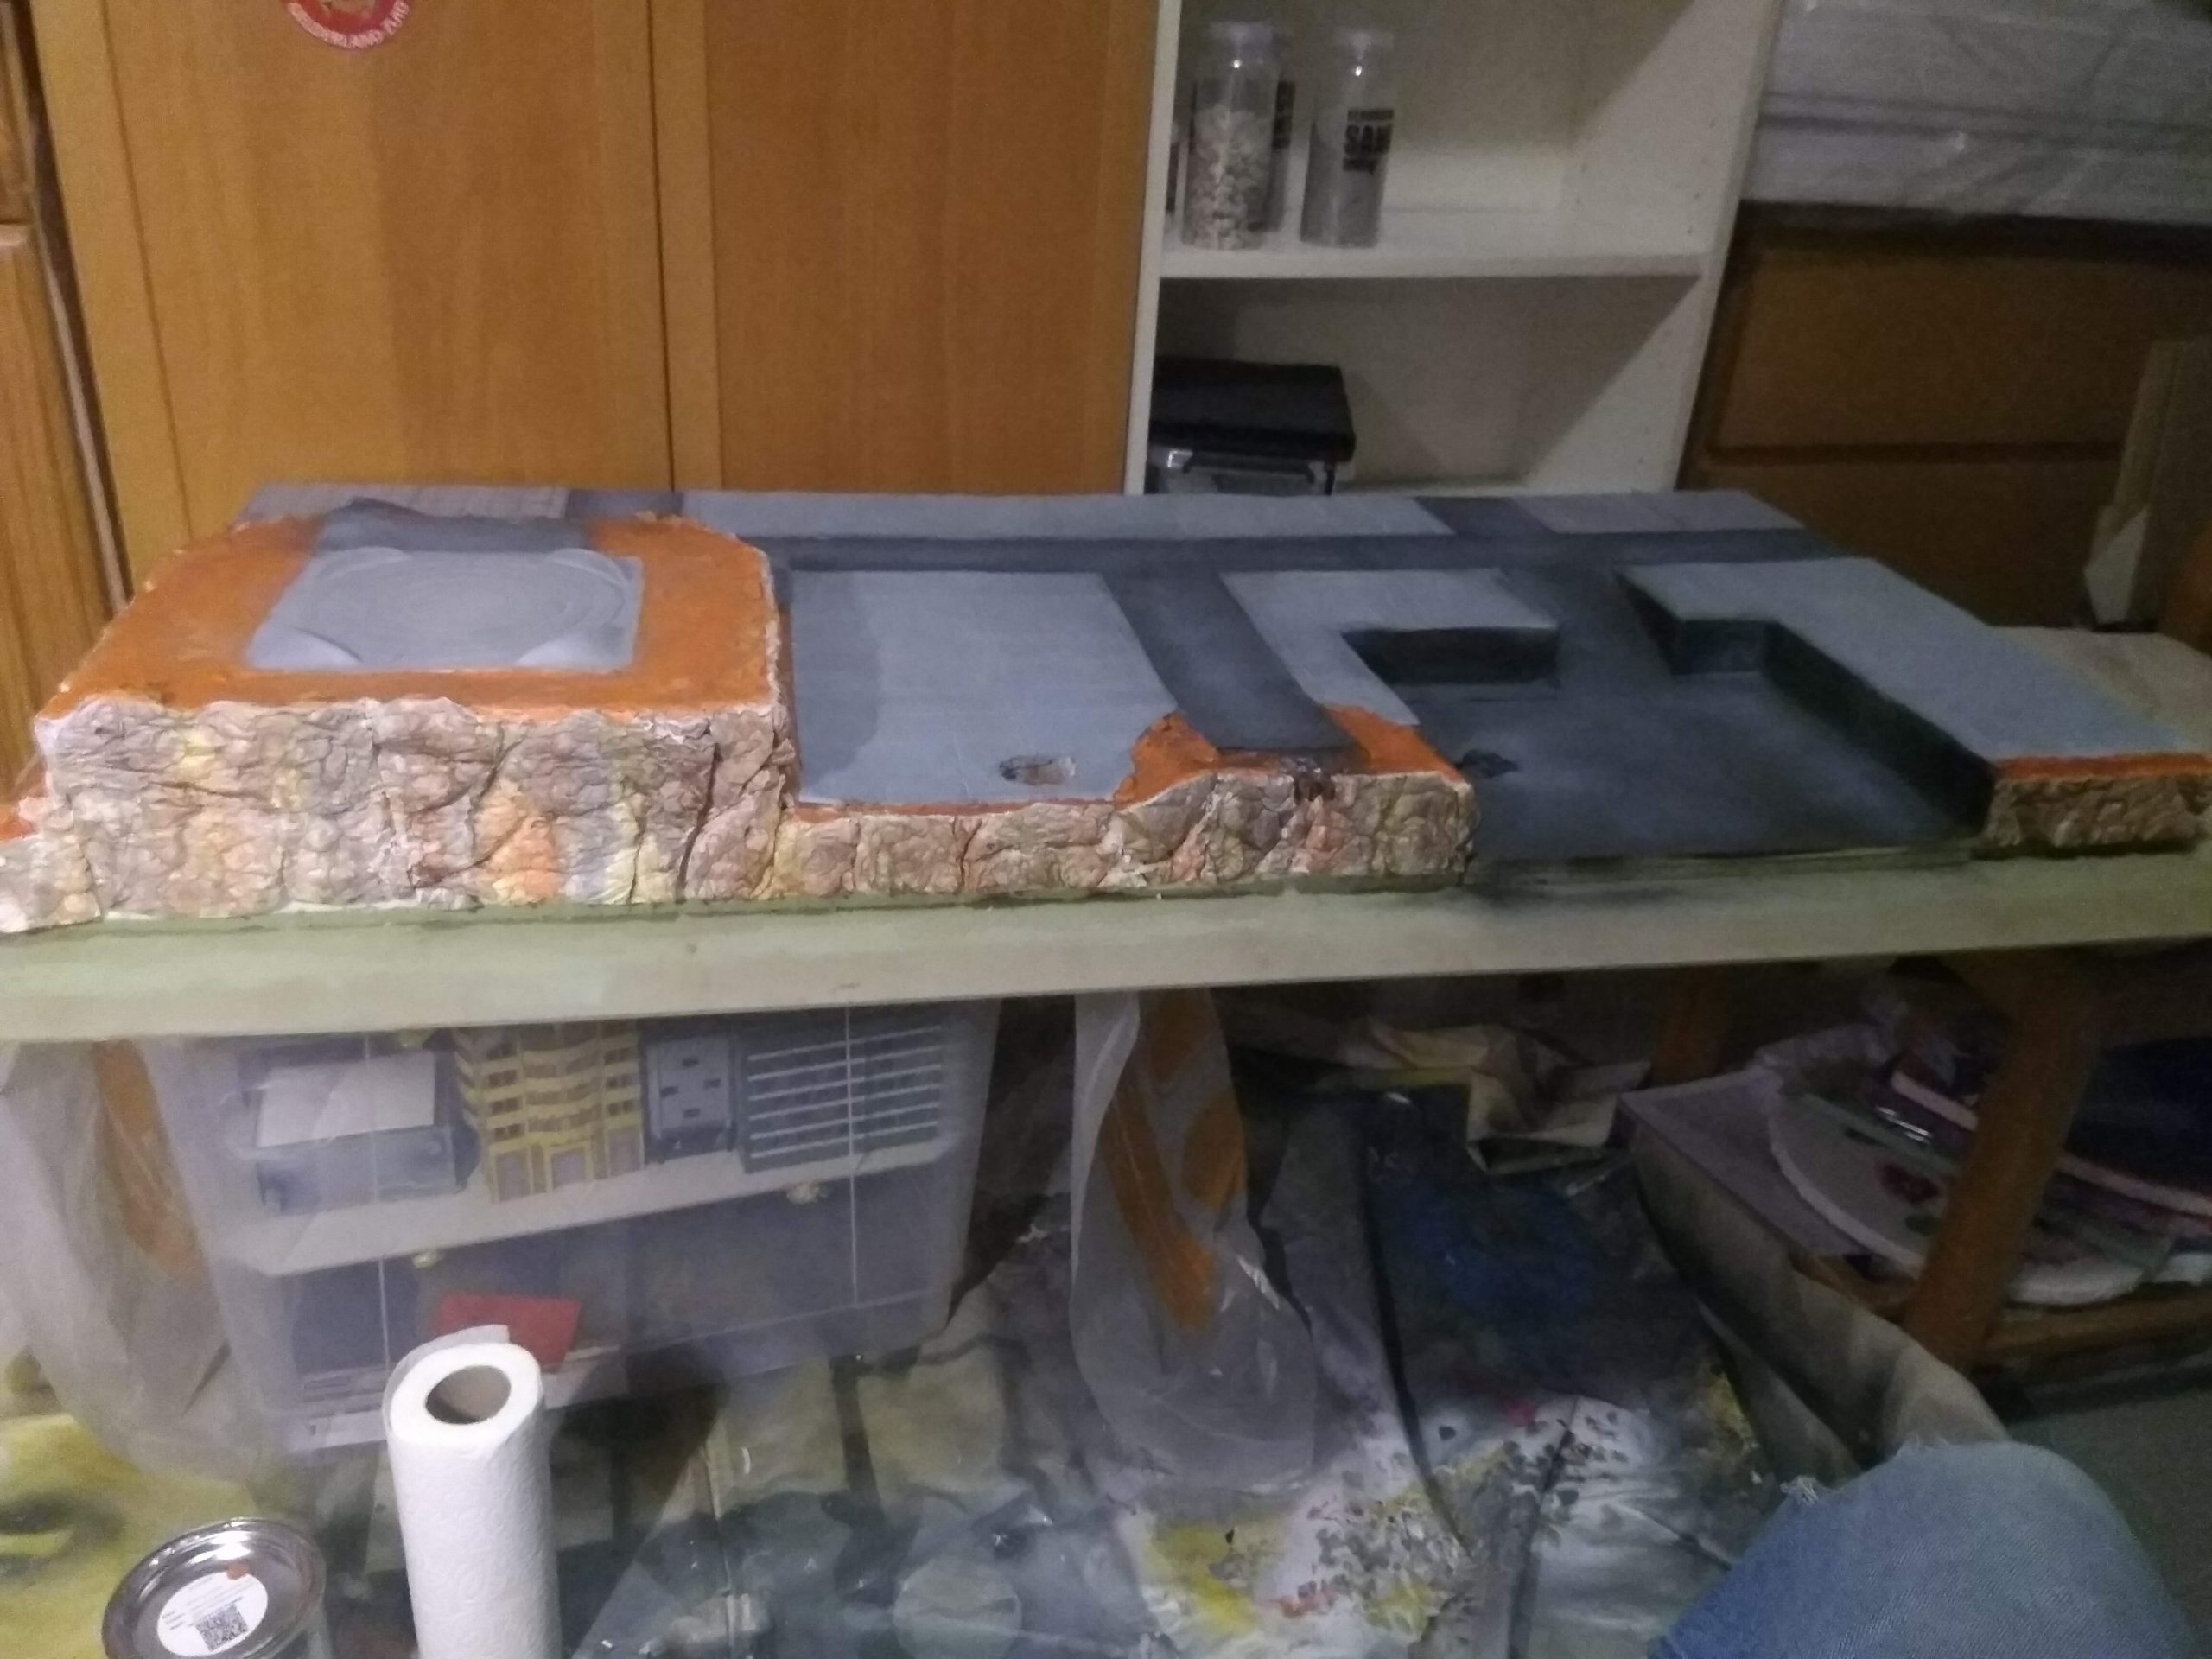
I started with the city side, drew out the block with a pencil, only then did I start cutting into the block #1. Giving us this first dry fitting!
That still gave some large gaps as you can see, so I went to block #2. Which get us the desert board road elevated and at the same height. Now bridges usually go up a bit before they cover a river, so ships can pass underneath. I used a sheet of 2.5cm high to raise it. The angle I got from the Terrain Tutor, for every 1 up you need to go 3 long. Otherwise the angle will be to steep and your (tall) models will fall over. For DZC that would be walkers, dropships on flight stands and such.
That looked good. Cut up the block under the road in the desert so I could fit a 1-lane road under neat it, and put a 2 inch wide 2.5 cm foam sheet there to help me angle the off ramp.
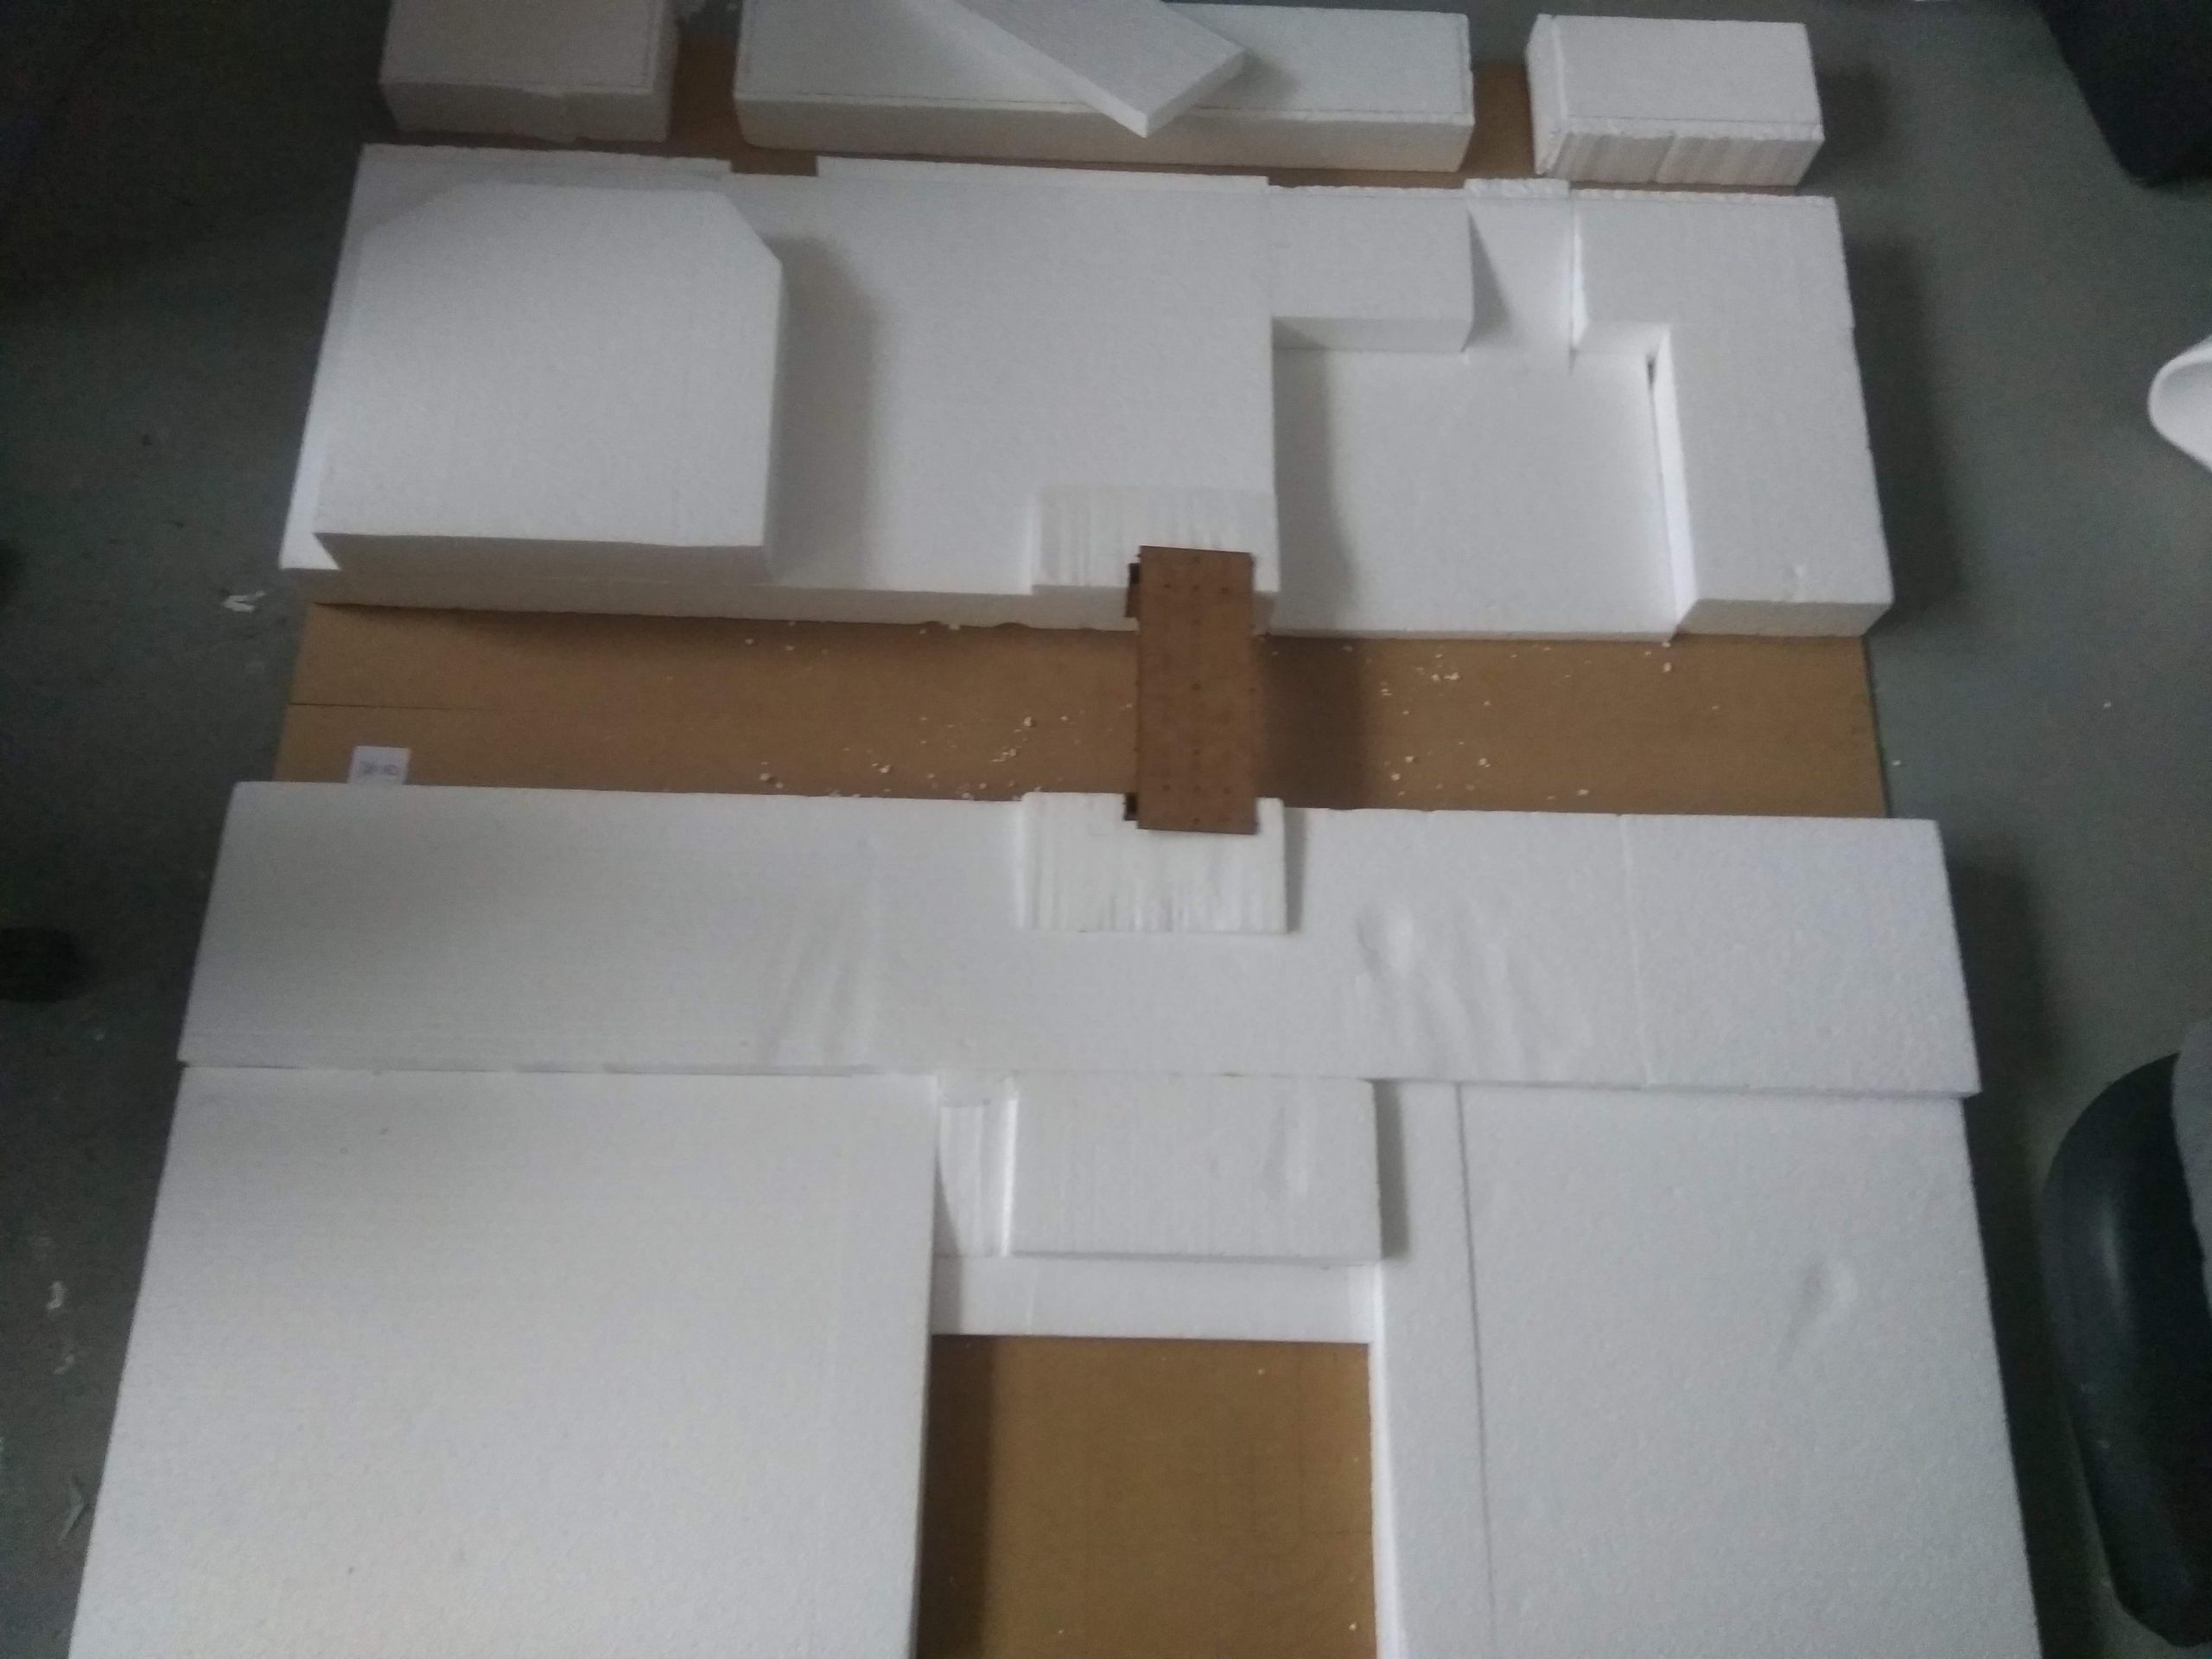
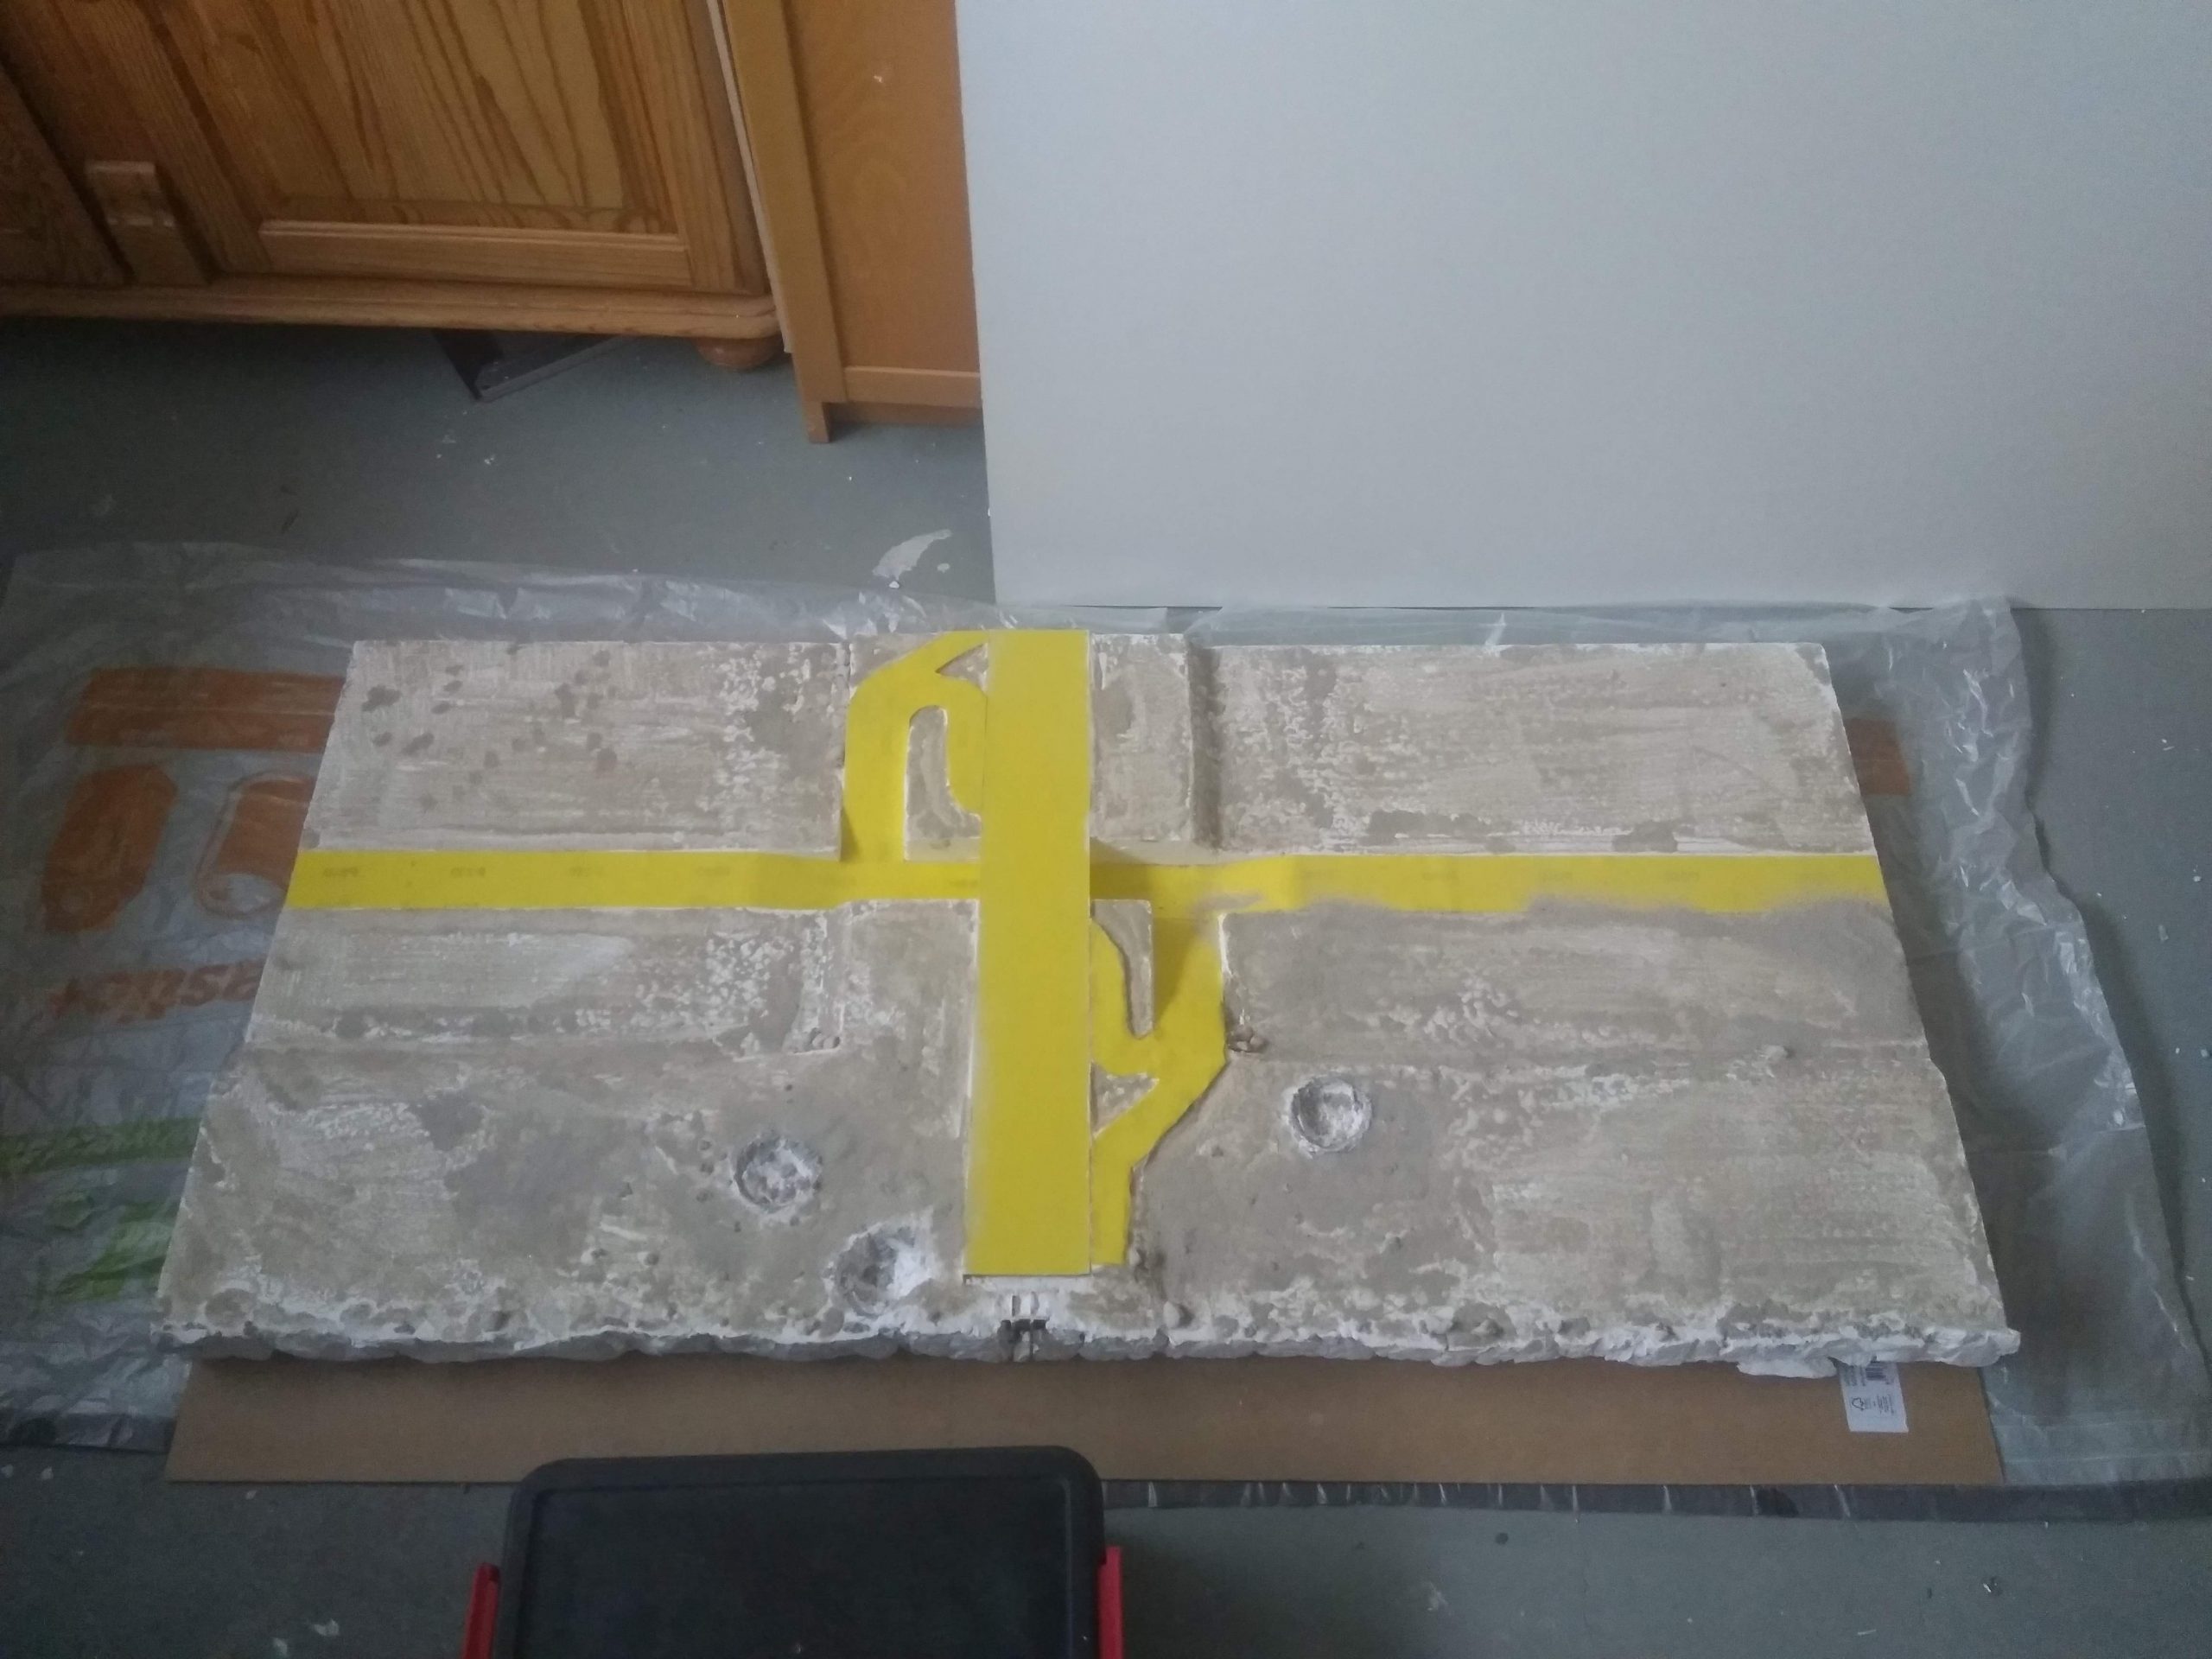
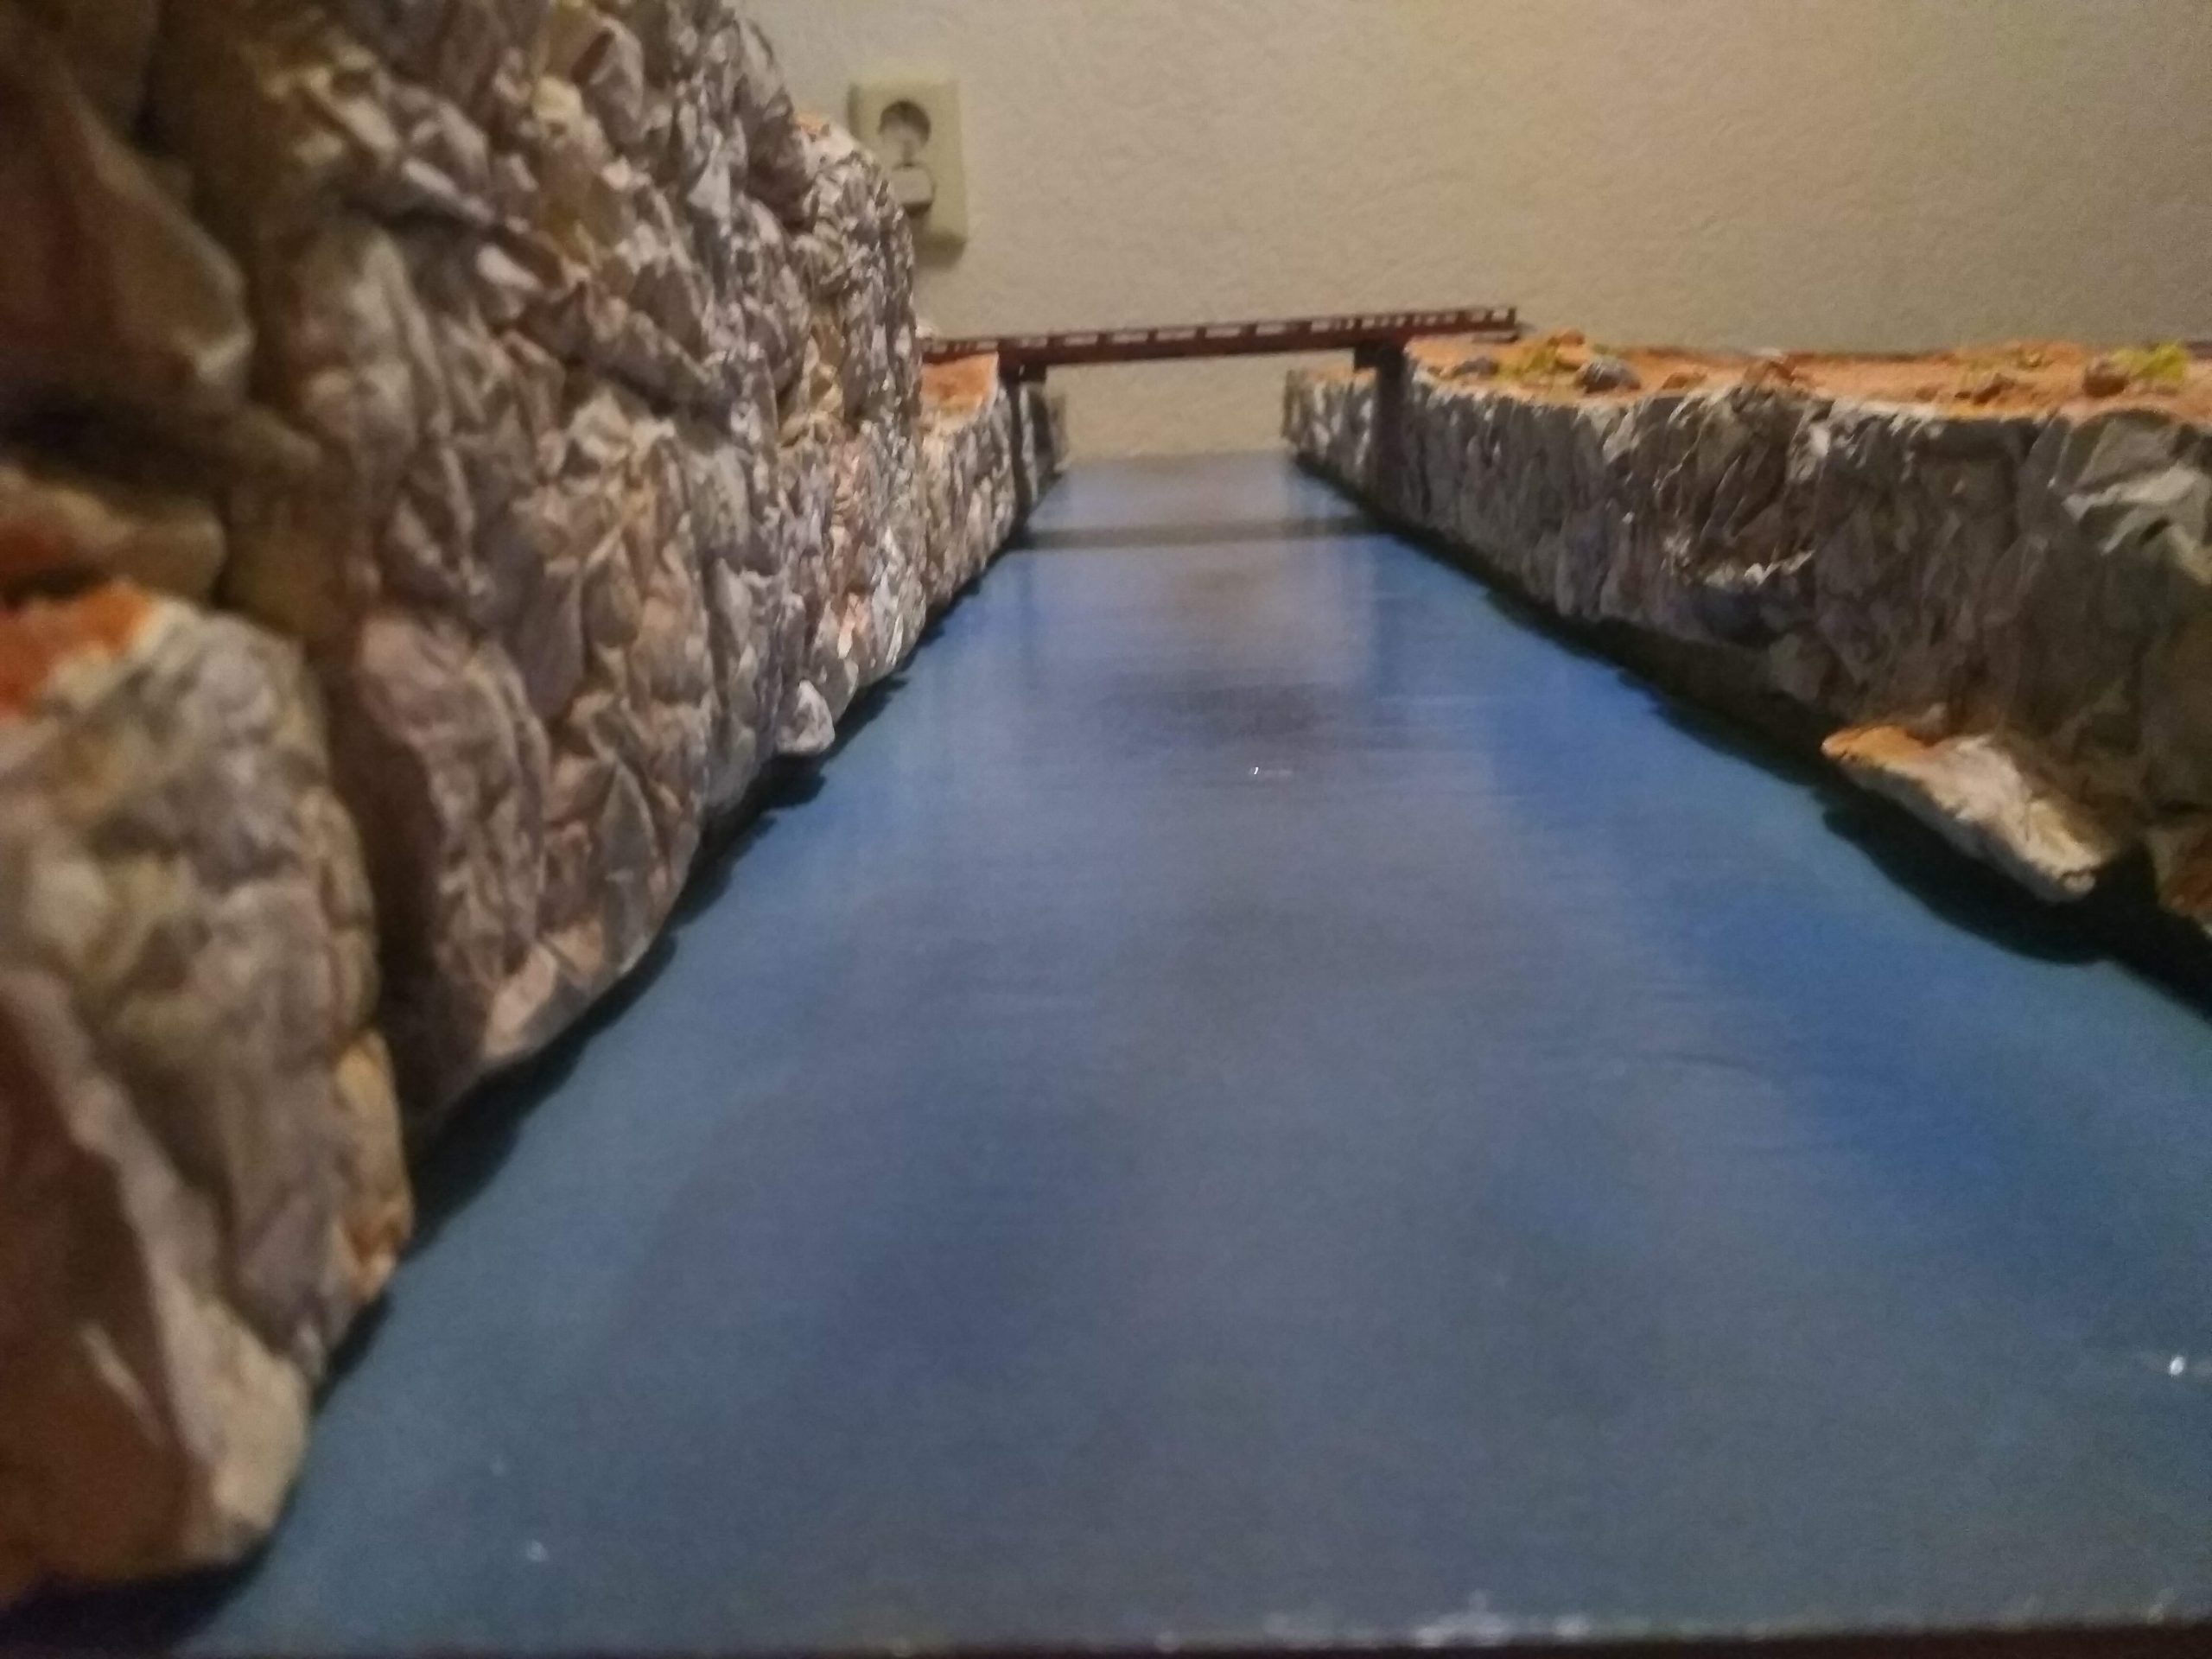
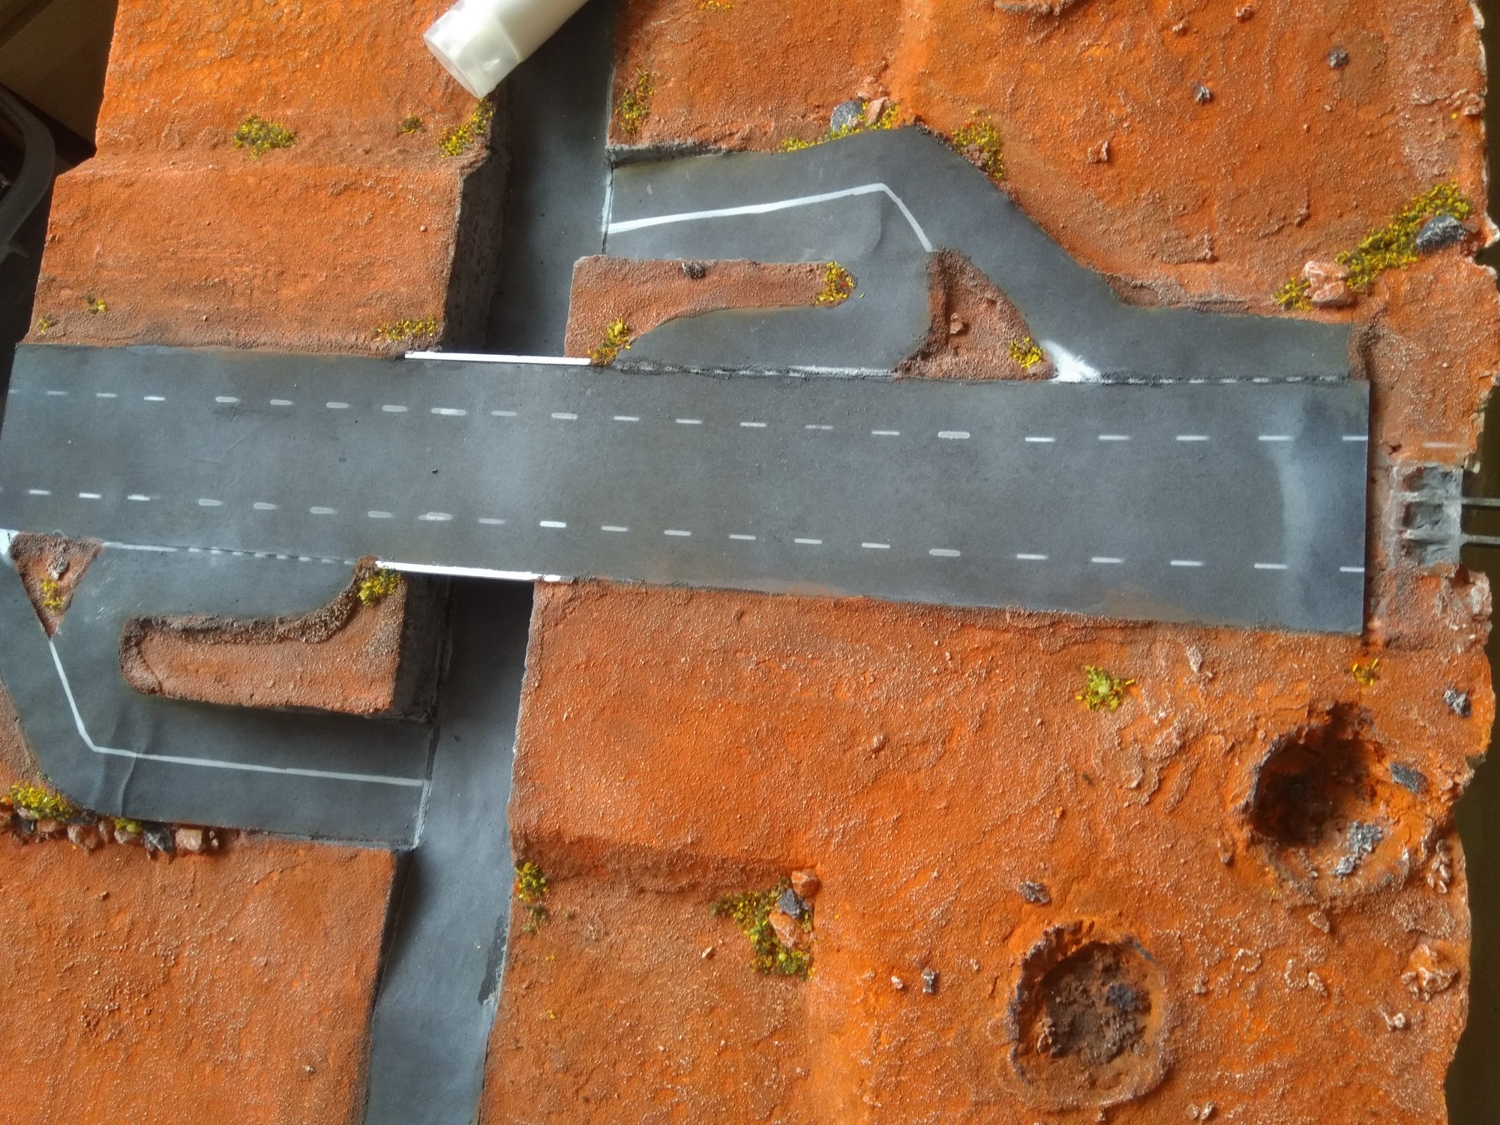
As you can see I put a bridge in place. This is a Blotz one, the 2 Lane Flyover – 9″ section with it 1 order a set of extra 2-lane Flyover – 2″ Support column (Half) the half part being important, because you want to be able to remove the bridge.
As I was ordering from Blotz I also order the 6″ section 2lane road with spur. Which I requested to have the lines fully cut out. This I used as a template for the road markings.
Now I placed the columns, lining the columns up was a pain but important as it would connect to the road into the desert. The columns then got reinforced by putting 3mm cocktail stick in them horizontal and vertical straight into the foam, with some wood glue on them of course.
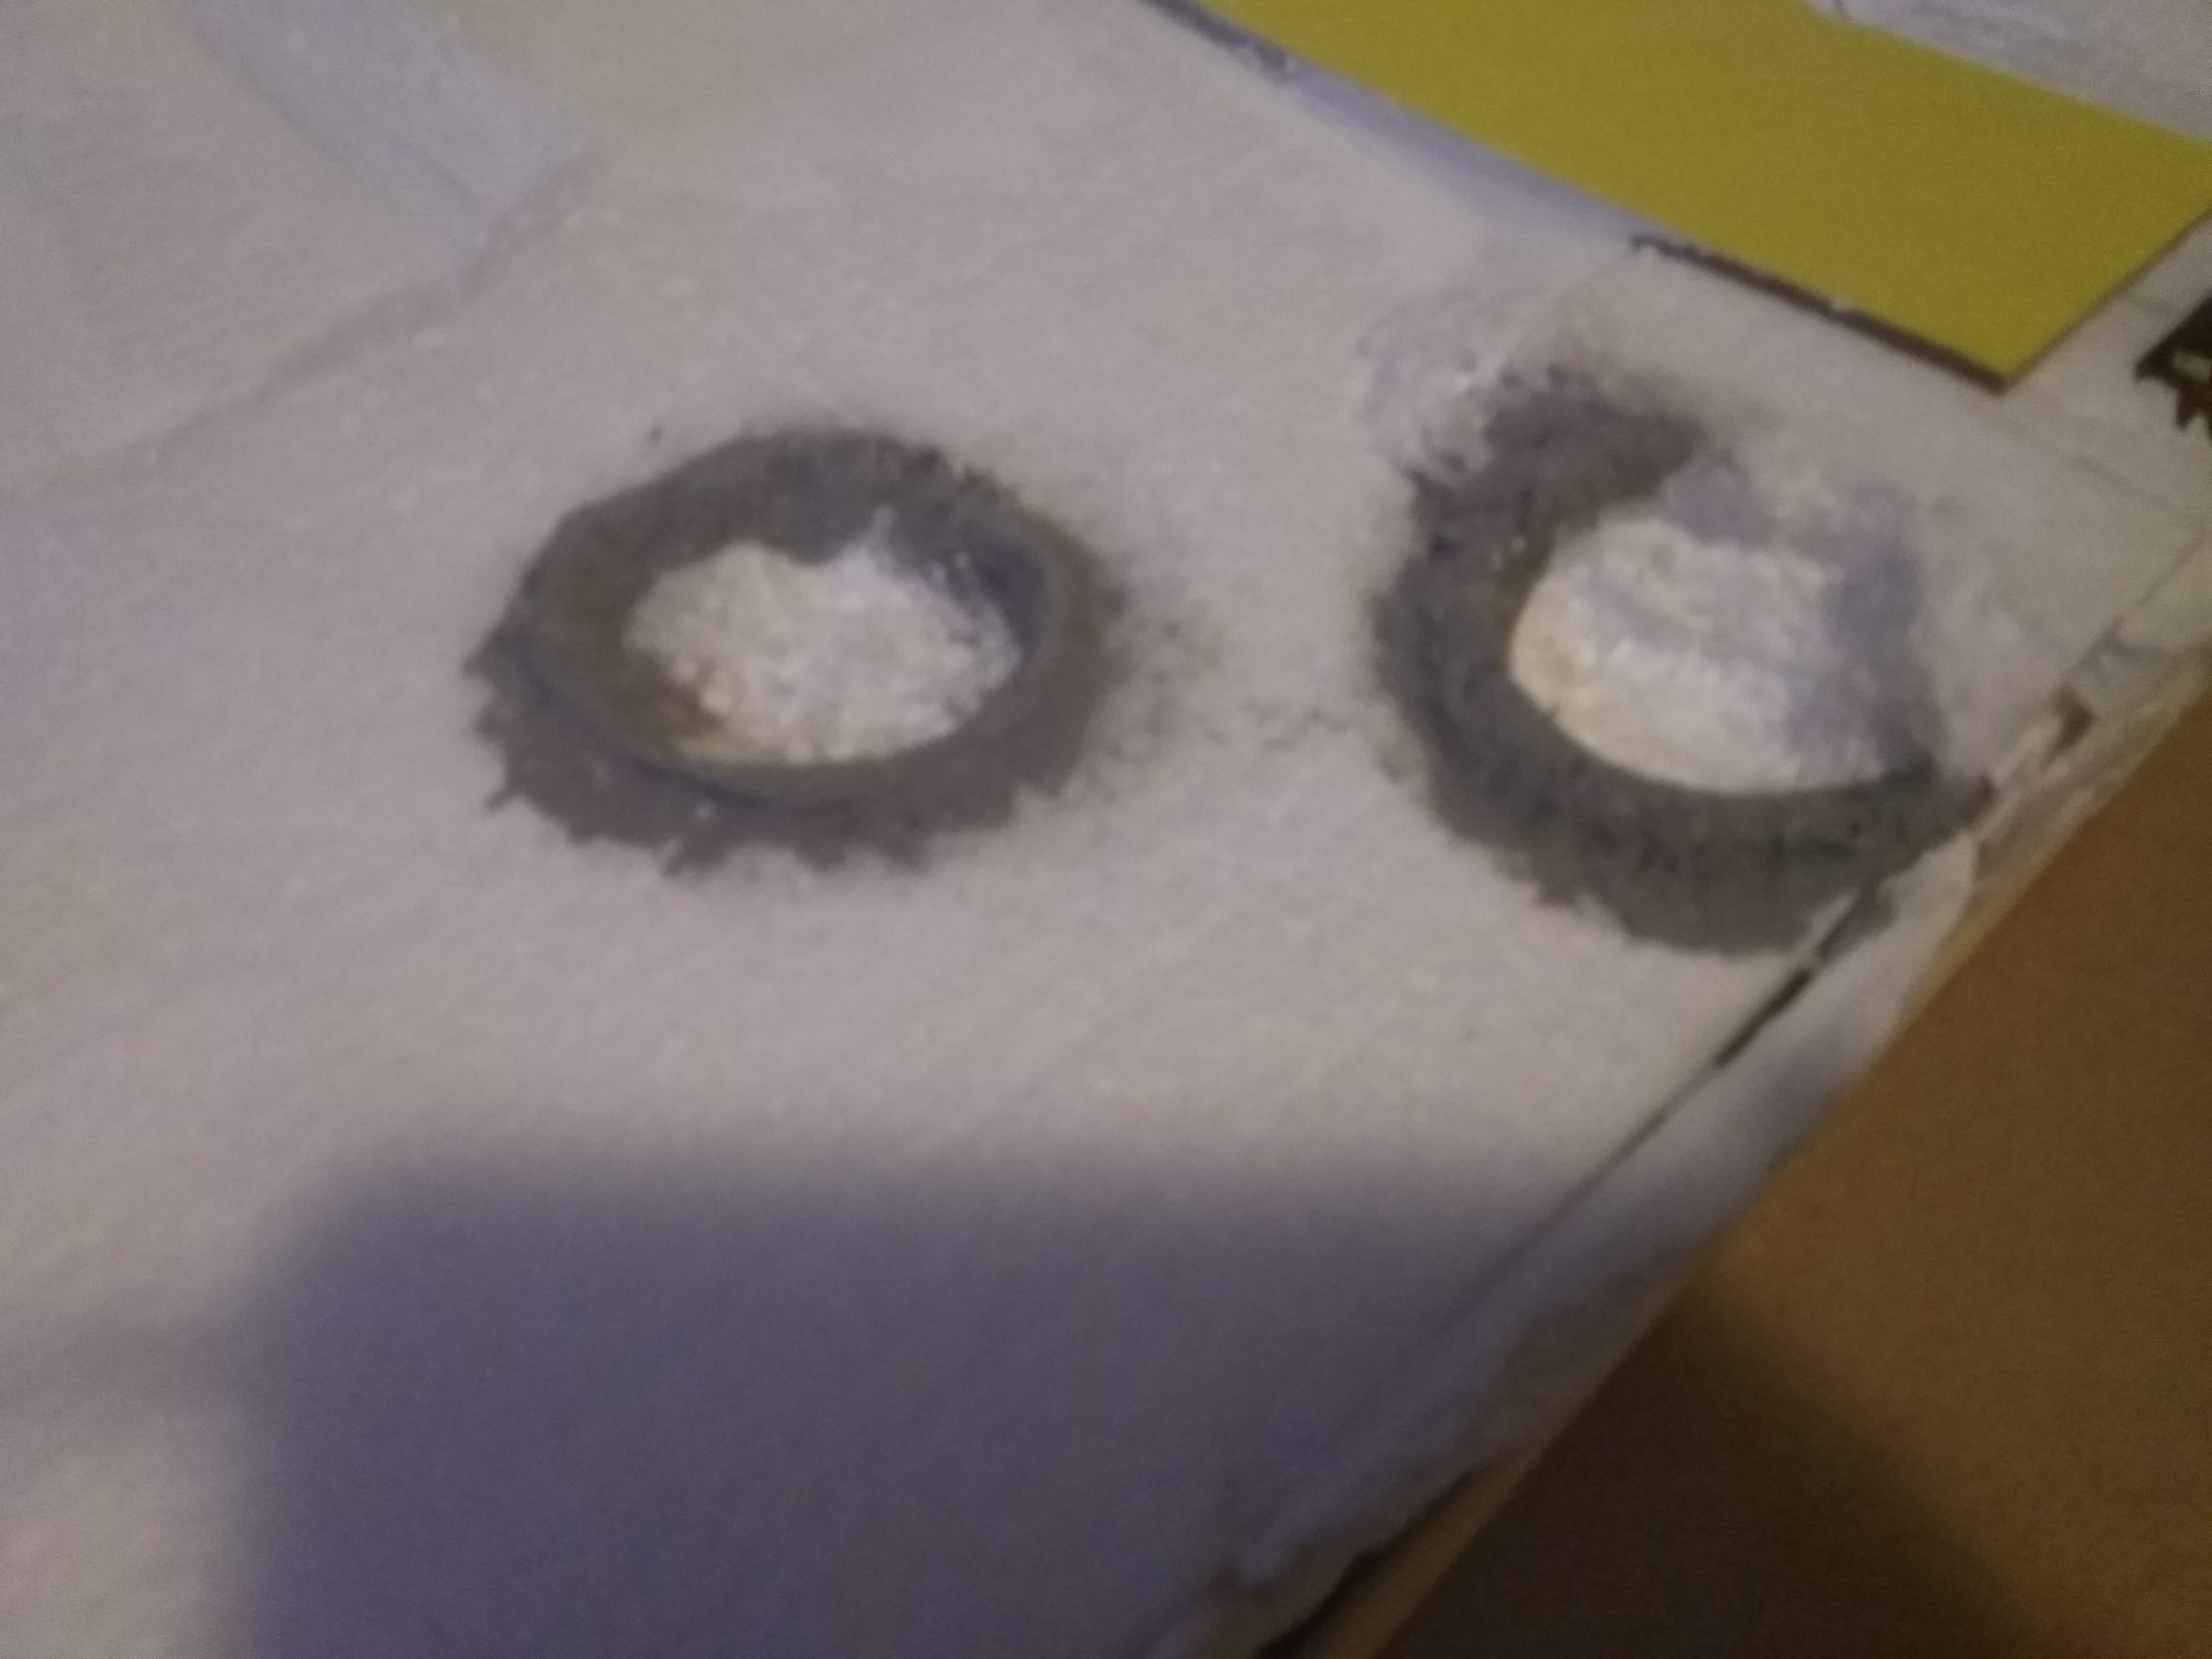
In this picture you can also see I the off ramps I made, and the that I let the desert come up again a bit. This gives some hight in case I wanted to do a pond/oasis or craters.
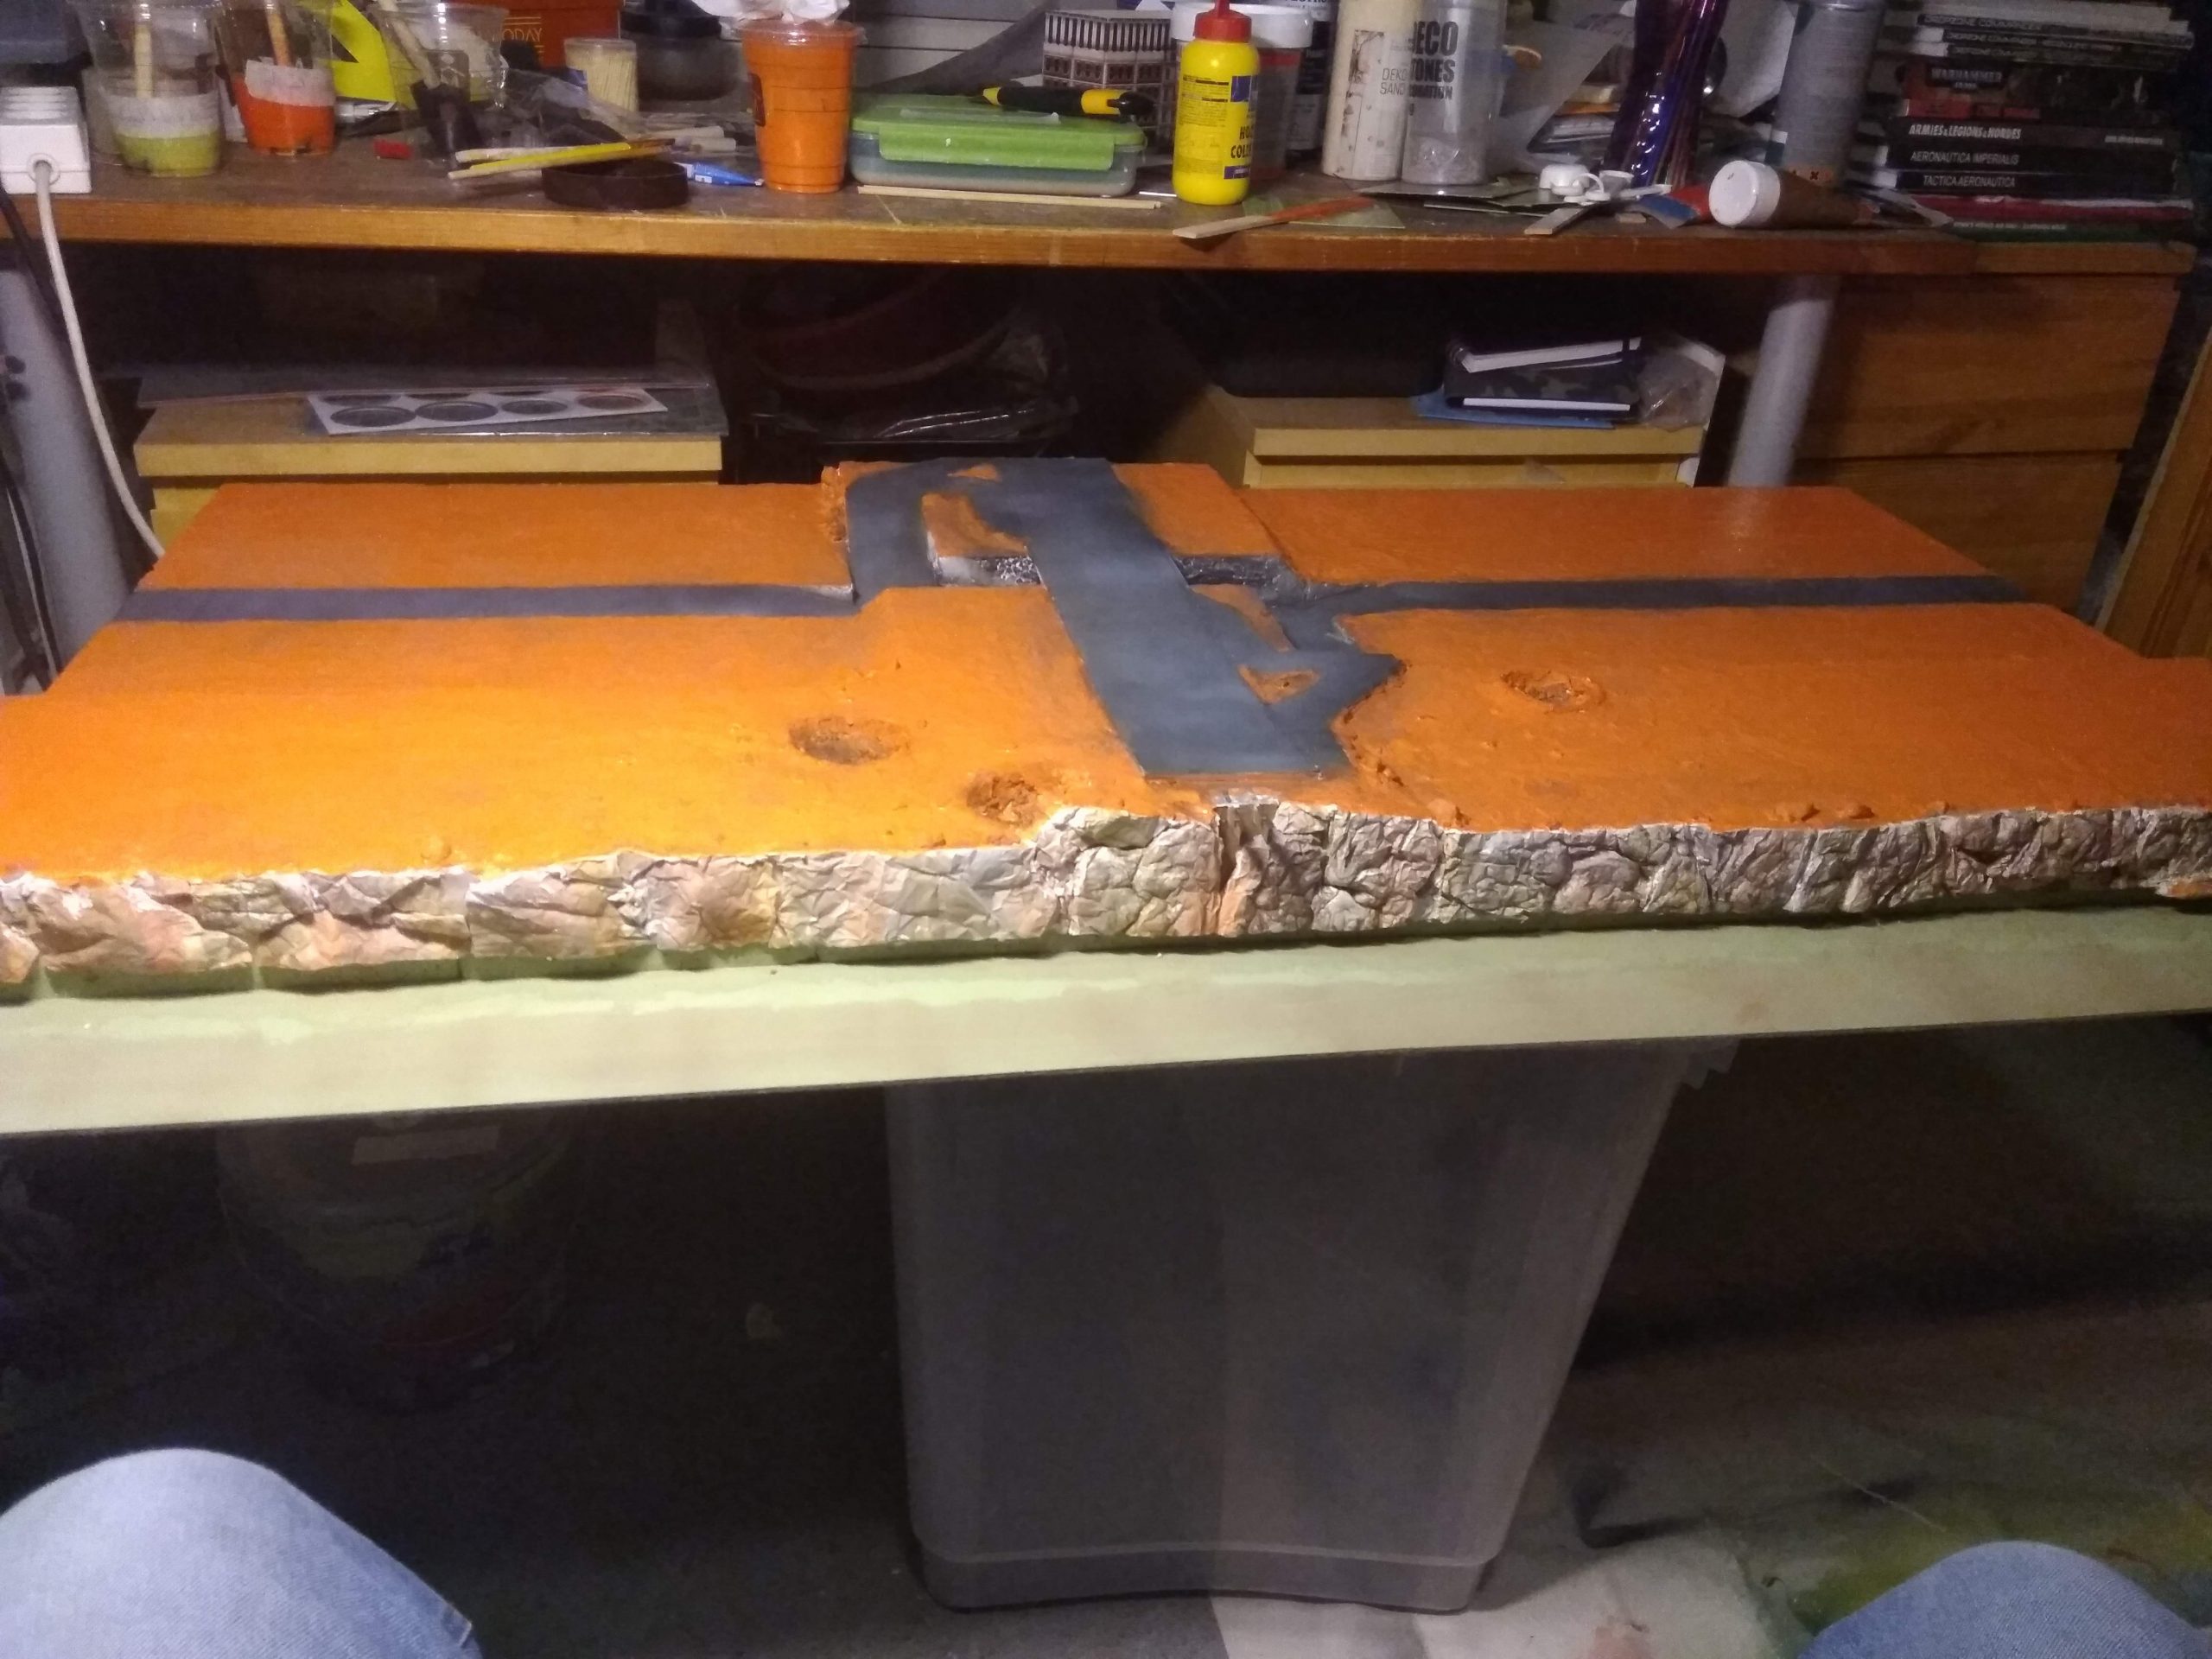
With everything the filling material and the roads done it’s finally time to make it look good!
I use plaster to make cliffs, using tinfoil for the moulds. If you want to know how? Check out the terrain tutor link here! https://www.youtube.com/watch?v=IaLpzNaVUaM You’ll need to cast several!
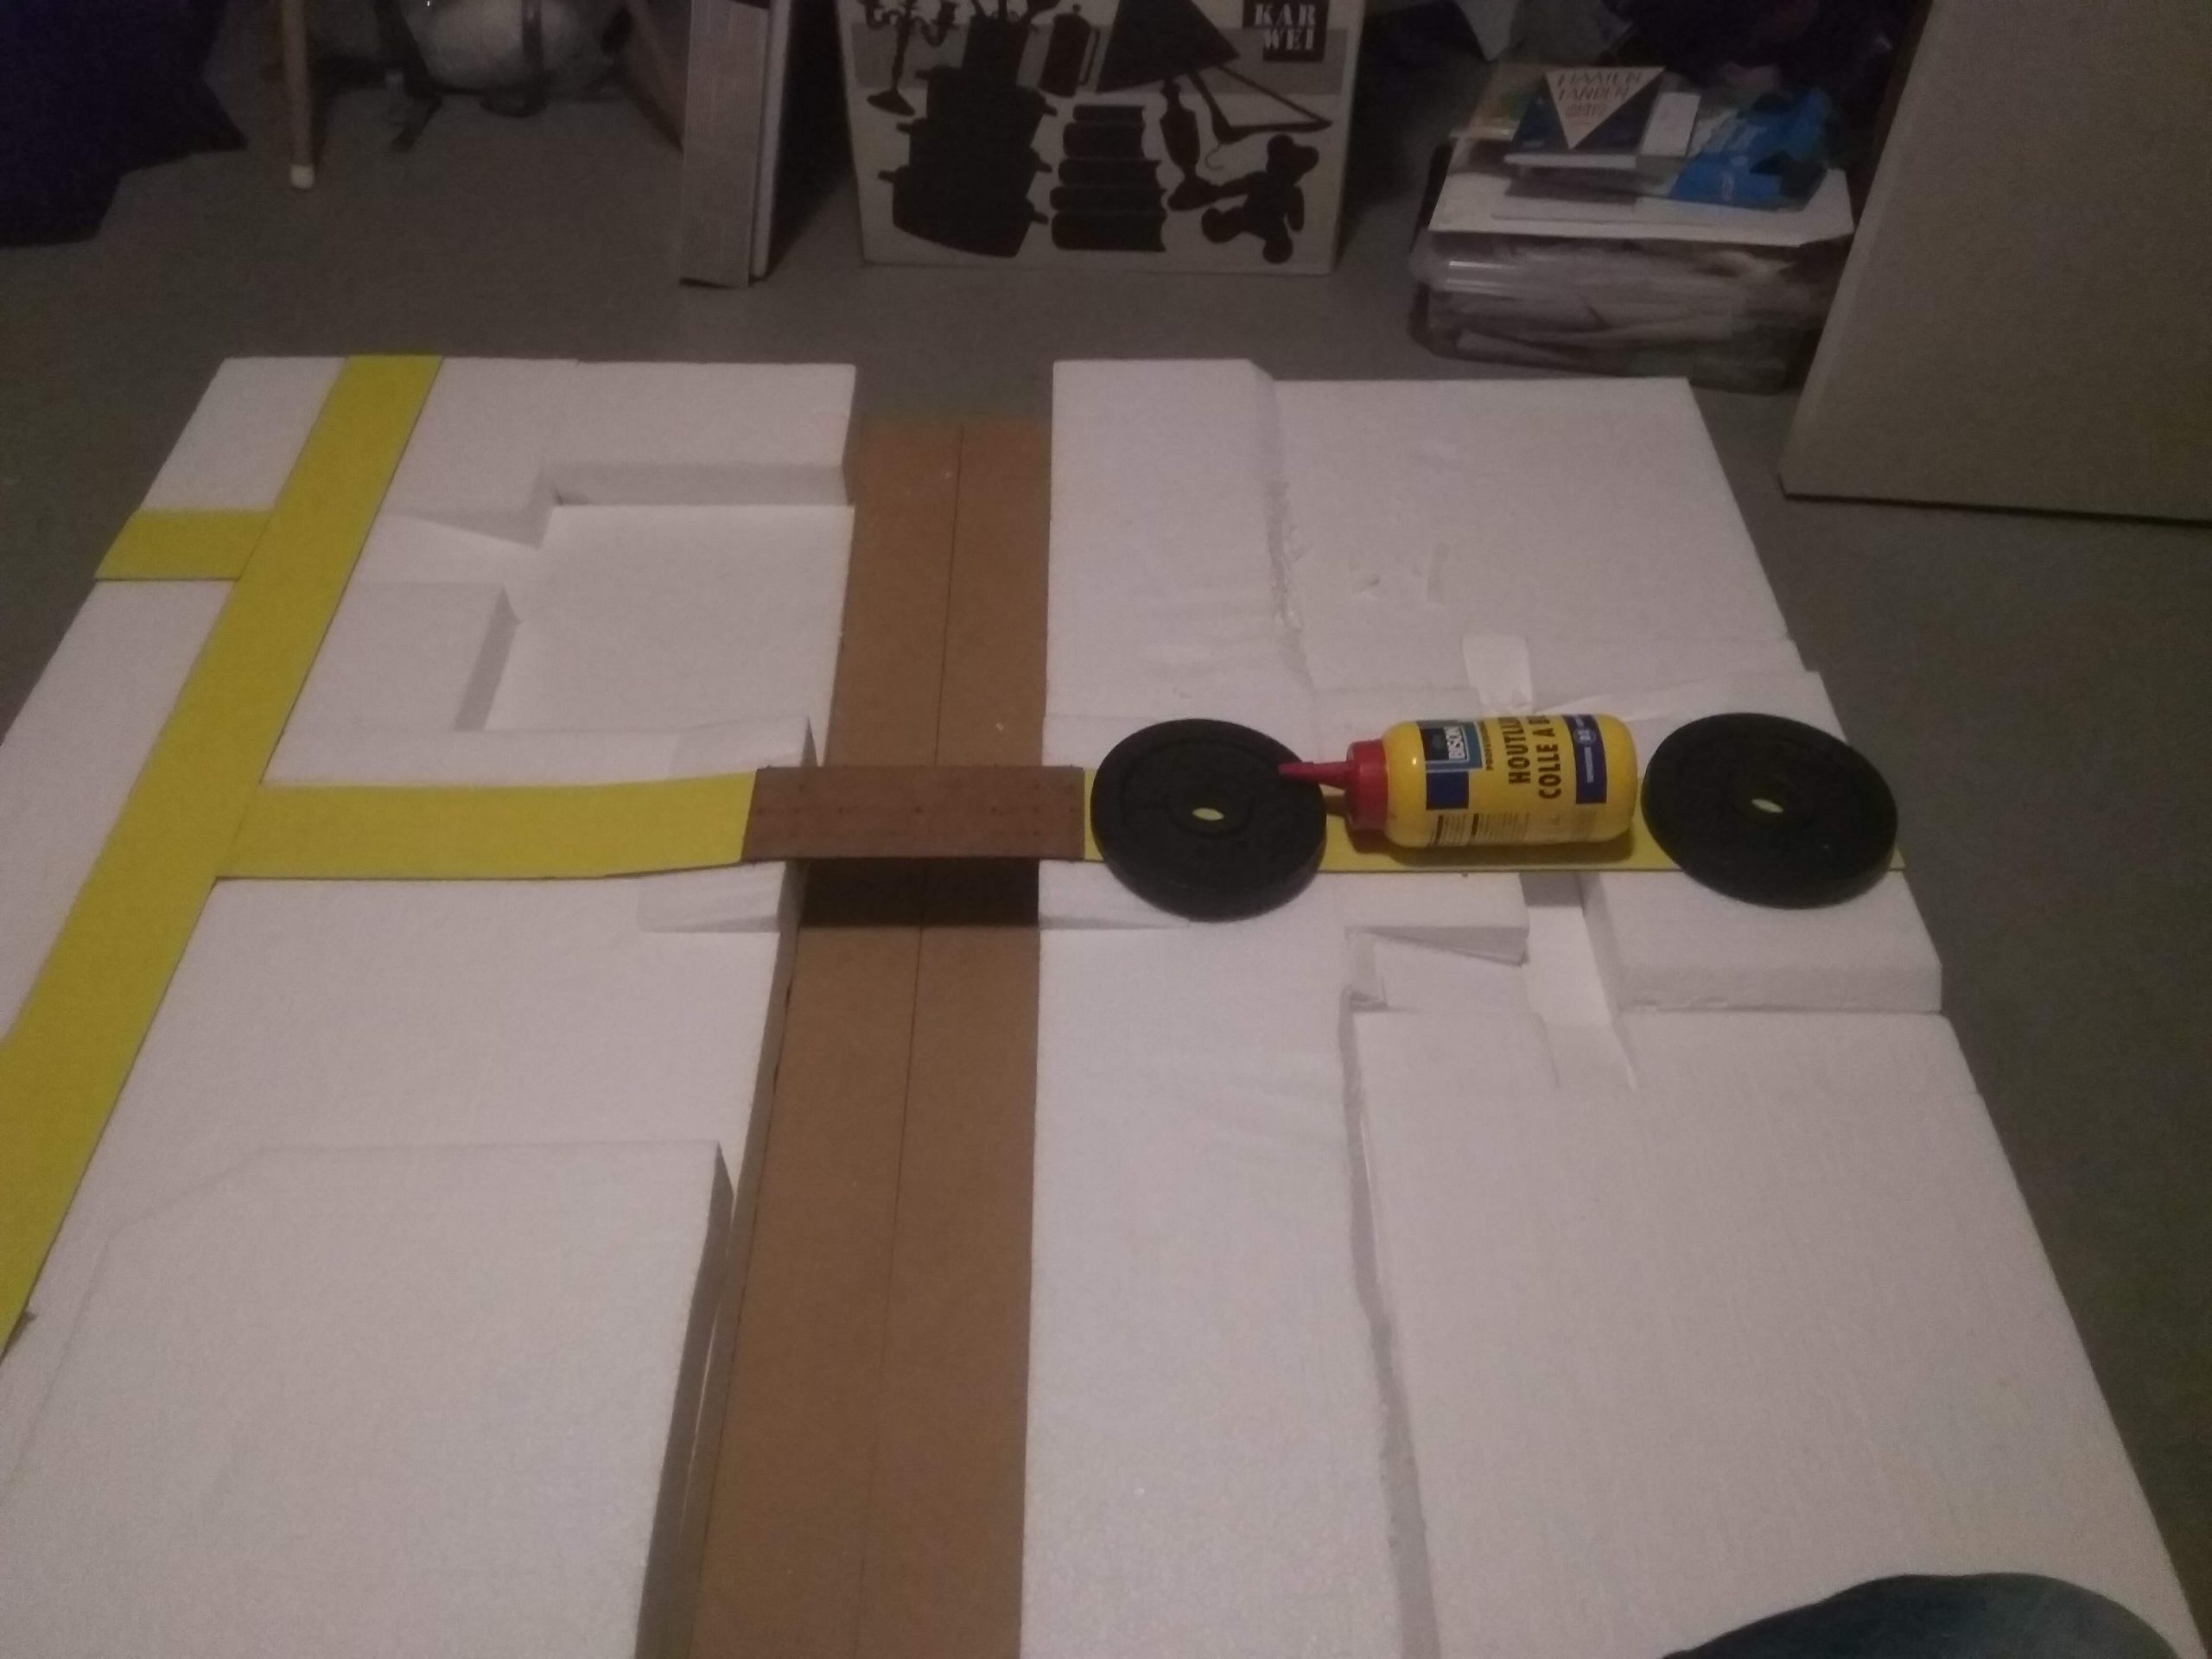
I choose to have a gap underneath, for the river to slide into. About 0.5 – 1 cm and placed cocktail sticks there all along the bottom. This help me with measuring the height of the cliffs and the placement.
If you flip the mould over you should have a flat surface, one on which you can mark down how high the cliffs should be. Use a blade or saw to cut through it. DO NOT rush this. If you do the plaster will break and you will have an harder time placing the cliffs. But if it does happen, save those bits to put on your board elsewhere. Glue the plaster cliff in place with wood glue. I put my boards on their sides, angling them 45-60 degrees, so gravity helps out. (90degrees will make your cocktail stick useless).
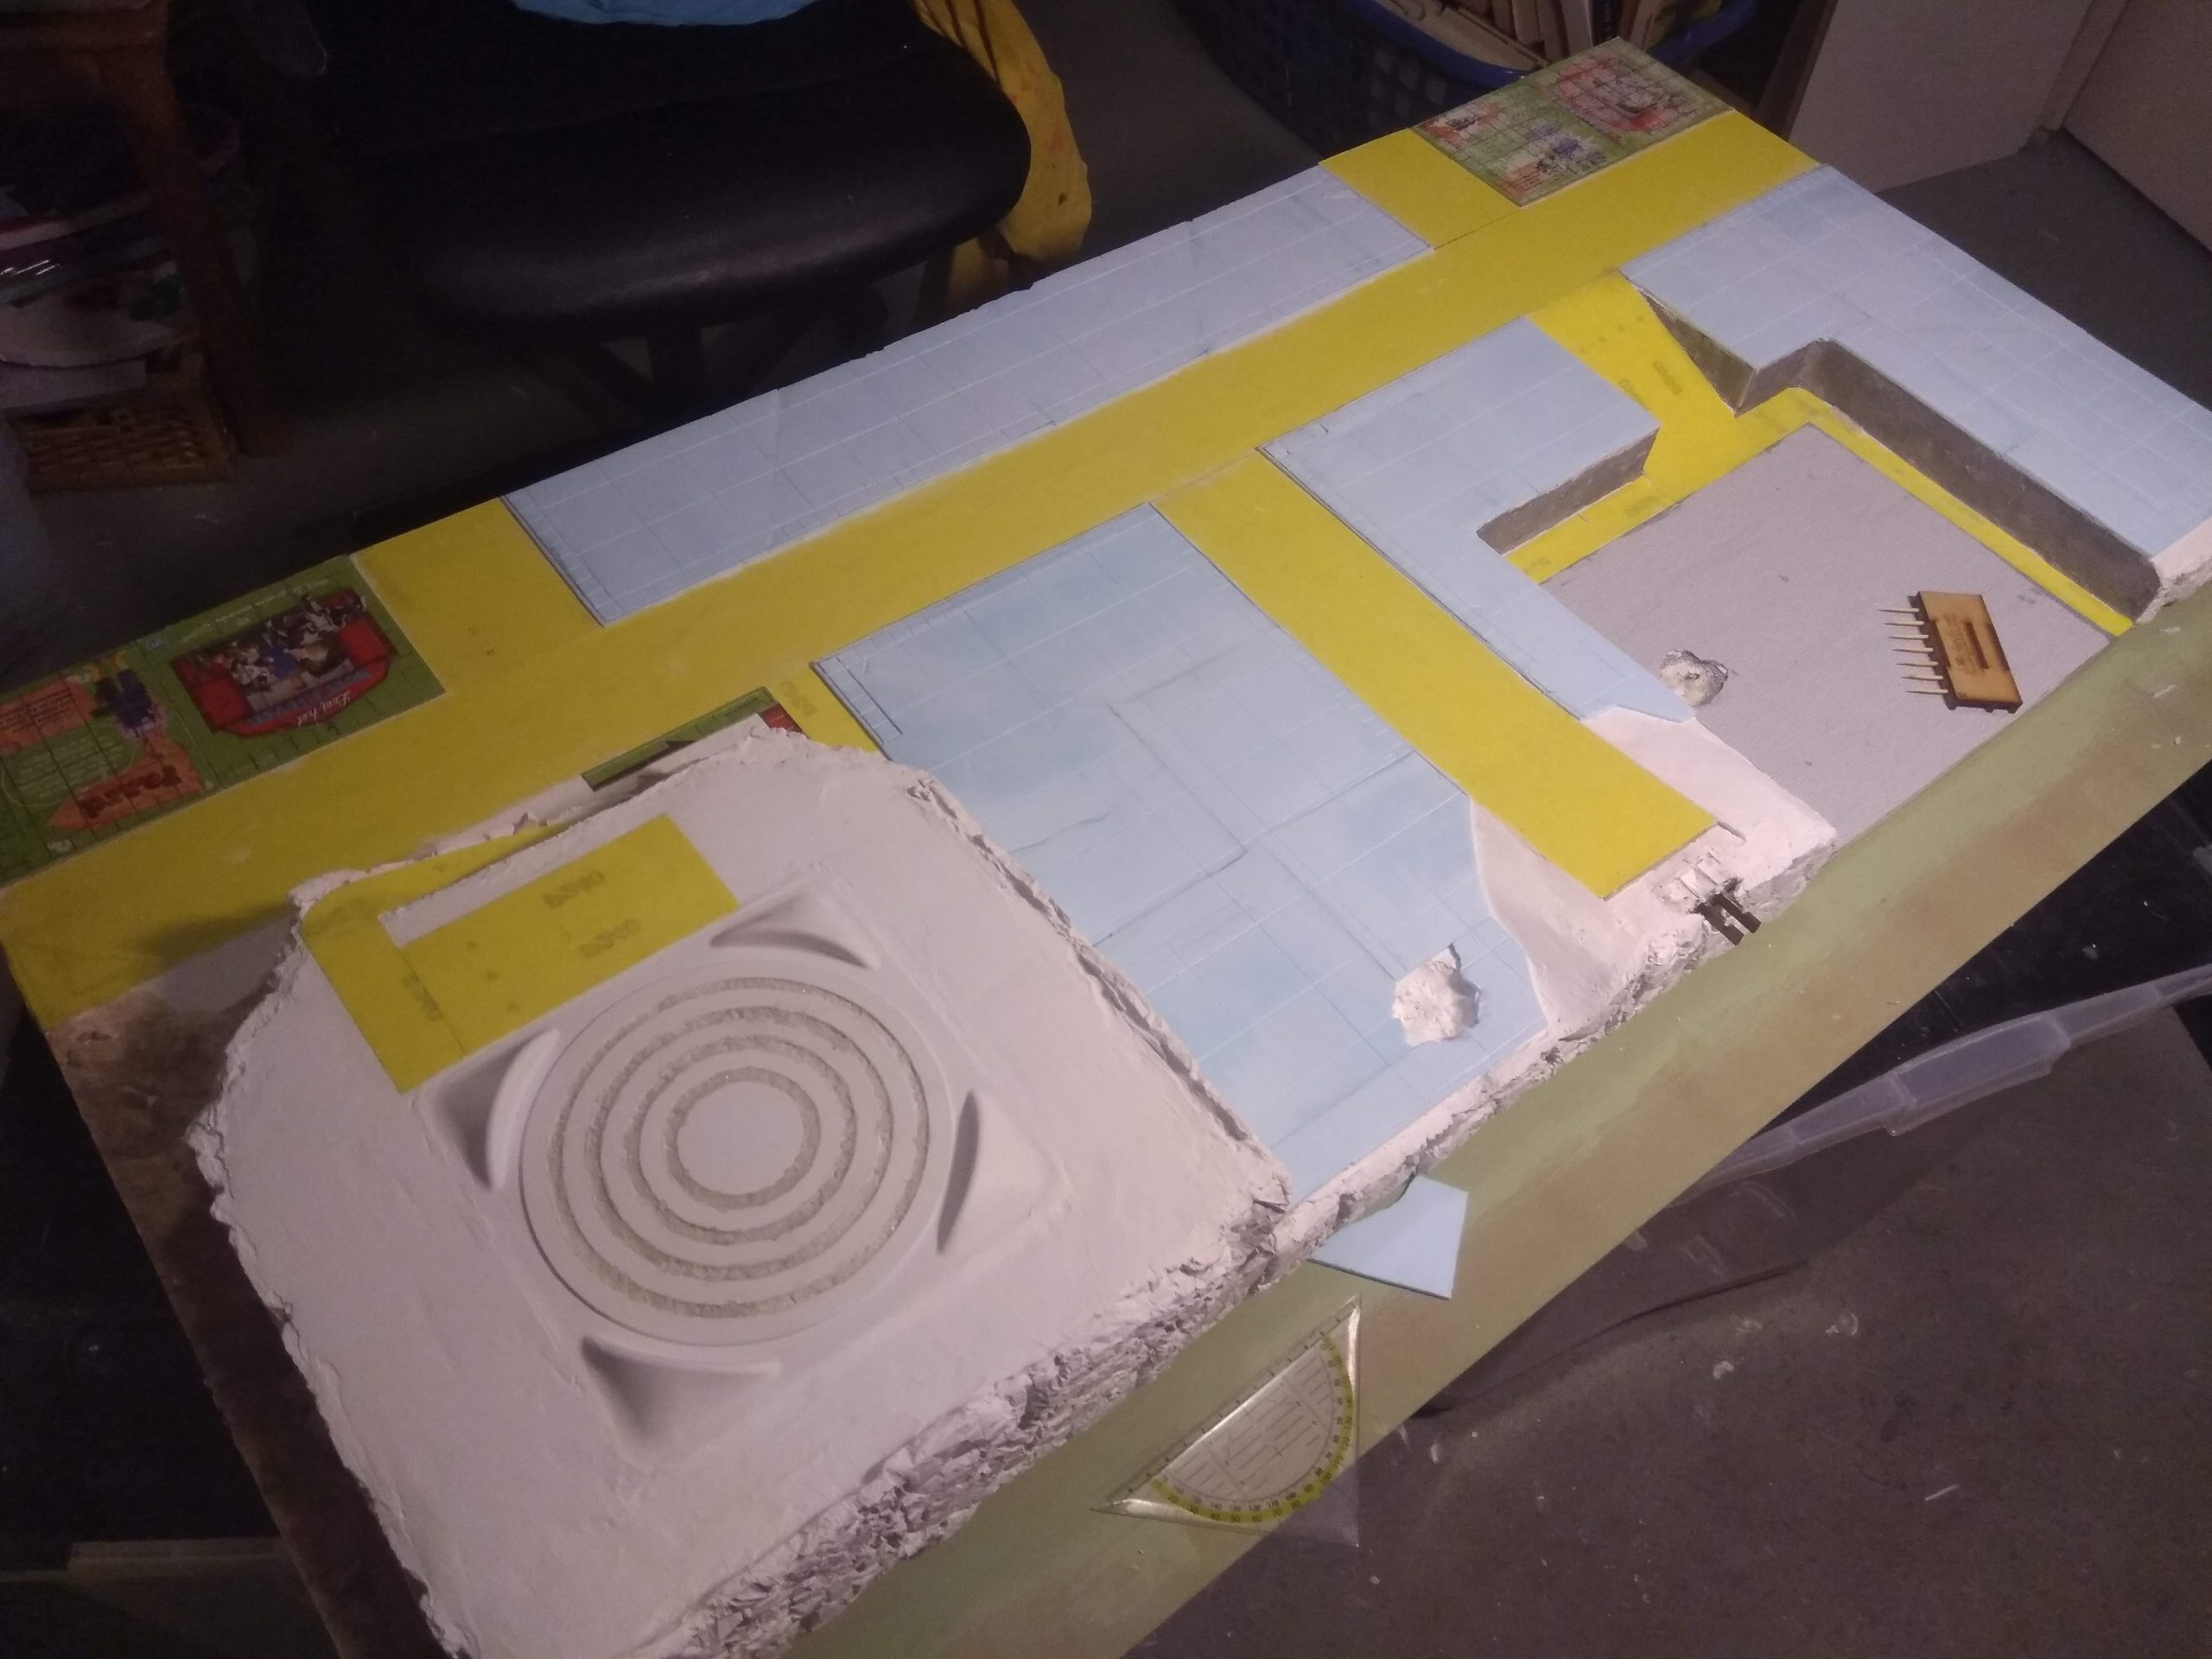
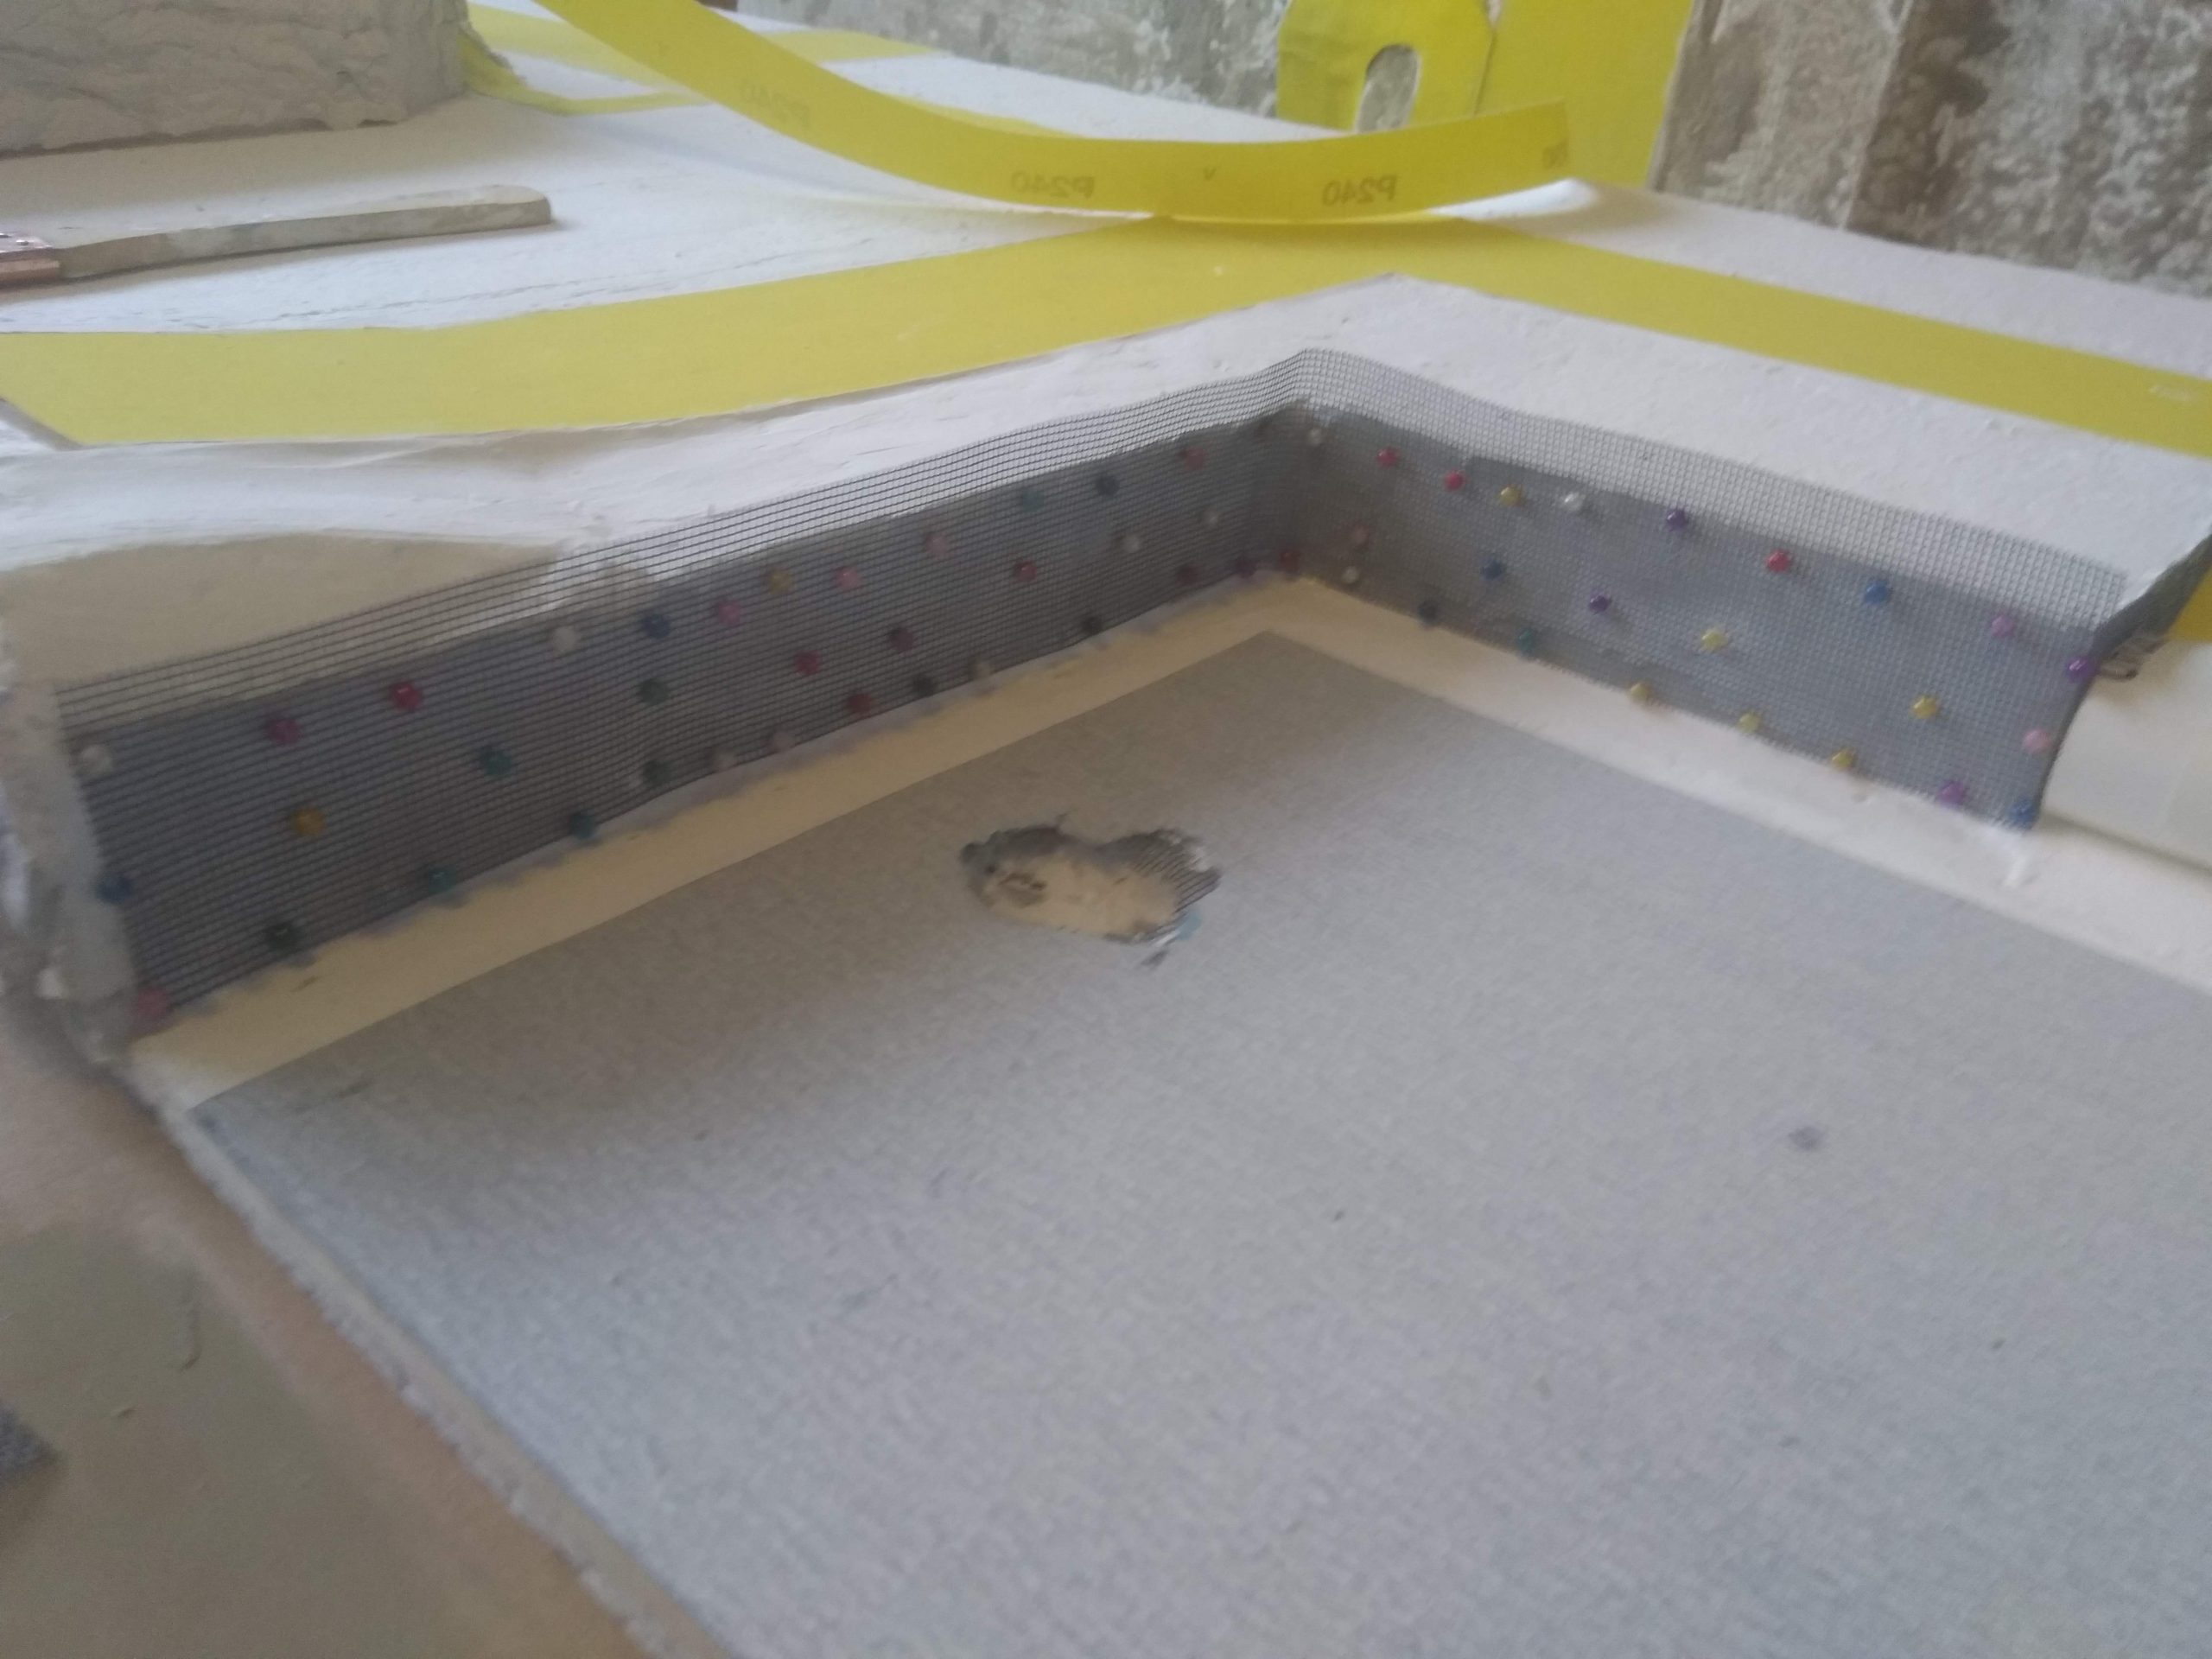
As you can see I also cut out craters and lined these with clay, but you can use other materials as well. If you look closely you can see the gaps between the cliffs and the foam and the cliff themselves. You can blend this in with wall filler/stucco. This I also put in the columns to fill those up!
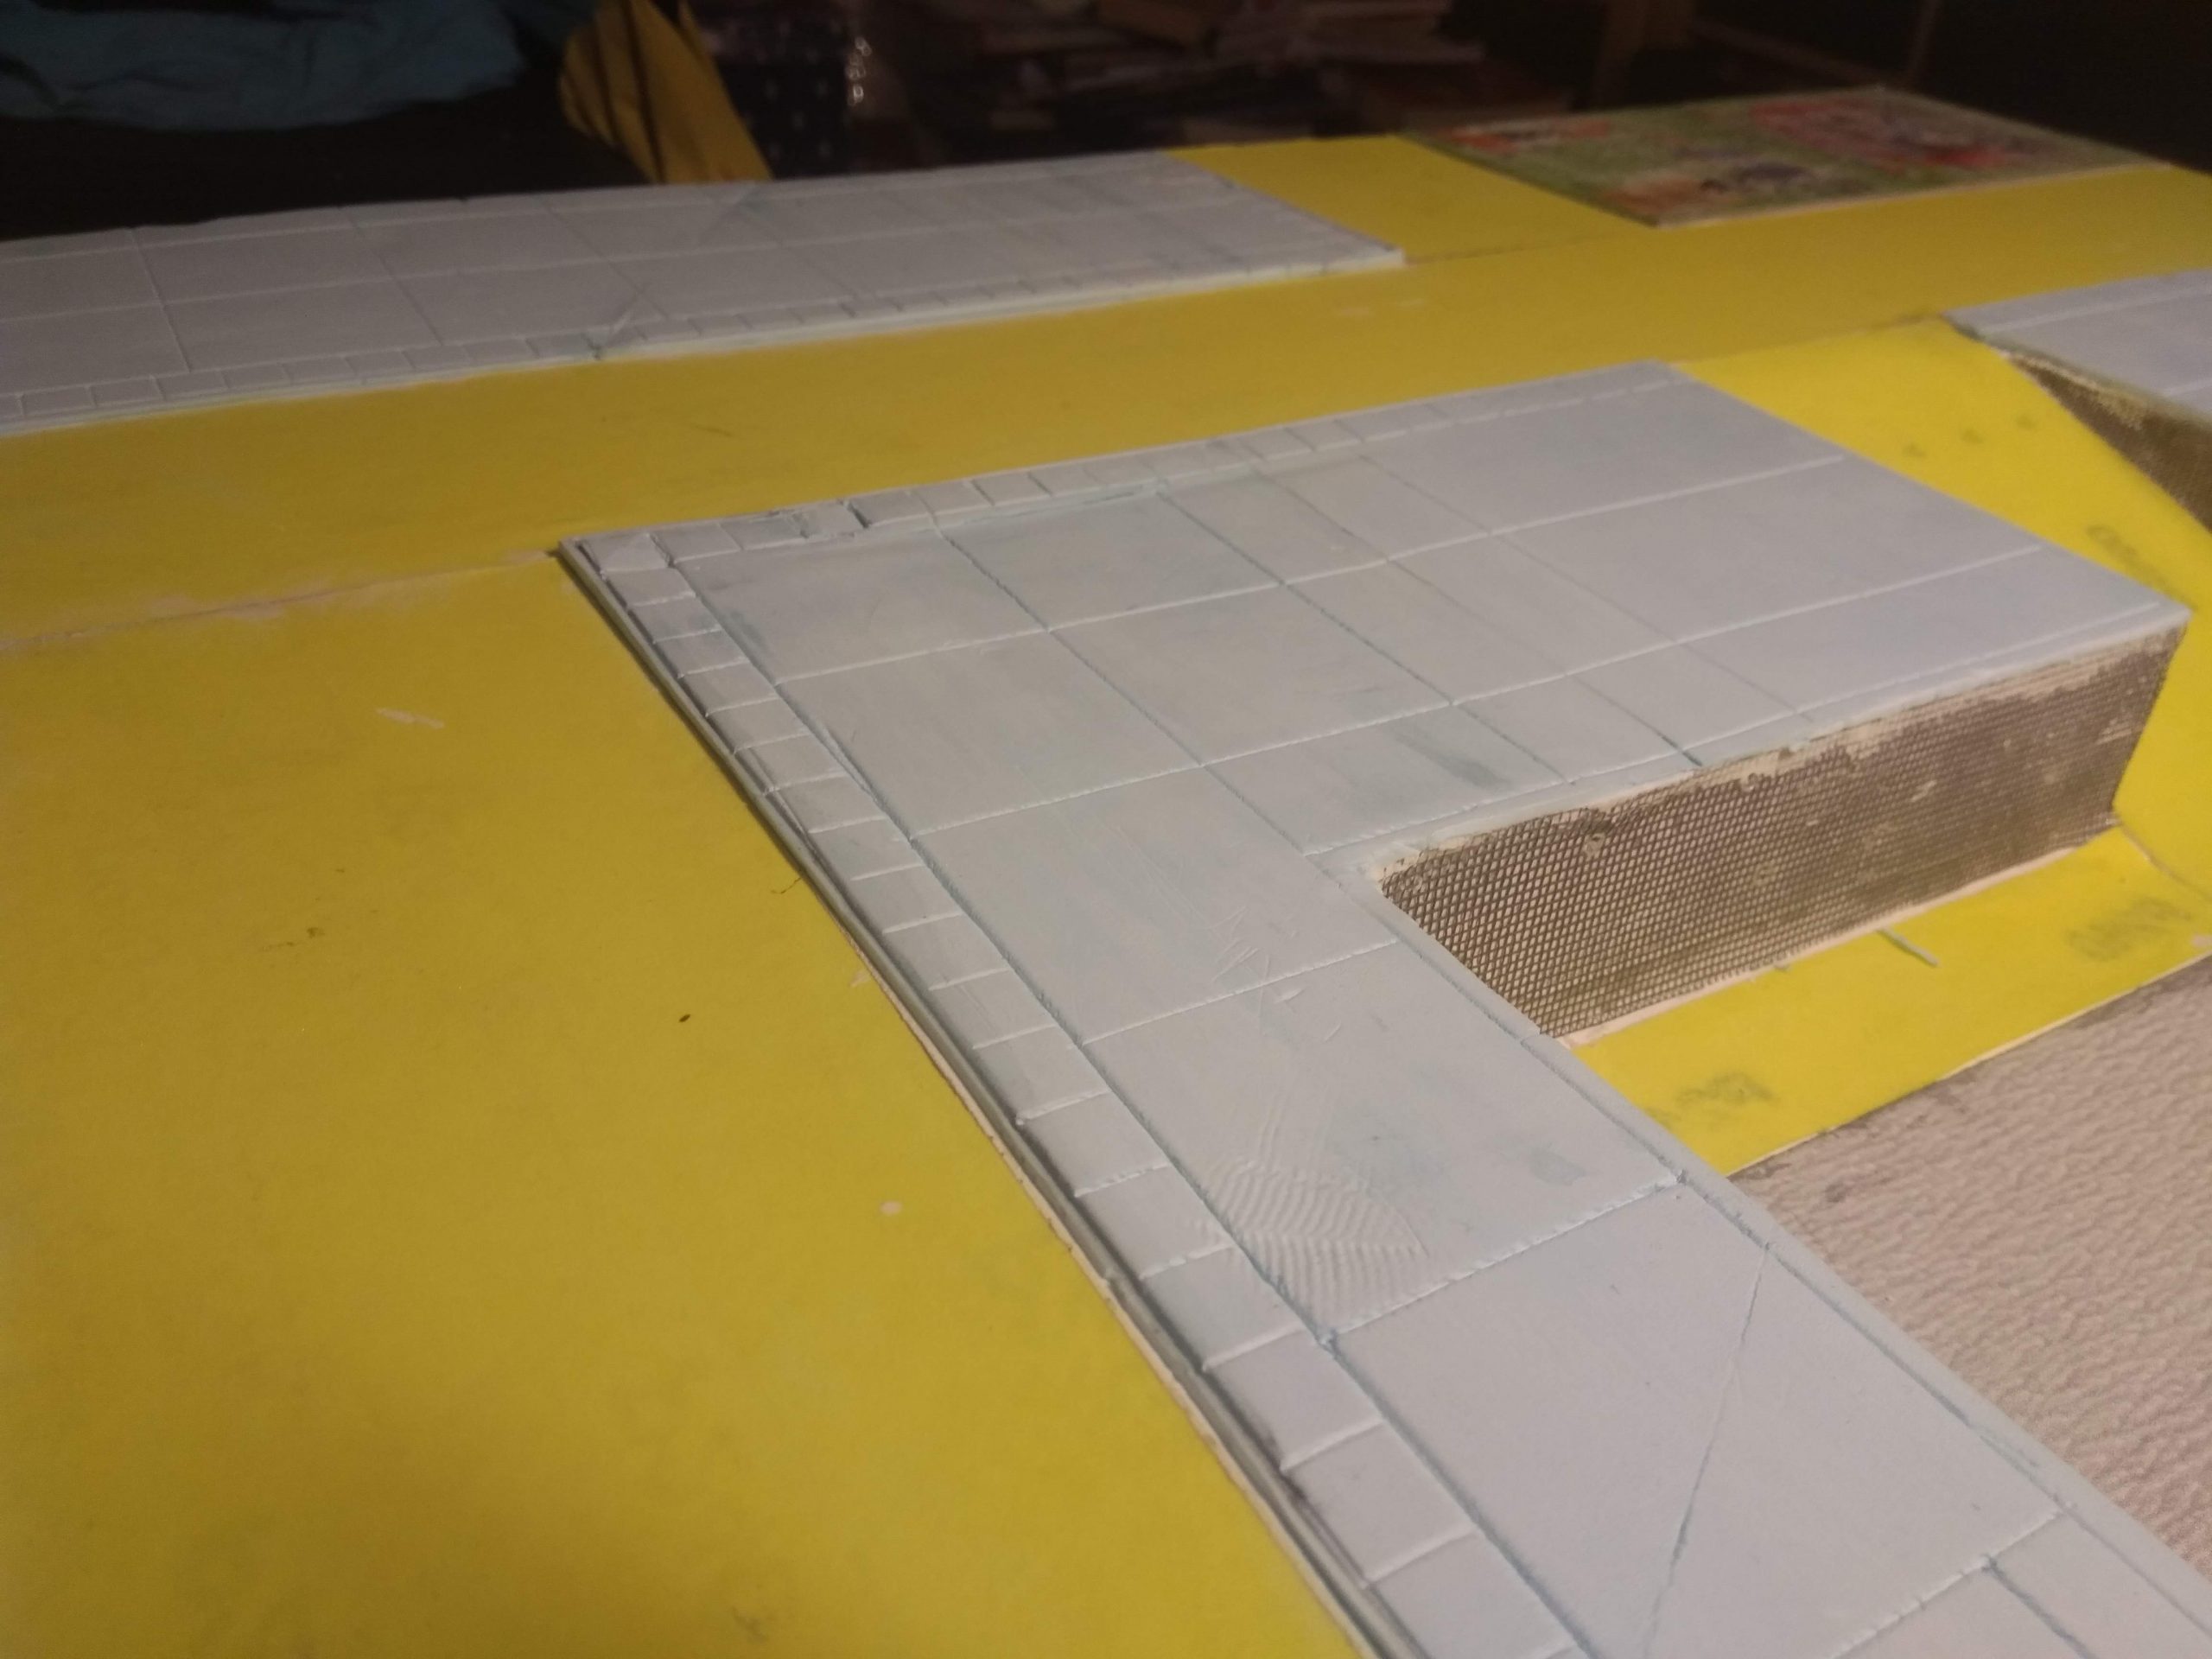
As I was blending in the cliffs I did the same with the roads. I had already sunk them in a bit in the city But this was not enough. I tried to get it level with filler, but that still didn’t work. So I needed to add 2mm blue foam sheets. I cut these myself, but you can buy them as well. My local train shop has them in 1,2,3,4 & 5 mm. With hindsight that would have been easier for me, instead of going filler and cutting foam…
Carving in the tiles took some time. For carving I used a pencil with a good point. I marked out a few spots at several intervals 2mm from the road. And use a very large ruler to get the pavement edge in. I then used a tool from Shiftinglands, which is basically a comb with teeth every 1 cm.
https://shop.shiftinglands.com/modeling-tools/85-rake-set.html
For the large tiles I just used the width of the ruler. Nice and big concrete slabs.
Blue foam is a great thing to use. After this I used the corner of the ruler to press some edges in to hide some mistakes and lines from me cutting the sheets myself.
If you look in the background you will notice wiring in the walls. This I put around the harbour to make it look link the earth is being held back by it. It is from a screen door, to keep flies out. I bought it some time a go to make fences and have used it for the UCM Dreadnought under construction I made as well. It takes woodglue/pva well enough, you just need to pin it in place.
Another hindsight tip for you folks is the large sheet of sanding paper. I should have either made the harbour as large as 1 sheet or make equal tiles. Oh well. I hid this mistake with some strips of the yellow sanding paper and some sand. Adding sand and rocks was the next step anyway.
For this you start off with large rocks and work your way down. Finally just ending with fine sand.
Pick a spot you want a rock to be. Get wood glue(PVA) straight out of the pot to put the large rocks down, then press some small ones around and sprinkle some fine sand. This will help blend it in.
Repeat with some smaller rocks on the larger flat area’s to break the surface up. Also put these in and around the craters. (Stuff got thrown out with a BANG!)
Finally thin the wood glue(PVA), 33% -50% water and some paint. This will help you see where you have been with the glue. DO NOT GO OVER what you already put down. It will come lose, and the fine sand will ruin the effects of the rocks. Also important to know, when you don’t have the time to do the whole area, don’t do it in straight lines! You will see those lines and it will look very made instead of natural. You’ll notice some on the photo below. You can correct this by going over the lines an extra time, feathering them out. You can do the same in the city around the bottom of the cliffs and tops. Some spill over on the roads is fine. Sand gets blown around anyway.
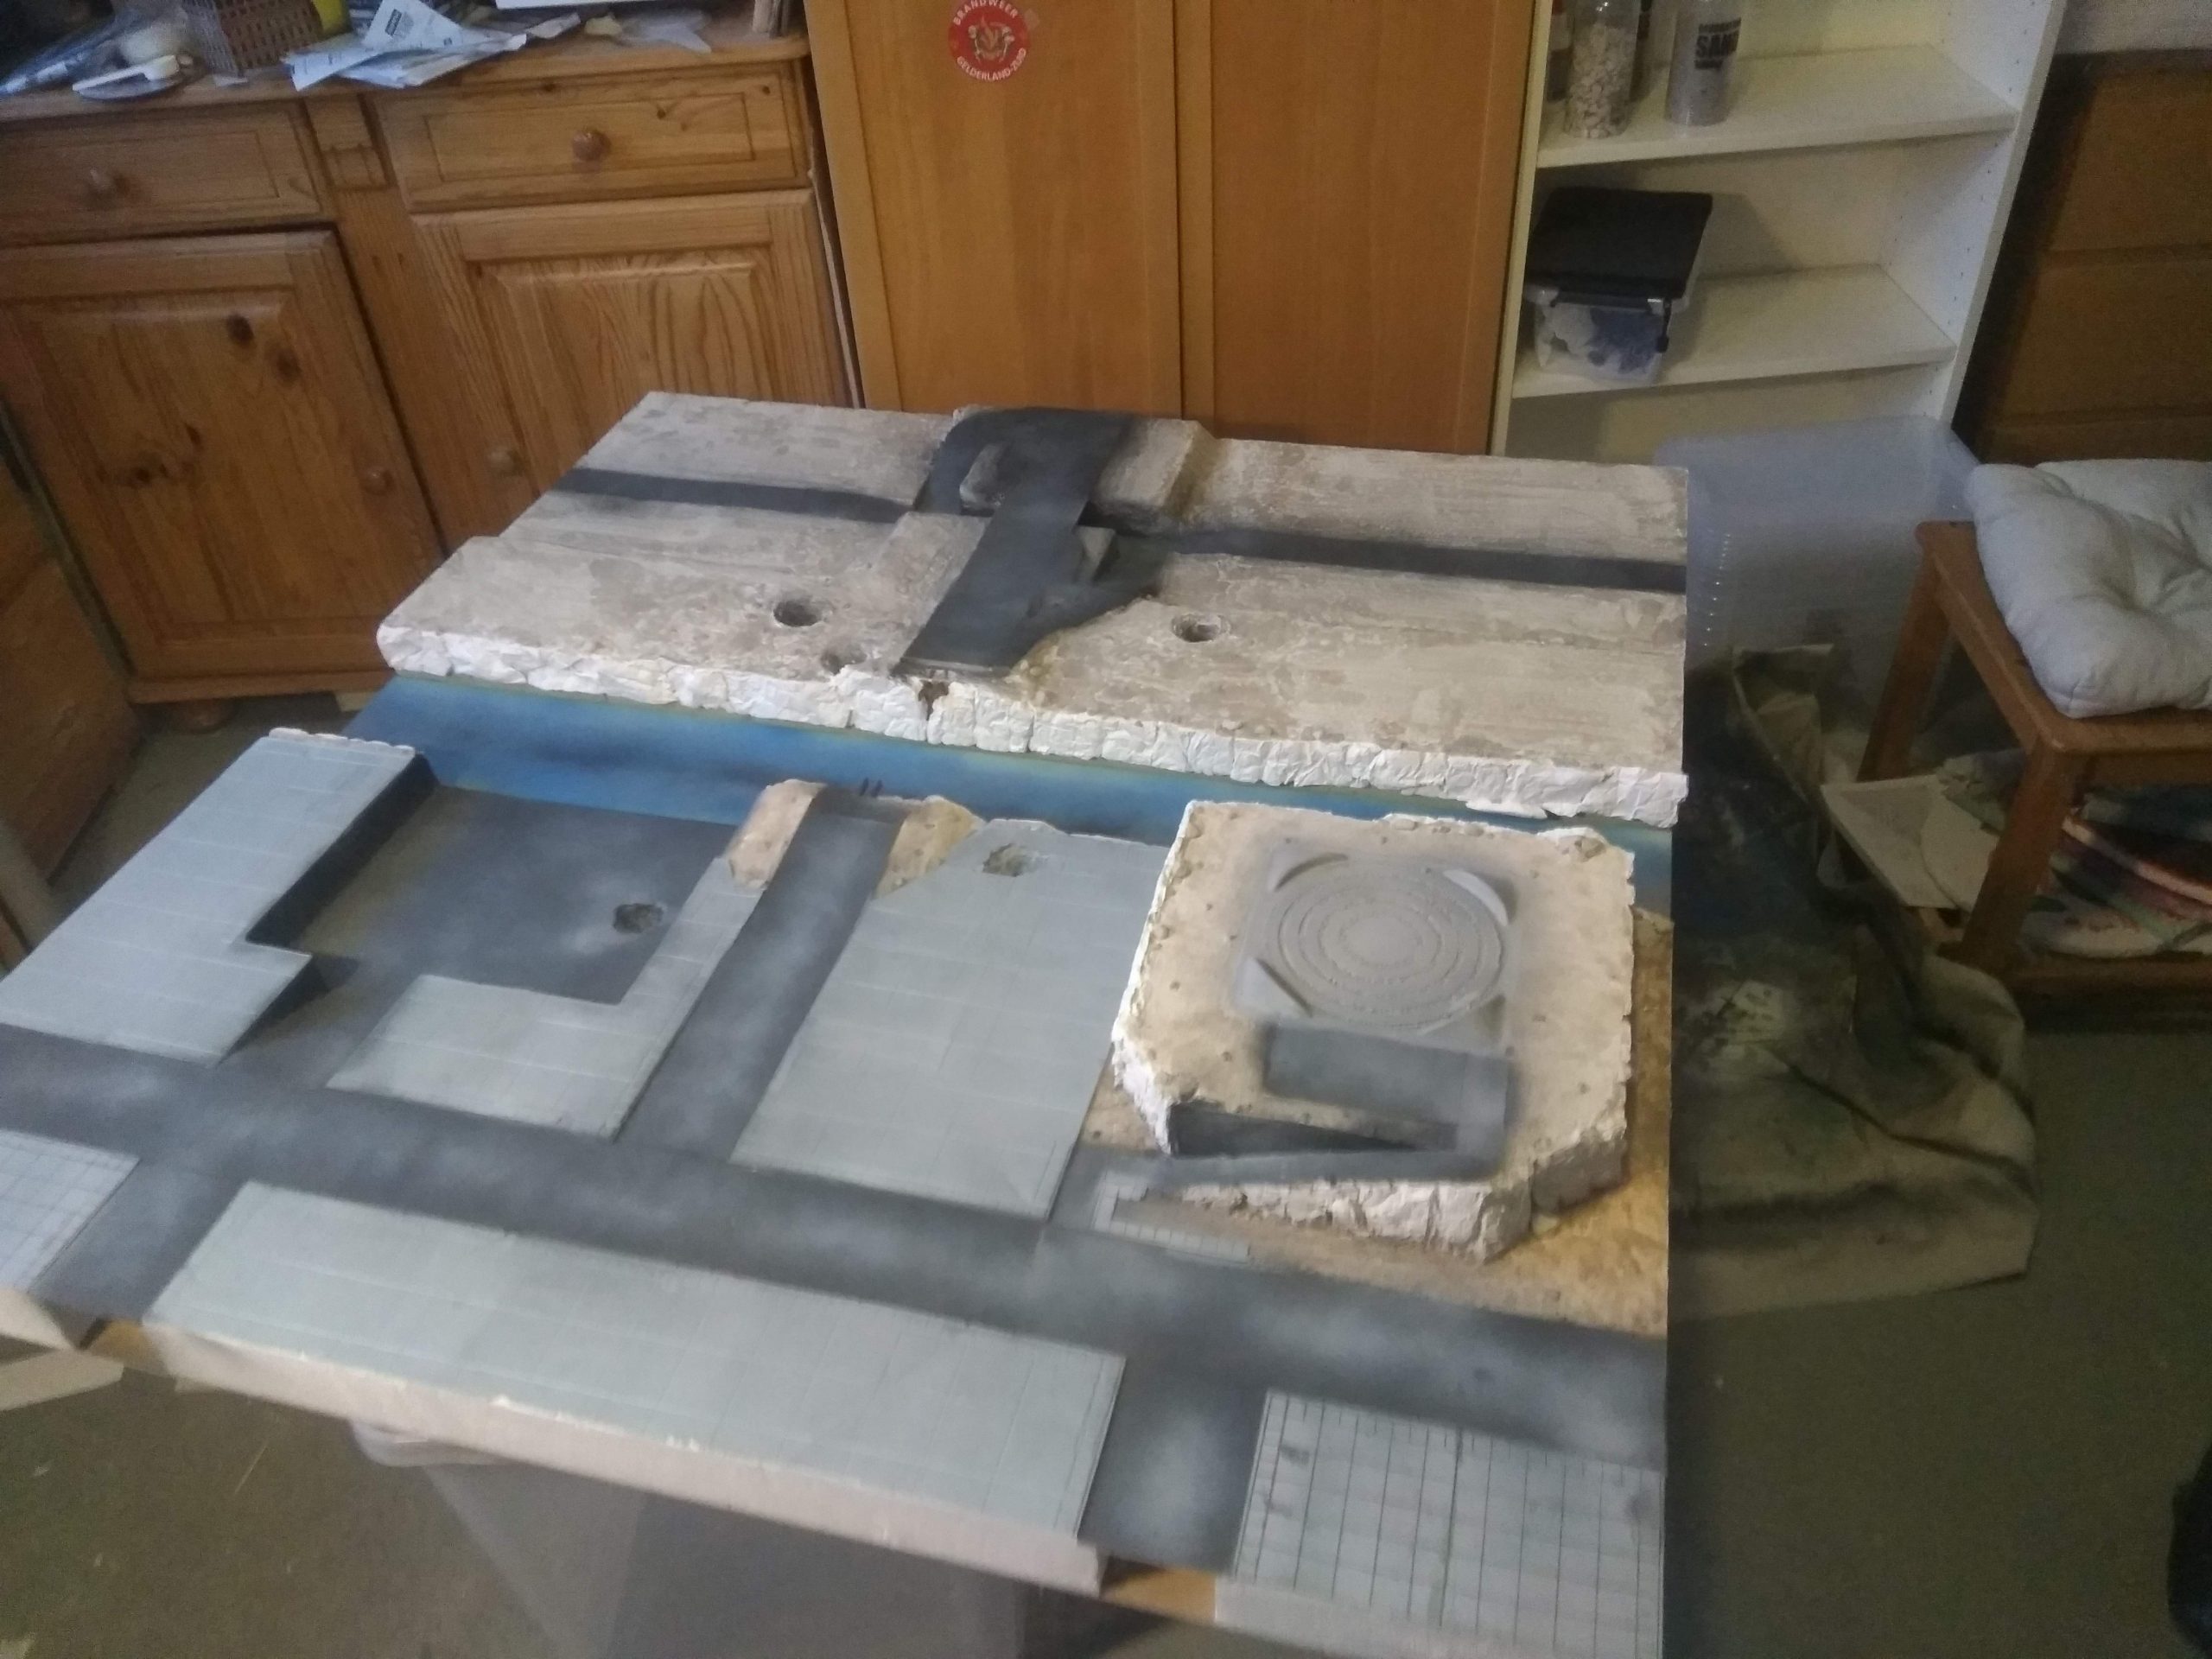
I now did the roads. Got a cheap black primer to get the tarmac road base. Put some paper down to protect the foam, sand and cliffs. When the cliffs get primer on them it will make the harder to do. So be very careful! I then used a cheap grey primer to overspray the roads to get colour difference. I like this method, but you could also drybrush it. The orbital defence platform also got a blast of grey.
The next step is doing the cliffs. This you can do with some very watered down paint, it will make a mess so don’t do this before you paint the ground below! The plaster soaks up the moister and takes in the pigments very well. I went with a technique called leopard spotting. Basically you use 3 colours: Red-ish brown, yellow-ish brown and a grey brown to blend it in. Check out the Terrain Tutor for a step by step. https://www.youtube.com/watch?v=uBiMry45qhM&list=PLohbeH3fTP1sy244bli51FN-QtNURIQzs
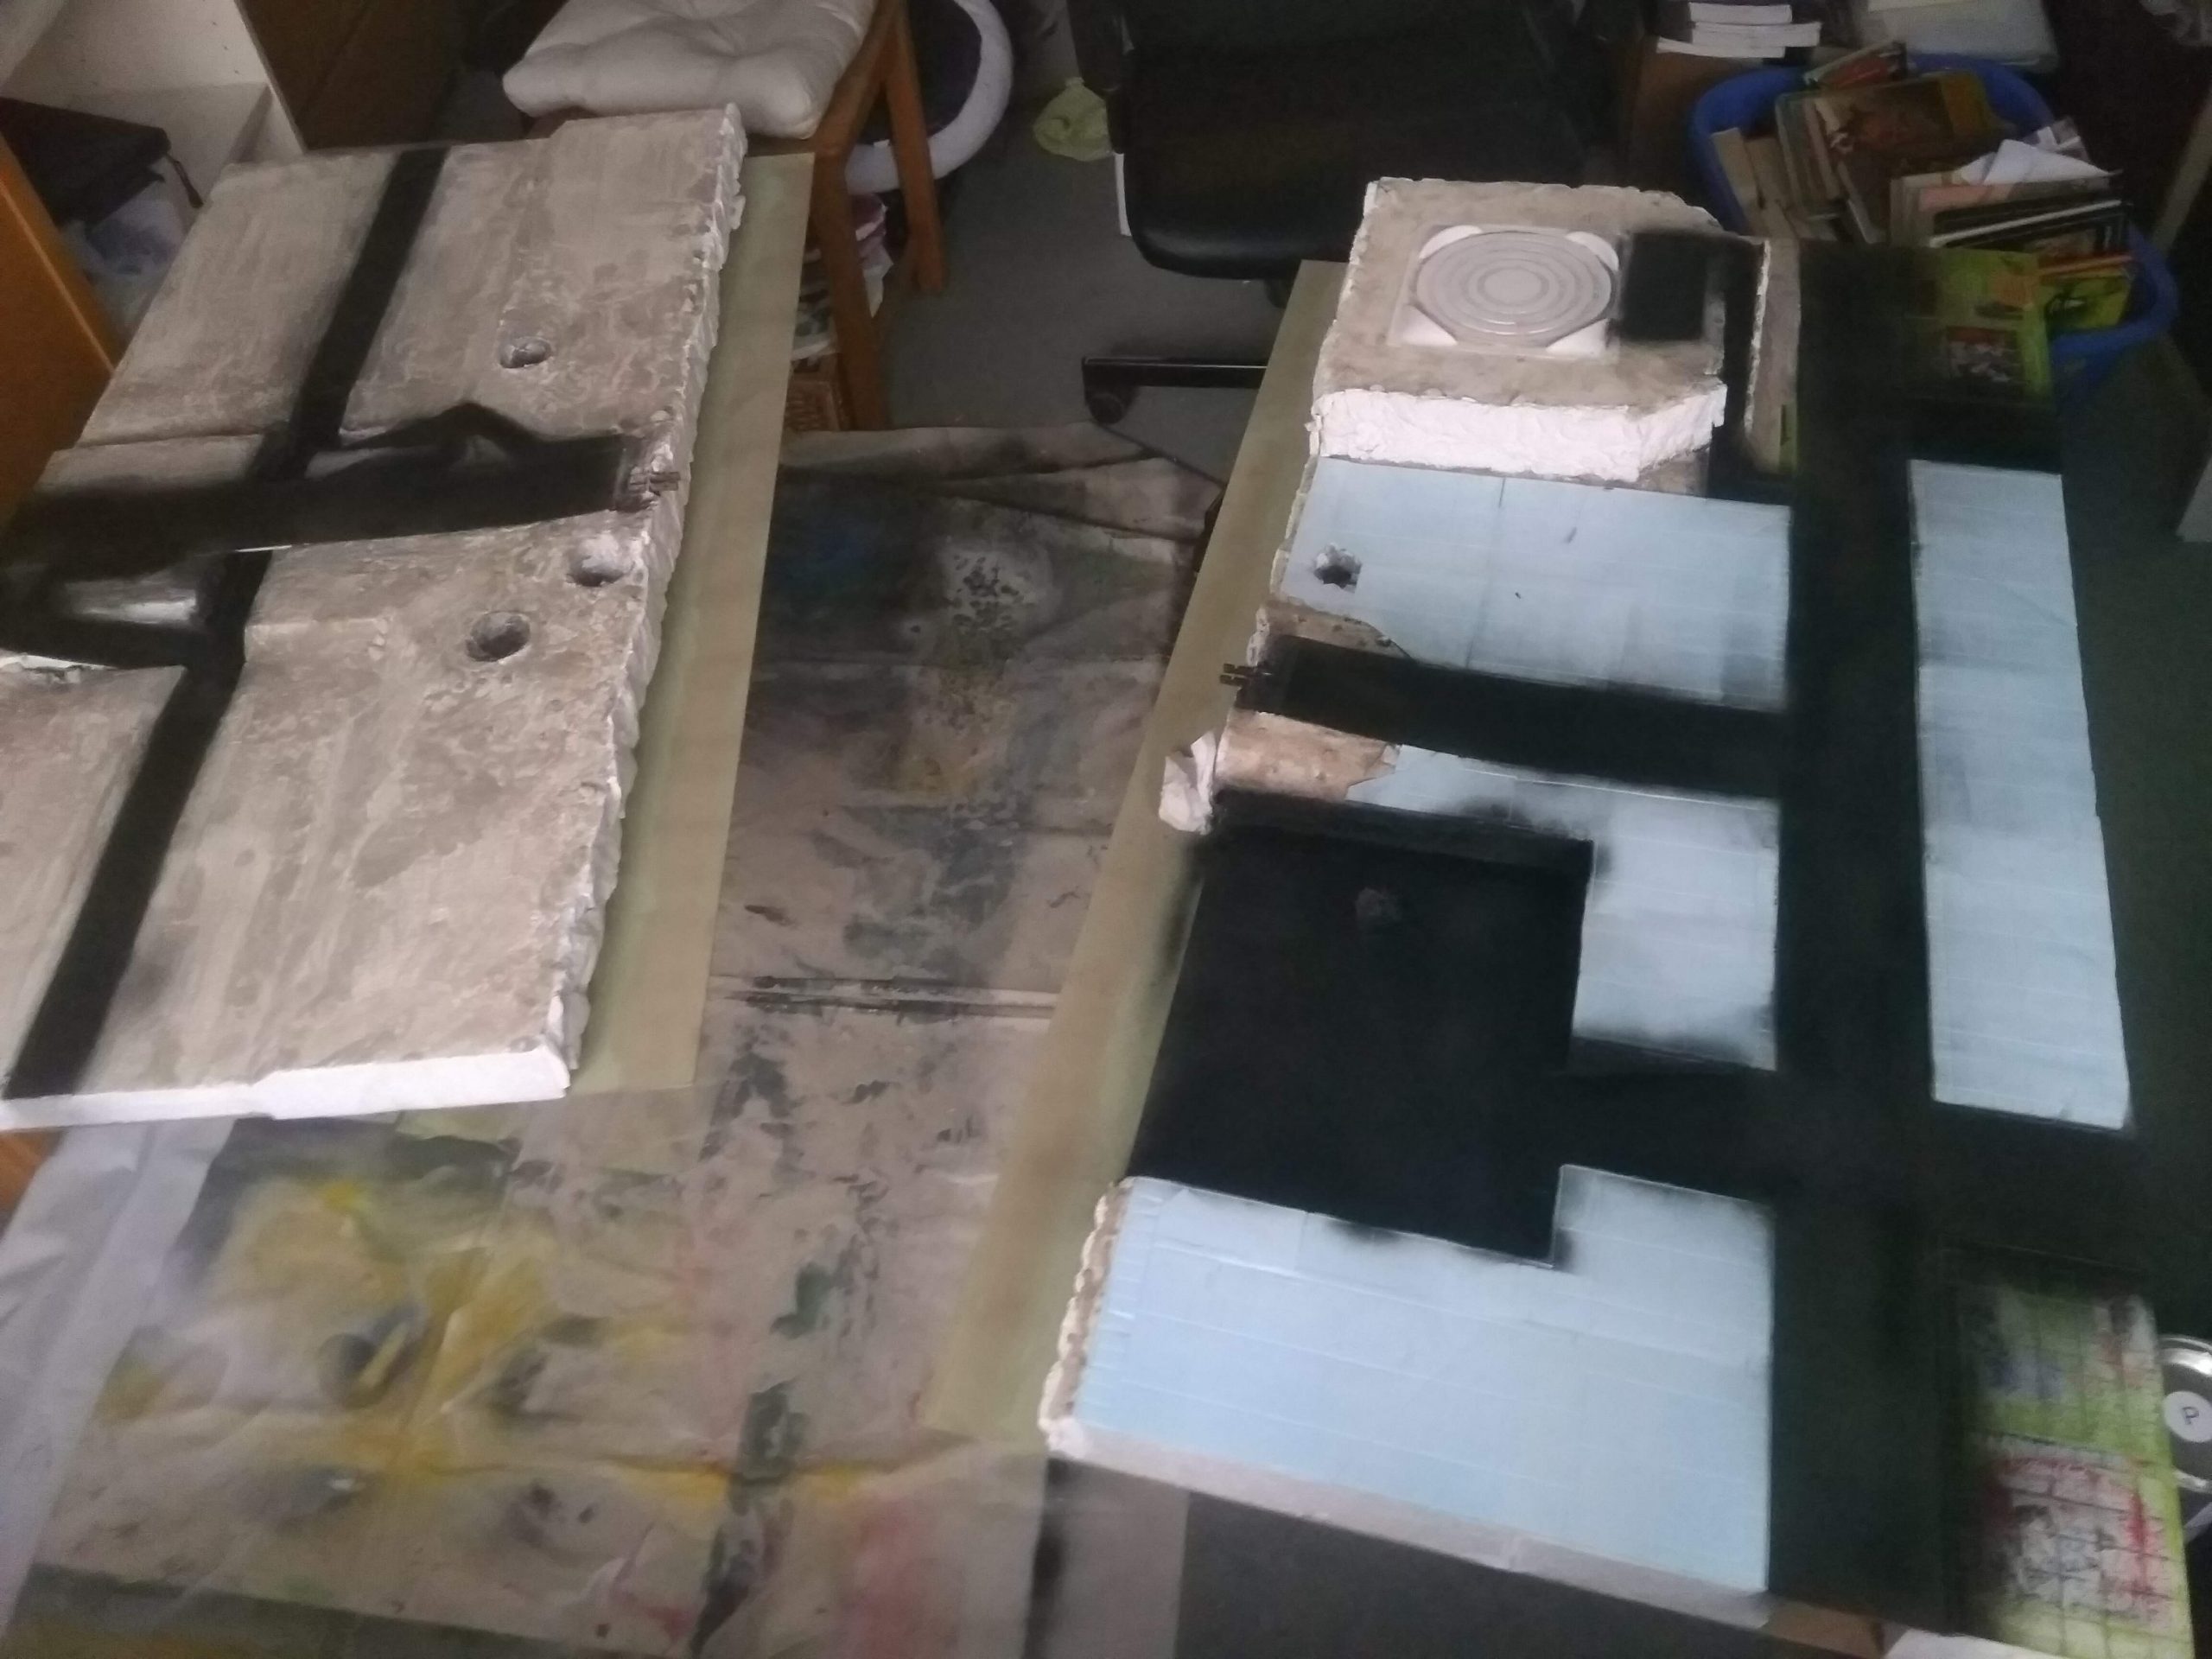
We’re nearing the end. I bought a latex water based paint in the orange I wanted. So I could always go back and get more in the same colour. (Say for if I wanted to continue the desert or make terrain in the future)
I watered this down AND added woodglue rations roughly 2 parts paint, 1 part glue, 2 parts water, as latex is quite tick. Starting carefully at the roads I worked away from them. Do not go over any bits you miss, as in if you see some unpainted sand. Wait until your board is dry and go over it then. Otherwise you will take the sand off(Wood glue reactivates when it becomes wet again) This will need to dry overnight.
I nearly forgot to write down how I made the river! I had some light green latex paint, this is used to seal the MDF. I was planning on making it a dirty river. So I added blobs of brown pure acrylic and stippled these out in the wet green paint. But I didn’t like the effect. So I sprayed it blue, then some patches of black and white. Then blue to blend it all. This I let dry. Used a 1euro glossy varnish to seal it. The first layer I made sure the river was laying down flat. The second & third layer the river got placed at an angle 25* degrees, and I went from side to side with the brush instead of down the length. This gives a small ripple effect, perfect for a 10mm river.
The organe was dry now and I saw a few spots of that where not covered, so I stippled the orange on those spots. Being small area’s they would dry quit fast. In the mean time I put some colour on the columns of the bridge and picked out a few rocks in the same colour. When this all was dry again, I did an overbrush off RAL 9001, a very light crème colour. Overbrush/dry brushing dries fast. So when I was done with both halves I could put a wash on over it. This was basically my orange mix, with some brown add and 50% hot tapwater. Hot paint flows better, giving you a cheap wash effect. So the overbrush got blended in with the base colour. Next step was stippling the city with a sponge with various tints and shades of grey. I also gave the craters an extra attention. The edges got dry brushed to bring out some details. The details, like piping and reinforced bars got a metal look. This was then given a wash. Overspill is fine again. Area’s around roads will become dirty with exhaust gasses anyway. (You can see this quite clearly when there’s fresh snow besides the roads.) As do explosions.
Be careful with the washes and the sandpaper, as cheap sandpaper doesn’t like water at all. TIP: Dap of with kitchen towel if you over spill on the roads.
Washes need some time to dry. So again let it wait overnight. As the next step is putting the road markings down. And if the area around a road is still wet you will just damage it or get wash on you. Something my kids think is funny, but the missus definitely does not….
As I said somewhere up there… I got a template for the road markings, you can also make this yourself. Just go to the TTC resource page and print out a road, and cut out the markings(But NOT the centre line). Be consistent when placing your template. I used the sparing in the MDF road to keep an equal distance, but you might want to open 1 marking at the end and use that to keep equal distance.
To paint it either use a airbrush or stipple it on with a stippling brush, a few passes are better than 1, as you can overflow the template. Use masking tap to do the central line. This will give you the long straight you need. Don’t forget to stop at intersections. On the bridge I cut 2 pieces of sanding paper and painted these separate from the bridge. Gluing them down after the bridge was painted.
As you can see in the photo, I did get some white overspray. I stippled this to make it a bit less obvious, before making the centre line. I also use the flock to cover up some other mistakes and then went an put it in where water would naturally collect. Something I did not mention before, the bridge in the desert is just the MDF road cut at the DIY store with a bit of plastic i-beam I bought at the rail model shop, for an other project. These need to be added before you blend the road in with wall filler.


Thanks for that Michel.
If this has inspired you to start a board of your own, take a look at our scenics range on our webstore.