

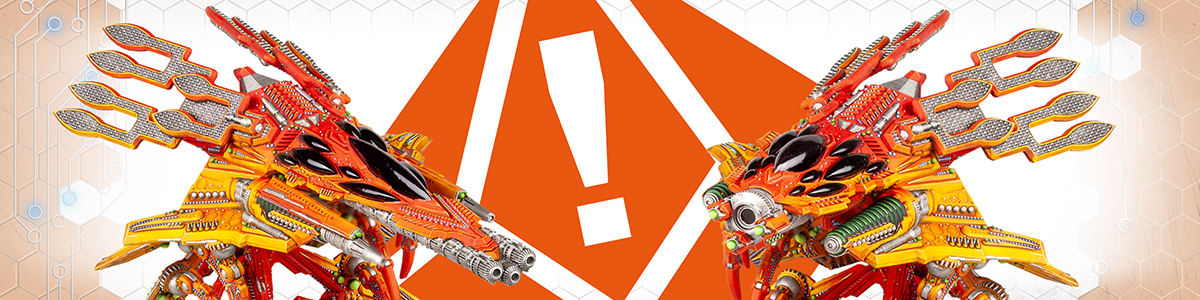
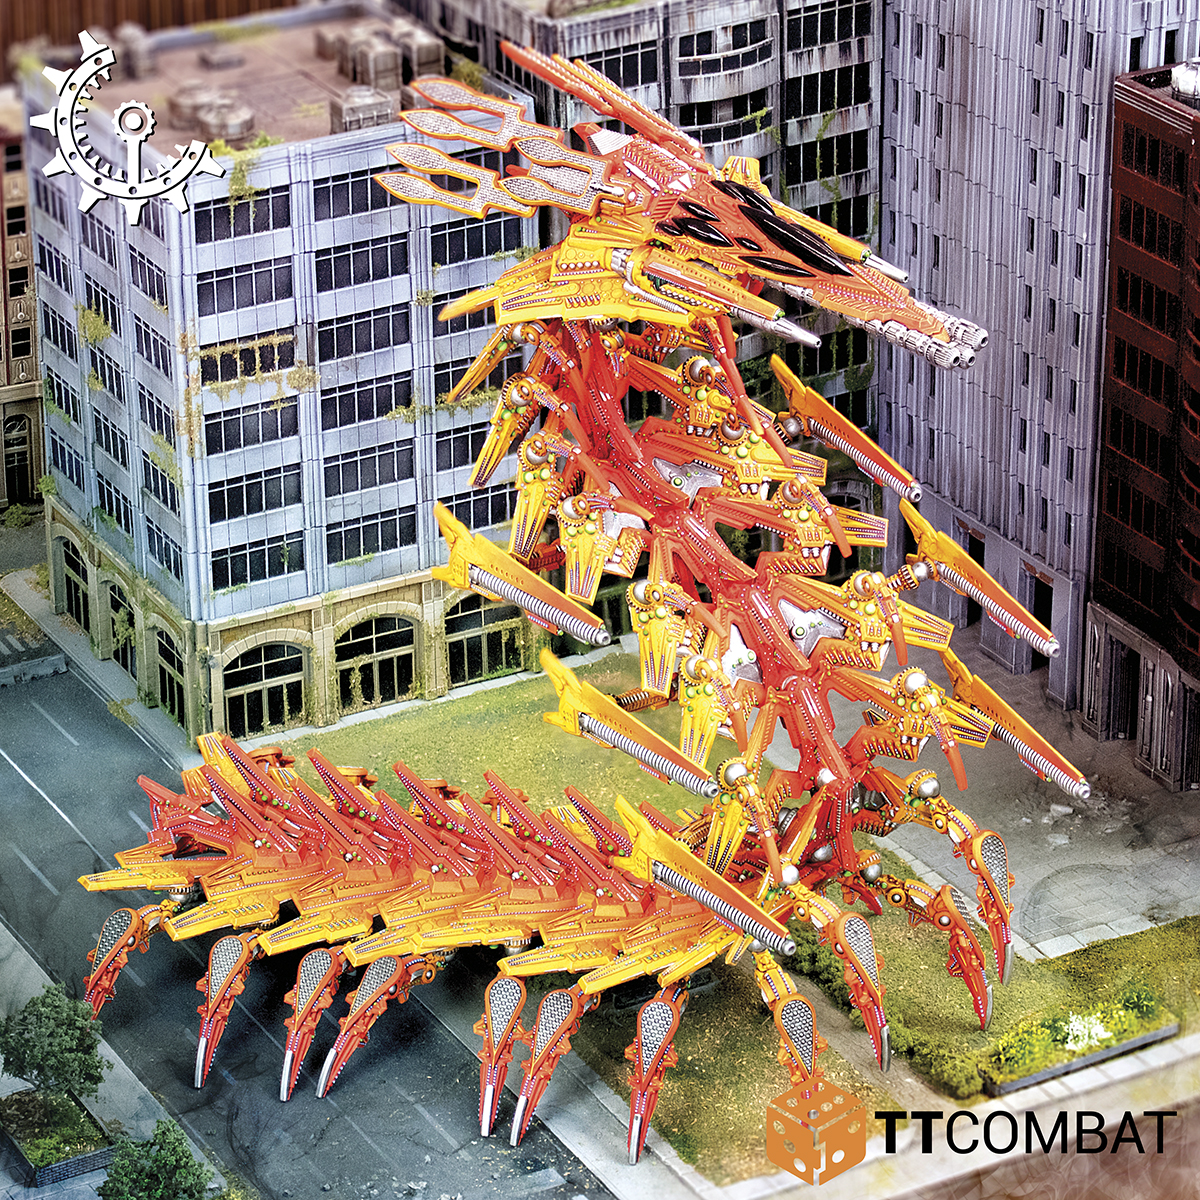
Not content with the younger races having all the fun, the Shaltari have let loose their own behemoths!
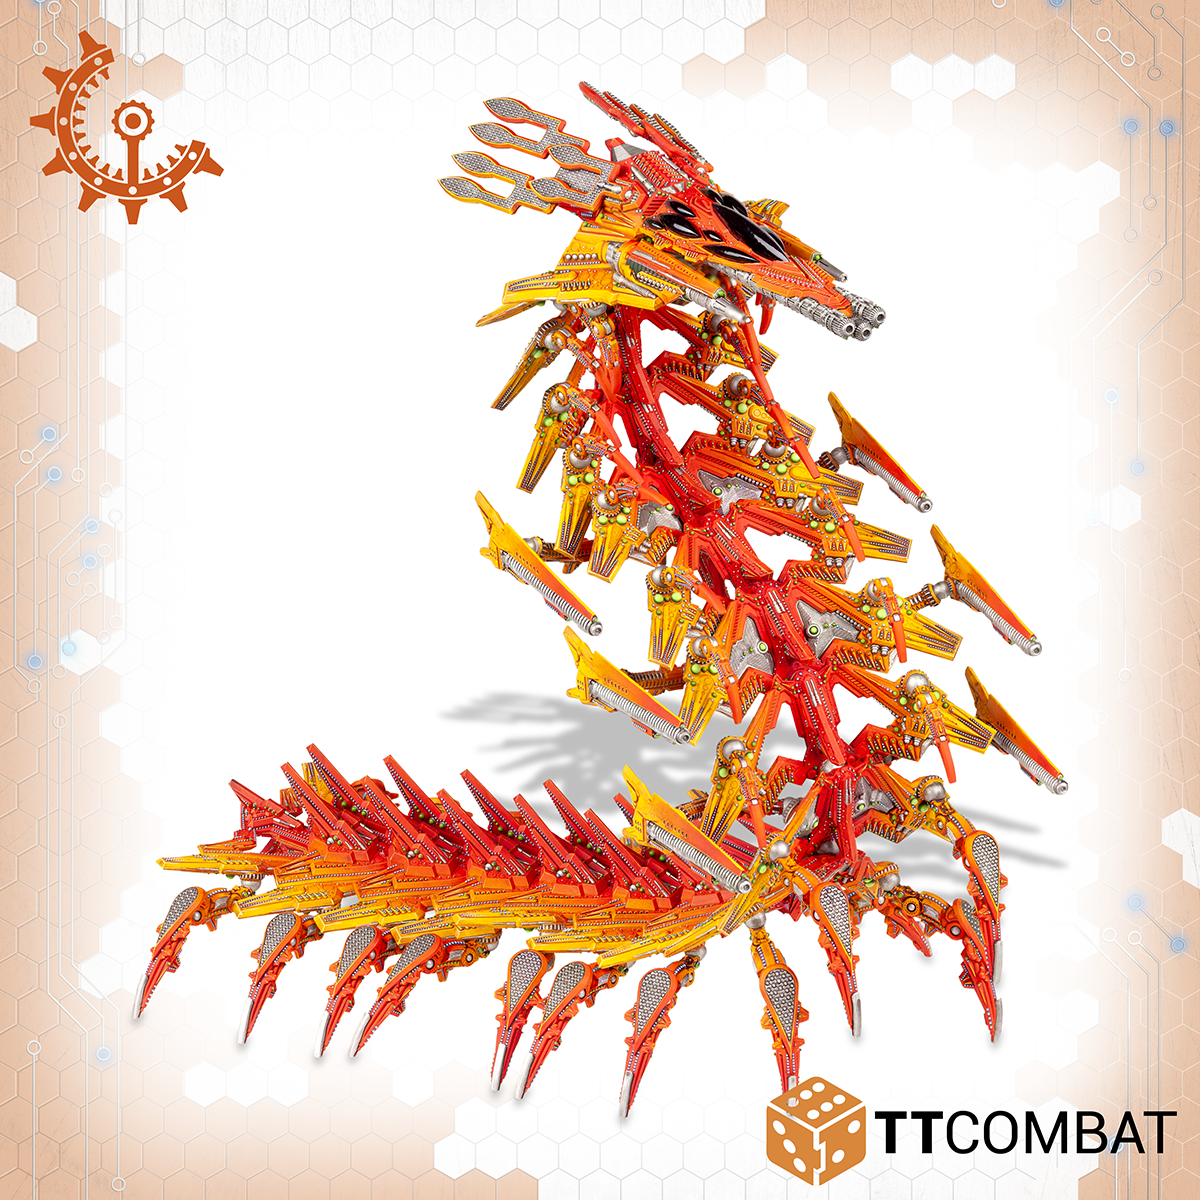
One of, if not the largest kits we’ve ever produced, the Shaltari Behemoths have…a lot of parts. Each segment is separate and can be posed thanks to a ball and socket joint. As these are advanced kits (and this is probably the most advanced of the lot) pinning is very much advised.
Lets take a look of one of these many-segmented behemoths!
The Stats
But what does it do, how does it do it, and why are the segments? All questions that will be answered in time, but like the Shaltari, we’ll leave a bit of mystery until this thing hits the battlefield (or at least the webstore).
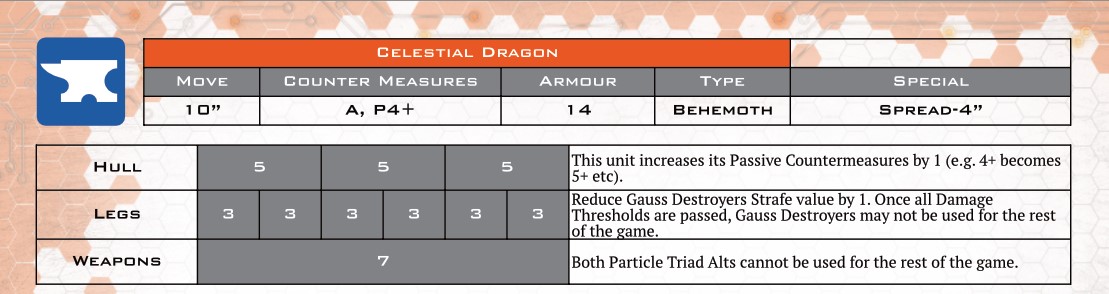
Starting from the top, the Shaltari Behemoth is fast. 10″ Move will let it get into position wherever it will put the most hurt into your opponents forces. Not only that, but it just doesn’t slow down. You can take it’s legs out all day, but with so many of them, you’ll never get them all.
Passive countermeasures give the Dragons a measure of protection from attacks, but they won’t last forever. Keep at its Hull and that passive will quickly degrade from a 4+ to an impossible to achieve 7+. The behemoth won’t benefit from other units that increase passive saves, it’s just too big. Shaltari commanders will need to be canny with how they position the Dragons, to keep them out of reach of units that can reliably punch through its passives.
Armour 14 is the upper end of Shaltari physical defence, though on a Behemoth, it’s actually on the low side. While other Behemoths use thick armour as their defence, the Dragons rely on the Shaltari’s advanced tech and passives. Anything that would concern a Puma, or Jaguar will concern this as well.

The Dragons are huge, and this is reflected in their Spread. While it’s going to be able to scuttle over no shortage of targets, it does make it more likely to hit scenery and other obstacles on the way down via Drop Harness. You can put this to good use, however, with the Grav Assisted Icosapede rule. Waist-high walls, gone. Ice cream trucks, unfortunately, also gone. A squad of tanks shooting at you, run them over.

The Weapons
The Shaltari are masters of technology, so they should have some of the strongest weapons in the galaxy, right?
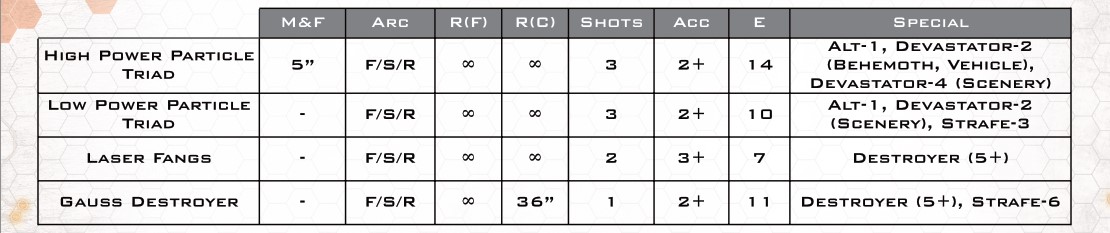
Energy 14, infinite range, and 3 shots. Huh. That’s definitely going to leave a mark when it connects. It’s strong enough to easily crit even an Armour 16 UCM Behemoth. It even comes with an Alt profile, just in case you want to take out more than one tank at a time. This weapon can’t possibly get any better, right?

Oh. Well then. This thing cuts through almost every defence short of your tanks growing wings and flying. It makes going for that 7 damage worth of Weapon Zone very tempting, though good luck getting through that with all that 4+ Passive saves.
That’s not even this Behemoth’s fill of weapons. Oh no, it comes with a pair of Laser Fangs. They might not have a lot of energy (they are only sidearms after all) but if they hit just right, Destroyer kicks in, making them a great tertiary weapon.
You might have seen that both variants of this use the same, absolutely giant, Gauss Destroyers. These are a single weapon system tied to the Legs Zone. With each leg you take out, the Gauss Destroyers get a little less scary. This can only be a good thing, as they are in fact quite scary. Very accurate, Energy 11, Destroyer (5+), and Strafe-6. They’ll make short work of whatever they’re pointed at.
That’s all for this sneak peek at the rules. Like the other Behemoths this one will have stat sheets and damage tracking sheets available when it releases. Check back tomorrow (around noon uk time) for that!
If the Celestial Dragon has piqued your interest in the highly advanced Shaltari, you can see the rest of the range on our webstore here!