

Colonial might strides forward!
It’s the the UCM’s turn to unleash their Behemoth!
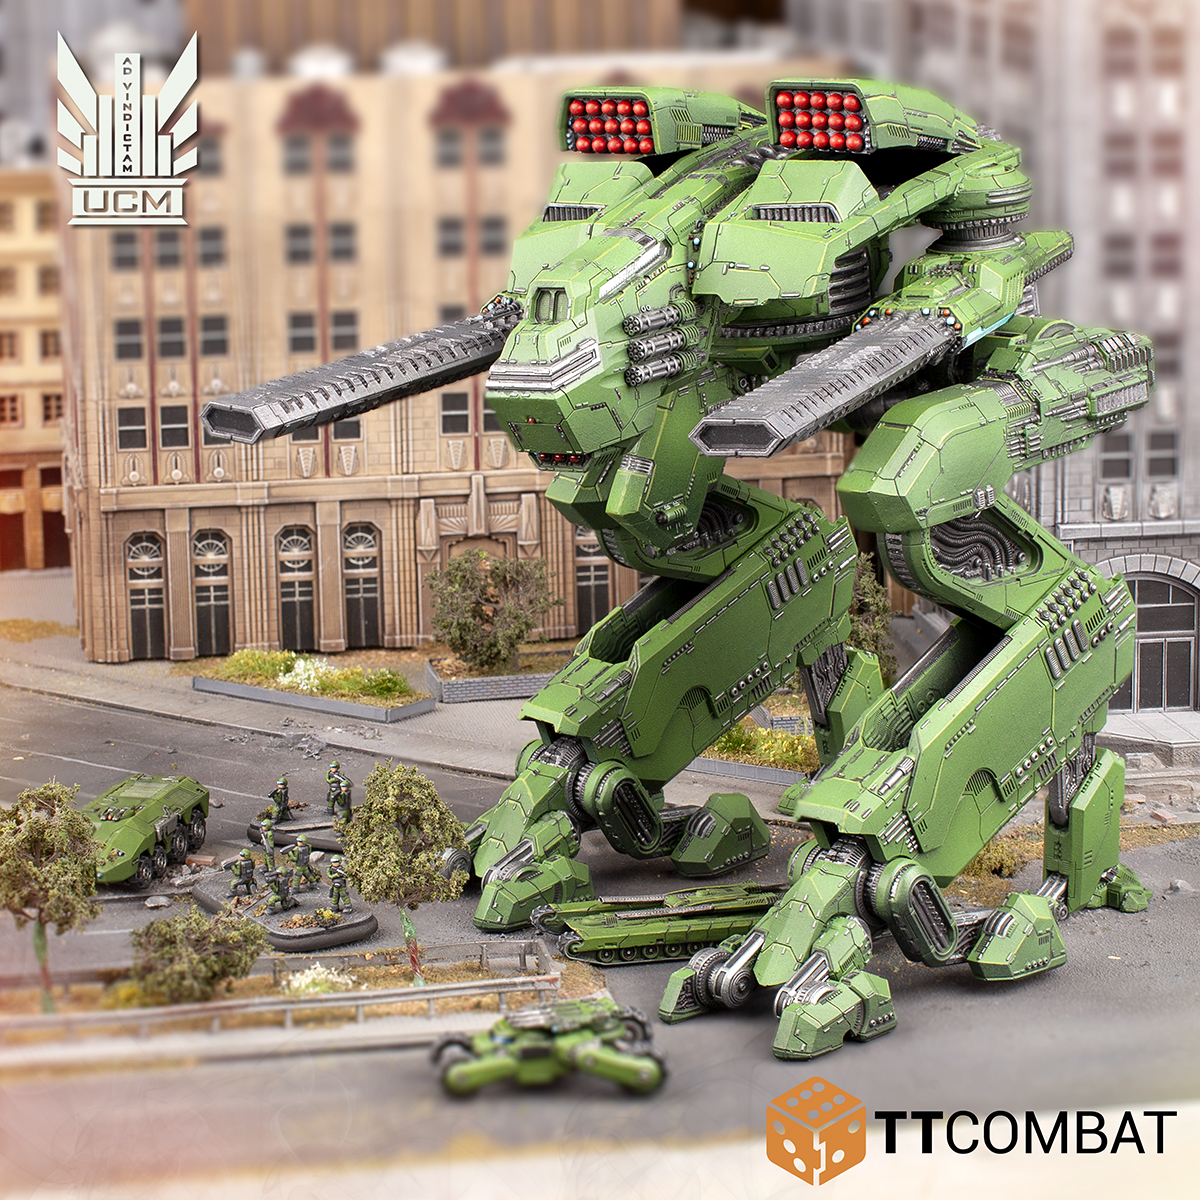
Continuing the releases of the biggest kits in Dropzone Commander, the UCM America and Japan make their way onto the store tomorrow! These kits keep the same incredible level of detail that Dave puts into all his kits.
Don’t just take my word for it, check out our 360 degree turnaround.
The UCM don’t normally take the legged option when it comes to vehicle design, but the Behemoth’s take a bit of a unique place in UCM combat doctrine. Equally as much a recruitment and propaganda piece as they are a combat vehicle, they’re the ultimate poster child for the reconquest.
About the legs. Dave’s made these in a way that gives you a lot of freedom in posing, with ball joints in the hips and many, many axles in the leg joints. Each leg comes to about 18 parts. Advanced kits indeed!
The Rules
“But what do its guns do?” I hear you cry.
We’ll get to that.
First up we have to talk about the hull itself. The UCM Behemoth chassis may not sport as many weapons as some of its counterparts, but it makes up for it with grim determination and a “get off my planet” attitude. Also armour. A lot of armour.
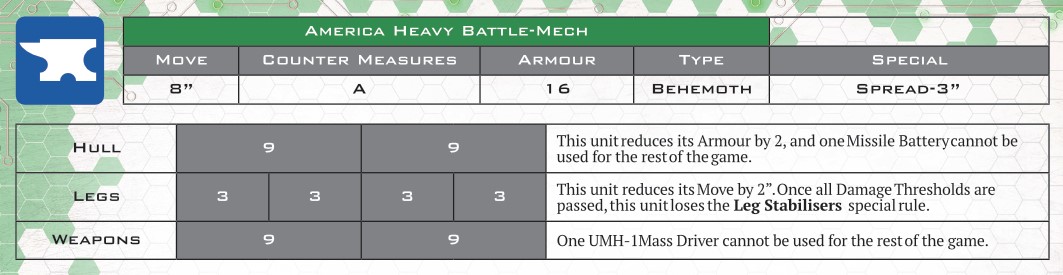
Both variants of the UCM Behemoth use this statline, with a respectable initial move, the standard UCM active countermeasures, and more armour than any other unit in the game. Only the mightiest of weapons can crack the armour on this massive war machine. Though once you’ve managed to take down a threshold on its Hull, it suddenly becomes more manageable.
With 8 separate damage thresholds, the UCM Behemoth sits in between the Scourge and PHR Behemoths. With both Hull and Weapons needing 9 damage to take out each threshold, it might be easier to cripple its legs, then focus on another zone.
Though some weapons can chew through even Behemoths or Armour 16. For those, taking out the Hull first could be the most sure fire way of taking this thing down. It takes 9 damage to Hull to reduce its Armour to 14, the same as a PHR walker. It then takes a further 9 damage (which should be easier now thanks to the aforementioned A14) to reduce its Armour to 12. Once you’ve broken through all that armour, you’ve also taken out the carapace weapons as well. A nice two for one that makes taking out the Hull a kind of attractive prospect.
The UCM Behemoth’s legs are is weakest Zone. 3 damage points each makes for a decent amount of spillover damage. If you take out all of the legs, that’s one threshold on Hull or Weapons almost half gone already. Not only does this Behemoth become immobile when the legs are taken down, it also loses its Leg Stabilisers rule.

Given good firing lines, the UCM Behemoth can be incredibly accurate, though at the cost of needing to remain stationary that round.
The weapon zone is fairly straight forward. 2 thresholds, each taking one of its main armaments offline. It may not seem like much, but when you have railguns as long as a building is high and firing rounds the size of a skip at you, you might consider taking one out.
The Weapons
UCM propaganda might have you believe that the America is accurate enough to shoot the juice box out of a scourge warriors hand at 60km. Or that the Japan’s rate of fire is enough to gut a bulk lander and its contents in under 4 seconds. We’re not interested in the UCM’s propaganda today, but we are interested in what these weapons can do on the tabletop.

The America is equipped with a pair of UMH-1 Mass Drivers. These things are as tall as a building and can put out a hell of a lot of hurt. Each one covers the front and a side at a range of infinite. They may only be a single shot, but with an Accuracy of 1+ and re-rolls of 1’s if the Behemoth plants its feet, you won’t be missing often. Energy 13 makes it through most armour, with Devastator-5 (All) putting the hurt on whatever is at the end of the barrel. These guns are great against large targets, but not so great at clearing out waves of smaller tanks.

That job is better worked by the America’s Missile Batteries. These are the two carapace mounted missile launchers capable of spreading E10 devastation over an area. Still capable of dealing with a single tank, or putting a few points of damage onto a building, they’re very much a secondary weapon to the Mass Drivers.

Shared between both the America and Japan, the Gatling Cannon Batteries are the 3 rotary cannons either side of the main hull. Firmly tertiary weapons, you won’t be killing many tanks with these. Though they make for decent damage against infantry foolish enough to come close to a wall in view of a Behemoth.
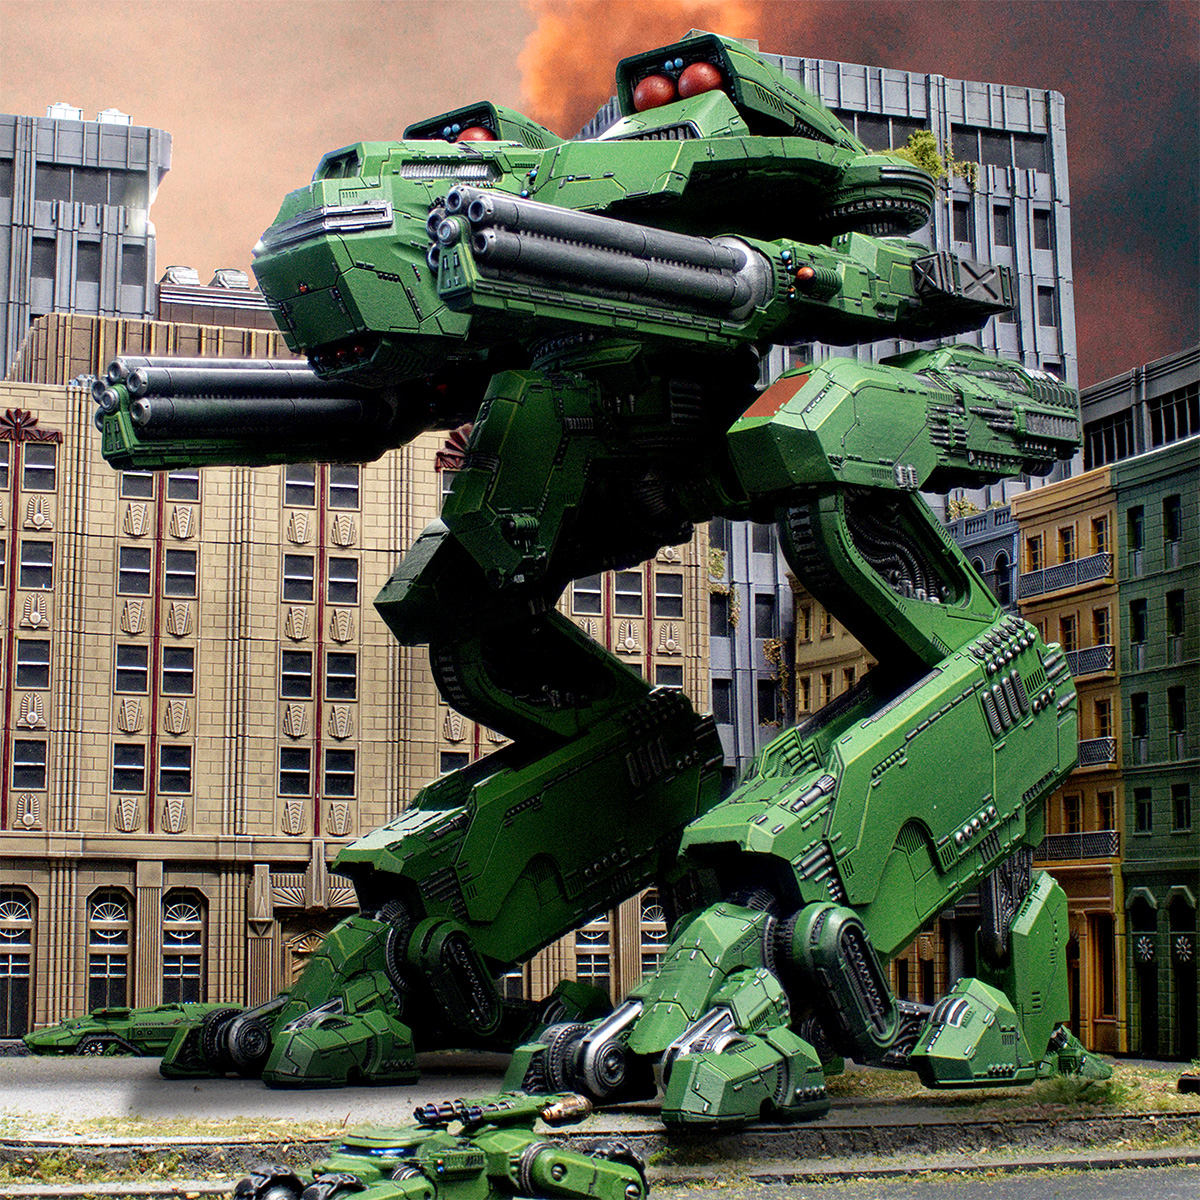

The Japan’s main weapons are its UMH-9 Stormcrow Cannons. Much shorter range than the Mass Drivers, these are designed to take down structures and fortifications. They should have no problem doing so with 6 shots and Devastator-2 (Scenery). While these are much less accurate than the Mass Drivers, the Stormcrow Cannons can Focus for a bit of extra Energy.

The Heavy Munitions Hailfire are the secondary weapons and main anti-Behemoth weapons. Though not as damaging as the America’s Mass Drivers, they still pack a respectable punch. The downside is that they are Limited (2) and M&F 1″.
Stat Sheets
Just like the PHR and Scourge Behemoths the UCM Behemoth will have their own stat sheets and damage tracking sheets. These make tracking damage super easy, with plenty of space for counters or tokens. Our favourite way of keeping track is to laminate these and use dry-erase markers to scribble out boxes when the Behemoth takes damage!
That’s all the rules for today, full stats go up on the web builder and download sections on Friday!
Dave’s pulled out all the stops with these units, and we can’t wait to see what you think of them. Which of these are you going to be using in your games of Dropzone Commander? Which one do you look forward to blowing up the most? Can you believe we’ve gone this whole post without a Metal Gear reference?
We’ll be back with release information on Friday, in the mean time you can find the rest of the range over on the TTCombat webstore!