The PHR Behemoth is almost here!
Finally, after years of teasing and waiting, the Behemoths are arriving to Dropzone Commander!
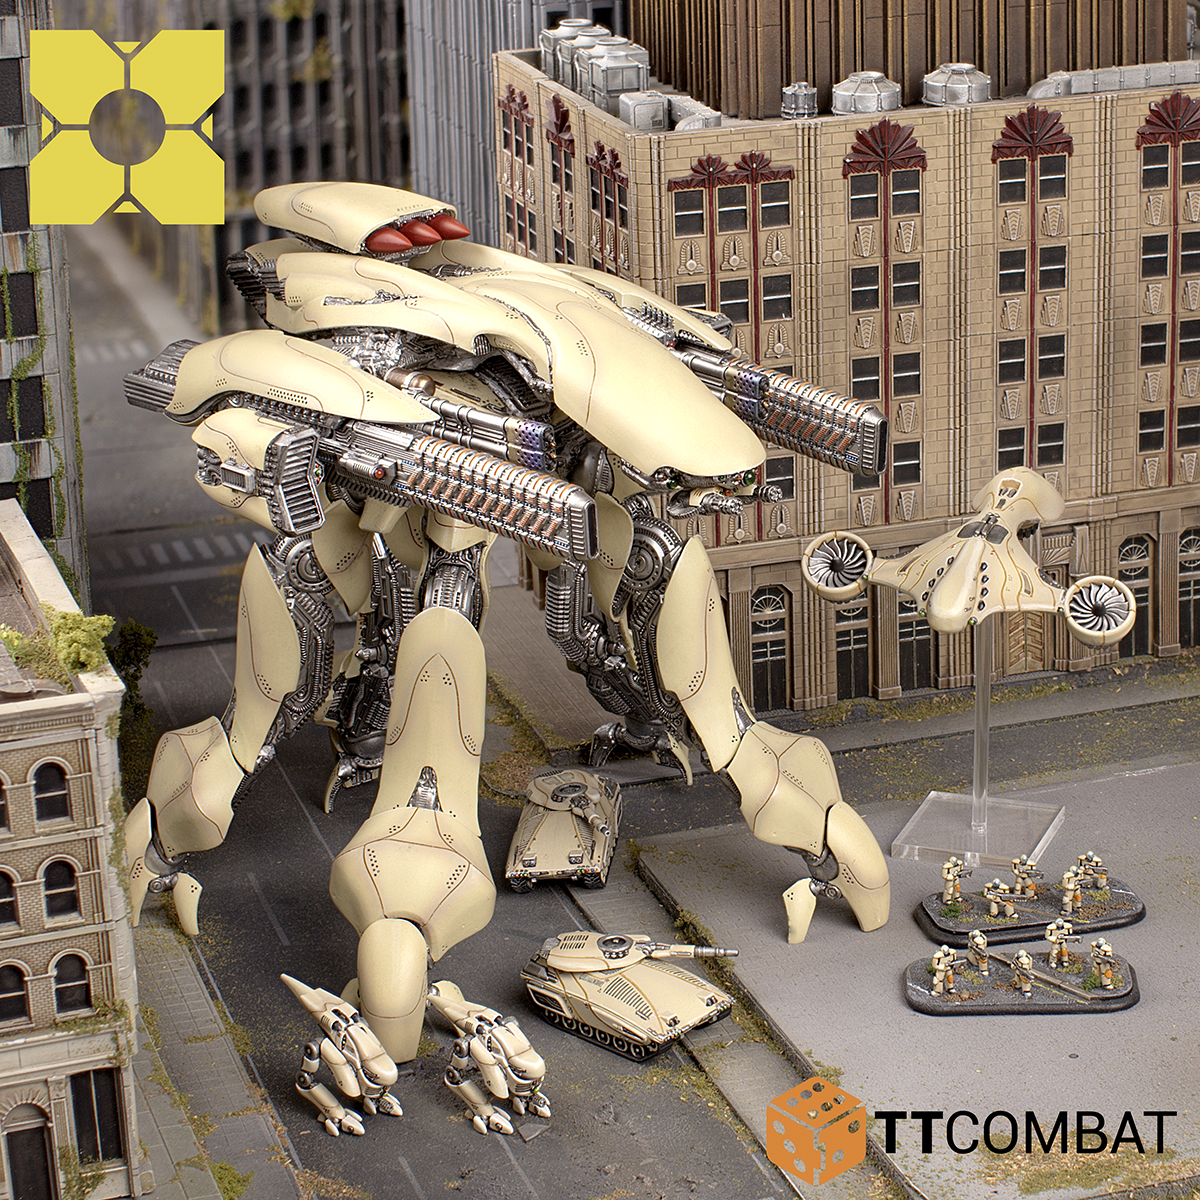
These units are the biggest ones ever in Dropzone, and are the biggest models we’ve ever made! Of course, with Dave designing them, you know that they’re no less detailed than the smallest Type-1 walker.
In fact, why not take a look at the entire thing in 360 degrees?
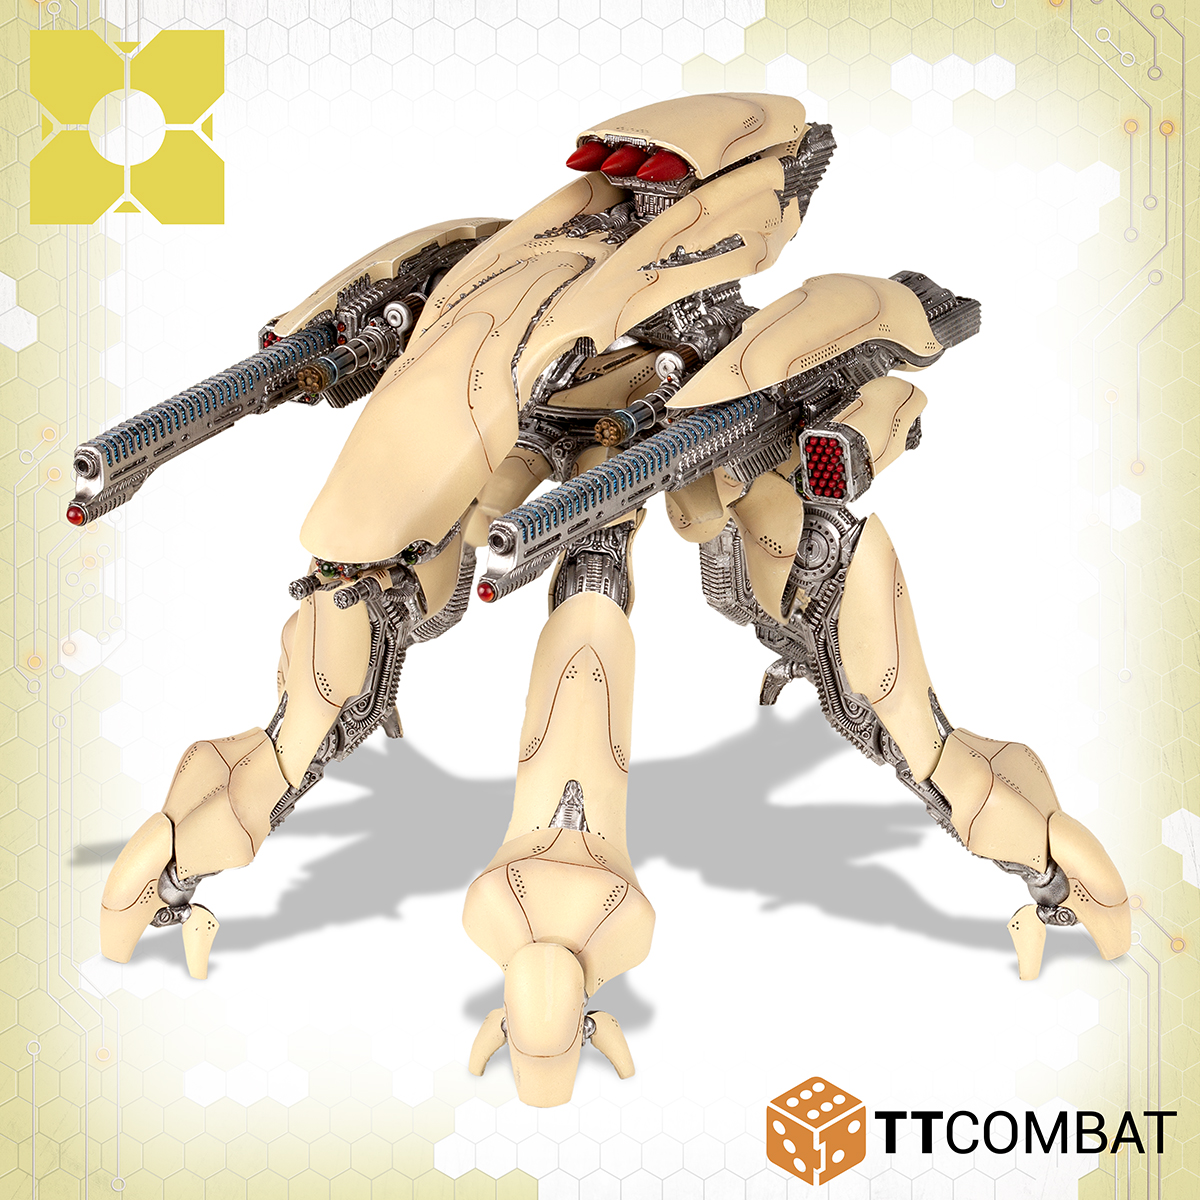
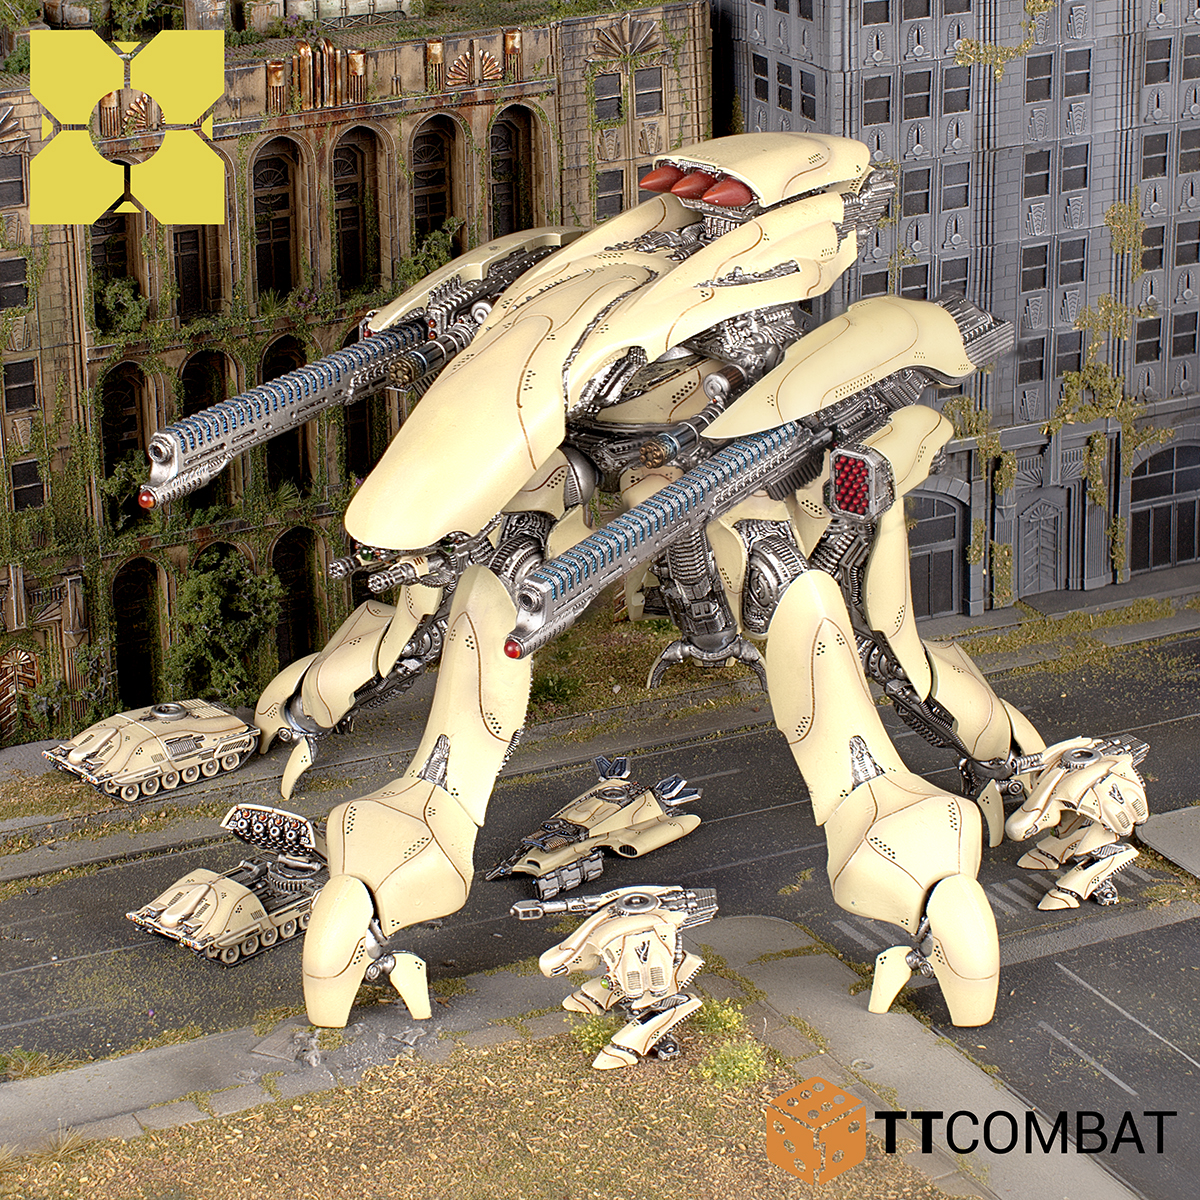
The PHR Behemoth is truly a thing of wonder. Clad in pristine PHR armour panels, it has loads of techy gubbinz underneath to keep you busy painting.
The legs come in four pieces each, which gives a crazy amount of customisation. Fancy modelling yours stepping on a downed Phoenix Gunship? You can totally do that. It definitely won’t be getting up again after being stepped on!
THE RULES
BUT WHAT ABOUT THE RULES?!
That’s right, there’s rules! Not only are these massive kits some of the most beautiful scale models around, they’re fully useable in Dropzone Commander!
The PHR Behemoth comes fully equipped with five legs, some huge missiles, and possibly the most guns of any of the Behemoths! Fitting for PHR’s high technology. It’s also clad in the signature thick PHR armour plates, so you know it’s going to be tough!
The PHR Behemoth (like all of the forthcoming Behemoths) comes in two types: the Chronus and the Tethys. Both of them share the same base stats and Damage Thresholds, it’s just the weapons and special rules that vary.
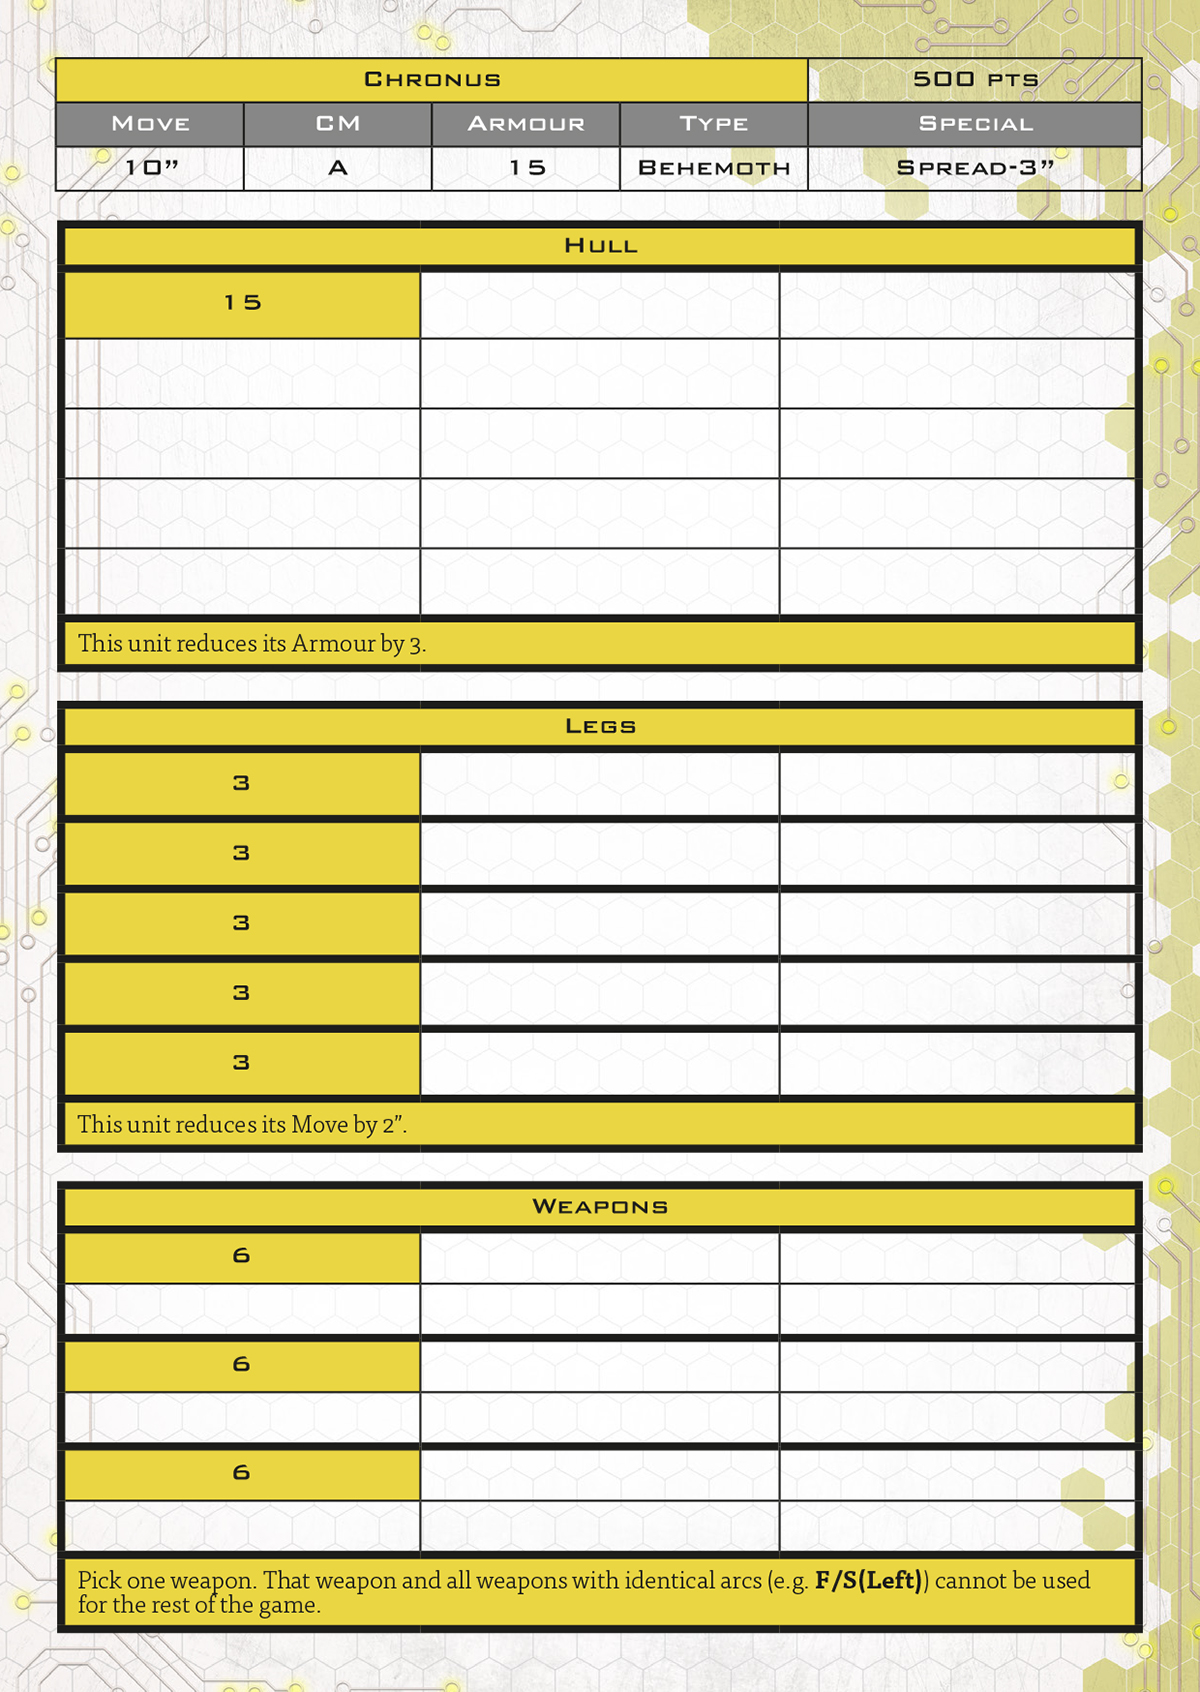
As you can see here, the Chronus is a mighty beast! Armour 15 makes it extremely difficult to damage, with only the highest Energy weapons even being able to pierce its hull. If you’re fighting against a PHR Behemoth, be sure to load up on Penetrative or Destroyer weapons!
We really need to talk about the Damage Thresholds though. This is where the different Behemoths really start to act differently. If you remember, you target individual Zones on a Behemoth, and need to destroy 2 of the 3 Zones completely in order to blow it up. Of course, blowing up a Behemoth isn’t actually always the best use of firepower. If you can stop it from actively participating in the game in any meaningful way, that’s often enough.
I’ll tell you now: the Chronus and Tethys have the highest total Damage Points of all the Behemoths – as is fitting for the PHR! With 15 Damage Points on the Hull, you’re going to have to deal out a huge chunk of damage to have any effect. However, the result of Crippling the Hull is that the Behemoth is reduced to Armour 12, which means that even AA weapons and some sidearms can damage it. If you manage to Cripple the Hull early on, it really opens up options for fighting it, and makes it harder for the PHR player to nullify your firepower. So PHR players: watch out!
The legs are probably the least attractive target for most of the Behemoths, but there’s always a draw. Not only are the legs the easiest things to Cripple, but every time you do, it reduces its Move value and has an extra Damage spill over to a different Zone. Cripple all of the legs and the PHR Behemoth cannot move, which means it cannot stomp! With D3 Energy 10 hits per squad stomped on, don’t discount how powerful that attack is. And with a massive Move of 10″ (it’s a skyscraper sized robot with 5 legs), it’s going to be able to saunter through an enemy’s battle line.
Finally the weapons. While there are only 3 Damage Thresholds here, each one will stop multiple weapons from firing. It’s basically like aiming at each arm, or the giant rockets. But for this one to be a worry, we really need to look at the weapons.
THE WEAPONS
Here we go, time for the good stuff! If 2D3 Energy 10 Drop-Harness hits and D3 Energy 10 stomp attacks wasn’t enough (seriously, this thing will squash enemies flat), the PHR Behemoths come with loads of weapons. We’re not going to show you everything today, but how about some big guns?
The Chronus comes with a pair of R7X-1 Railguns. These are the biggest Railguns ever seen (on a Dropzone model anyway – there are certainly bigger ones in Dropfleet)! They even dwarf a Tiamat’s guns, which is saying something.
While not longer ranged than the Tiamat, the R7X-1s are more accurate, have a ridiculous Energy 14 (seriously, that’s 3s to Crit an Alexander), and are Devastator-3 against Behemoths! The Chronus variant is an extremely good Behemoth hunter. While the Railguns might be a little overkill on smaller targets, with Dev-2 on any other Vehicle, you can easily take out a Warstrider in a single shot (with no Passive saves thanks to E14).
The Chronus is also fitted with a pair of massive R7X-5 Rotary Cannons. These jumbo sized machine-guns are even more powerful than the Heavy Miniguns on the Hades. With double the number of shots and Focus-2, you can rack up some serious firepower. They also ignore Soft and Body cover, which makes them great for ripping through entire squads of infantry who think they’re safe in a Garrison.
Unfortunately for the Chronus, the Rotary Cannons cannot go above Energy 12 from Focus, but even that is enough to turn a mainline battle tank into a heap of slag.
Oh and of course the Chronus is also armed with Stealth-X Missile Clusters, Dual Miniguns, and the crazy Nova Missiles, but it’s time to move onto its brother the Tethys.
While the Chronus is very much an anti-big vehicle Behemoth, the Tethys takes a more mixed role. The Chronus is a point and click destroyer, but the Tethys rewards careful play more. You’ll have to be canny to get the best use out of it, but skilled (or lucky) players will be able to make a real mess of their opposing armies!
The Tethys trades the Railguns for a pair of R7X-2 Sunglaives. These are new weapons to Dropzone, previously only seen (in a scaled up version) on the PHR Dreadnought.
The Sunglaives have an infinite range, which makes the Tethys a good candidate for walking on the board rather than Drop-Harnessing in. That means it gets an extra round of shooting! With 2 shots each at Energy 11, the Sunglaives put out more hits overall than the Railguns, but are much less likely to damage their foes. Luckily though, the Tethys has a trick up its sleeve:
If you Overcharge the Sunglaives, they gain both Devastator-2 (All) and Destroyer (4+) for the round. It takes both actions, which means you’ll have to set up your firing lines in advance. But if you have the action free, it’s not a bad idea at all to overcharge. Destroyer (4+) is insanely good, as on a 4+ to hit, you automatically Crit your target without needing to roll to damage. With Dev-2 (All), that means you can take on Behemoths as well. Or if you have some particularly heavy armour to take out reliably, it might be worth it. It means you don’t get your stomp attacks for the round, but with infinite range, you can keep out of harm’s way too.
Unfortunately, the Tethys does have another use for an extra action.
The White Nanomachine Colony replenishes Damage Points from a single Zone, potentially taking it above a Damage Threshold. That means that if a Sunglaive is destroyed, you can send you White Nanomachines in to bring it back online again, doubling your damage output and thoroughly frustrating your opponent. If you’re doing this every round though, you’re not getting your full damage out, and the Tethys will end up a little more immobile as a result. Still, it’s a very useful skill just in case you need it.
As with all of our Dropzone Commander models, the full rules will be available on Friday, both as a free download on the Resources page, and in the Dropzone Army Builder.
And as with all Dropzone Commander models, these rules join into the living, evolving ruleset. They might not last like this forever, and almost certainly will need some tweaks later on down the line. We take all feedback on our unit balance seriously, although particularly with Behemoths, we will be waiting to take feedback on games played, since these massive units need some serious table time to get an idea of what they bring to your games.
Oh and to make playing with them easier, we’ve also made some alternate sheets to keep track of damage:
These full page sheets are super easy for damage tracking. You can use counters or dice, or – our favourite – laminate the sheets and then use a dry-wipe pen to mark off damage as you go. There’s nothing more satisfying than erasing some of that damage with White Nanomachines!
That’s all for today! Are you excited or scared by the PHR Behemoths? How are you going to model yours? The legs, arms, and even hull are all completely poseable, offering loads of options for making this epic kit to your exact specifications.
We’ll be back on Friday with all the release information, but until then, you can check out the rest of the PHR range on the TTCombat webstore!
