
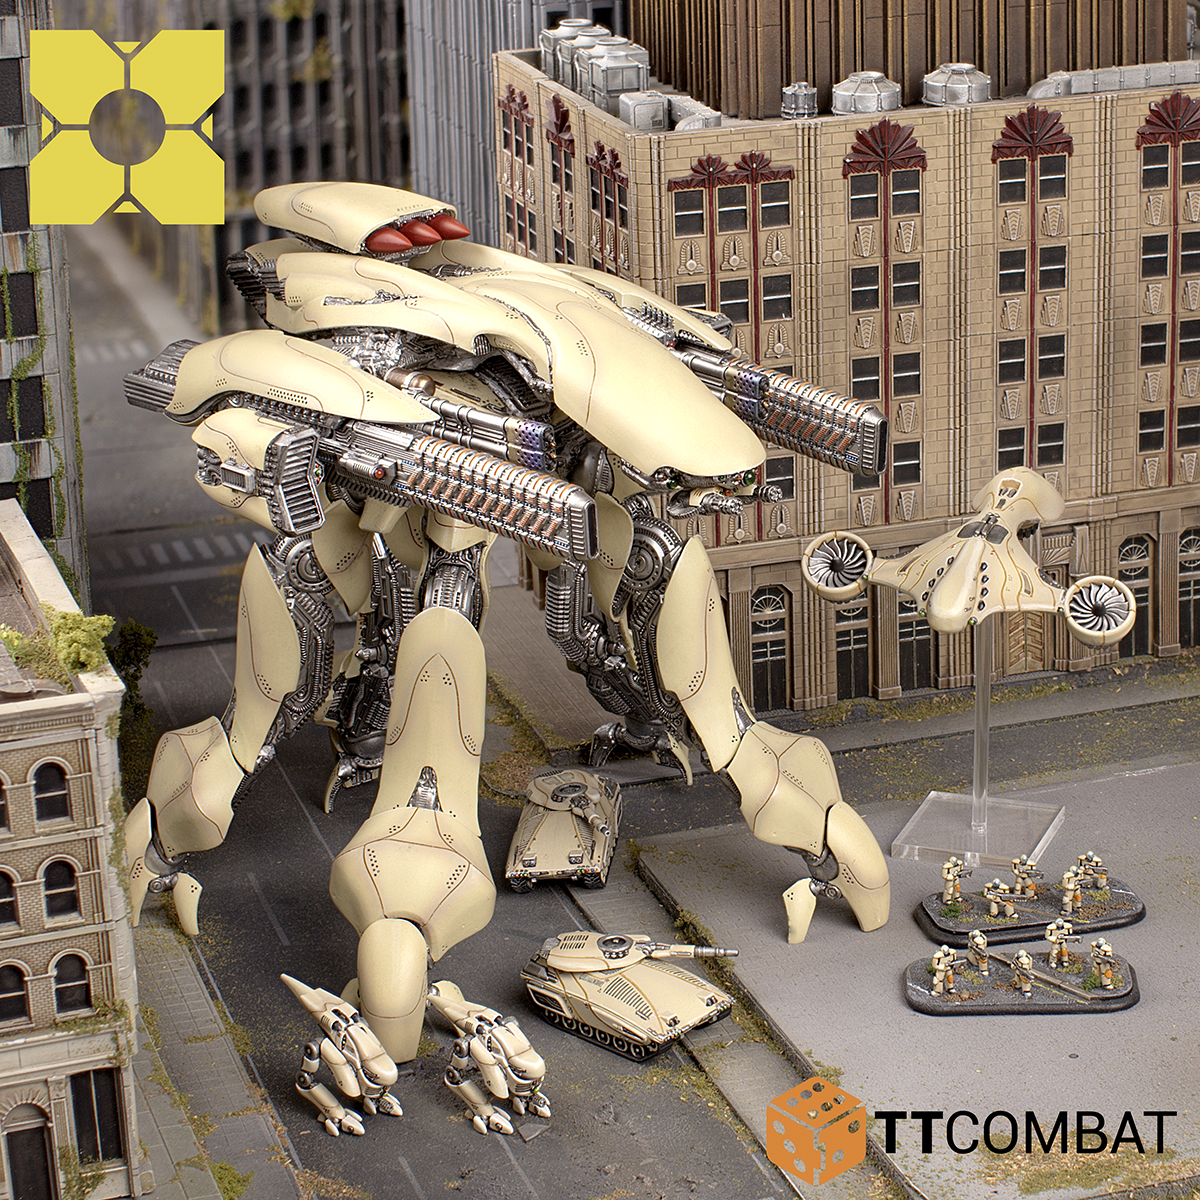
What’s that coming over the hill? Is it a monster?
No! It’s Behemoths!
They’re finally arriving! While they may have been delayed in orbit for a little while, the Behemoths are finally Drop-Harnessing onto boards around the world this week. With the pre-orders for these massive models coming this Friday, we thought we’d have a bit of a refresher on the rules before we dive into the new unit entries later in the week.
They’re really big, and can pack quite a punch. But not to worry, they’re not invincible. We’ve been working hard to balance these giant models, and can happily say that they’re very fun to use! The Behemoths give out a lot of damage, but can also be quite fragile. You’ll have to play aggressively to get the most out of them, but if you do, don’t be surprised if they don’t last until the end of the game. Of course, when they die, they explode in spectacular fashion, so that isn’t always a bad thing!
Without further ado, let’s have a bit of a refresh into how these giants work on your tabletop.
Deployment
Behemoths start the game in Reserve, which usually means they’ll move to In Readiness at the end of the first round, ready to be deployed in the second round. That means no one is on the receiving end of a Behemoth at the start of the game!
You can deploy your Behemoths in two ways: as normal, or via Drop-Harness.
Normal deployment involves them walking on the back of the board. This isn’t a terrible idea, since Behemoths have a high Move value (a single stride of these titans has them stepping over a building, so they do move far). They often have long ranged weapons too, so coming on the back is a safe play. Although they’ll be hampered a little by line of sight, it does actually make them a lot less likely to be shot apart.
The second – and most risky – deployment strategy is literally dropping them into the game. It’s Dropzone Commander after all! A Drop-Harness Behemoth can be called in by a friendly Infantry squad. It takes both actions though, so it’s a good idea to have some elite infantry in a small Troopship to zoom up the board in round 1 to Signal your Behemoth in round 2.
Drop-Harnesses can be used to land on enemy units! They land and smash up anything in their way. If they don’t smash them, they can get hurt badly right back. Of course, that’s not always as much of a problem for the Behemoth as it is for the poor souls its landed on!
Every Destructible scenery piece and squad landed on takes 2D3 automatic Energy 12 hits. That can equal a lot of dead things on impact! Although a Signal action places the Behemoth within 6″ of the Infantry squad, so a round 2 arrival might not do much. You could wait until round 3 for a massive impact, but that’s another round of not shooting!
When a Behemoth drops from orbit, there’s a long time for the enemy to shoot it out of the air. If it’s slightly misplaced, it might clip a heavy bunker. If it lands on a particularly tough opponent, that could shatter the pistons in a leg – those Drop-Harnesses slow the descent a bit, but it’s still rather dangerous!
When landing, you have to consult the table below.
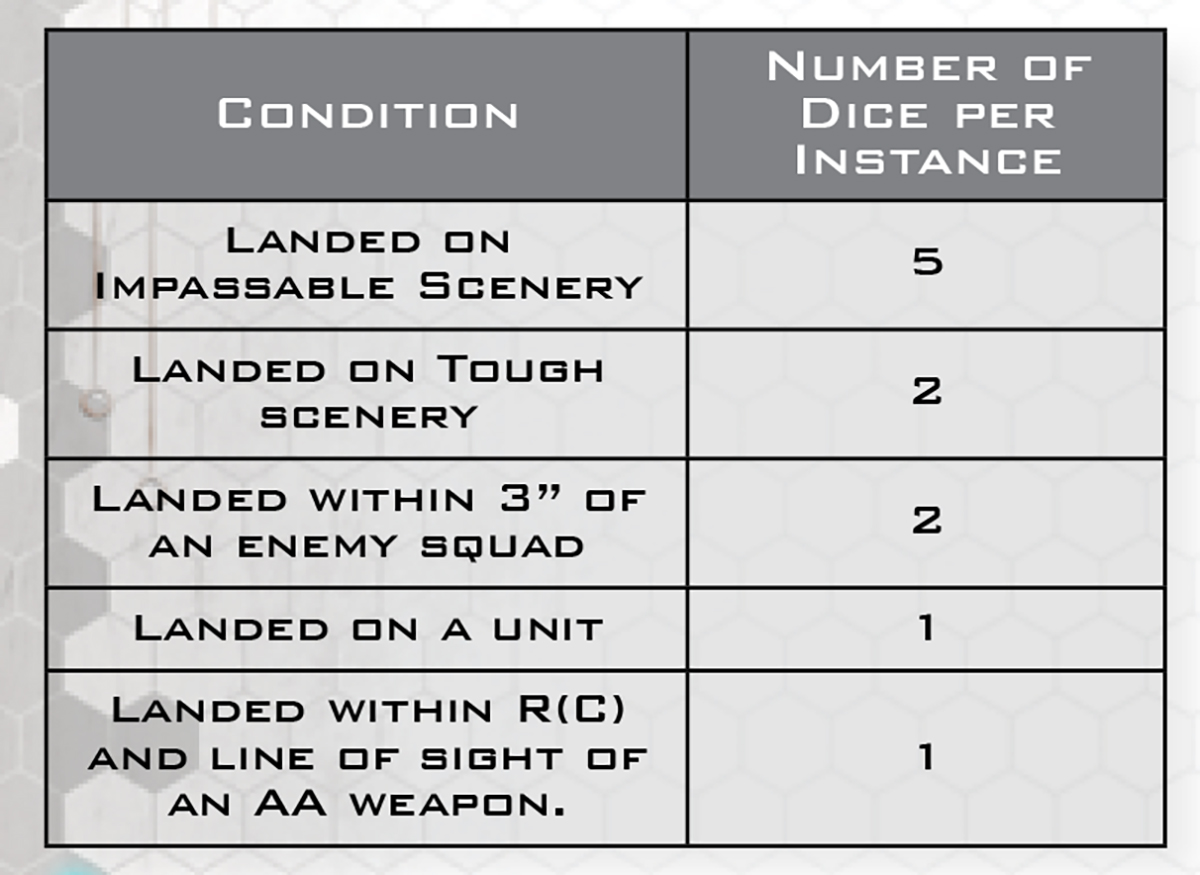
Add up all the instances of the above things happening, and roll that many dice. Remember, the dice listed are per instance. So if you land within 3″ of 2 enemy squads, it’s 4 dice added to the pool.
For every dice roll of a 1 or 2, the Behemoth loses 1 Damage Point from a random Zone (we’ll get to those in a minute). It can be quite devastating if you place it badly!
Luckily enough, anything that is smashed to bits by the landing is removed before consulting this table. If you land on it, it can’t stop you!
Regardless, a Drop-Harnessed Behemoth cannot be activated that round, so it’s round 3 before they start delivering the pain.
Dealing Damage
Behemoths deal a lot of damage. There’s no way around it. They’re huge and a massive amount of points in your army. They can’t take objectives or have Command Cards used on them, so they need to kill things!
All Behemoths come with a range of guns, which can be shot just like any other weapon in the game. They’re often bigger, so do more damage or have higher energy. Generally speaking you’ll find one Behemoth variant is better at dealing with other Behemoths or large models, and the other one is better as taking out smaller targets.
But it’s not just the guns! Behemoths can stomp on things as well! When moving, any units underneath the Behemoth’s Spread take damage. The Spread value is essentially a way of measuring Behemoths with greater accuracy – it gives a number in inches to measure to and from the Behemoth. Each squad that gets stomped on (friendly or enemy) takes D3 Energy 10 hits. They hit automatically, so be prepared for a lot of damage! The Behemoth’s player decides where to allocate the damage, so you can put it all on one enemy tank, or spread it out throughout your own squad if you stomp on them by mistake!
Oh and Destructible scenery pieces take this damage too! Unfortunately, buildings are a little tougher to Behemoths than tiny tanks, so any failed damage rolls instead do automatic damage to the Behemoth.
Taking Damage
Speaking of doing damage to the Behemoth, how exactly does that work?
Well, a Behemoth is essentially made up of 3 different units, called Zones. Each one has a Hull, Legs, and Weapons. When targeting a Behemoth, pick one to hurt! The main statline contains its Armour value, which is the same on all Zones, but each Zone tracks its own Damage Points.
Further than that, each Zone has a number of Damage Thresholds. This is a way to lower a Behemoth’s effectiveness while it is still walking around smashing things. Once a Damage Threshold is reached, that Zone is Crippled, which gives a certain effect.
Each Zone on each Behemoth has a different number of Damage Thresholds, and indeed each one has a different amount of Damage it can take! And each Crippled result is slightly different on each Behemoth too!

While this sounds quite complicated on paper, in reality it presents itself like a type of puzzle. Behemoth Hulls are usually the toughest, but Crippling them makes the entire thing easier to damage, so the other Zones will go down quicker. Taking out the Legs means they won’t stomp on your units as badly, and can indeed stop some from moving entirely! However, destroying the guns lowers the Behemoth’s overall damage output. Figuring out which to deal with is no easy task.
To help with the job, every time a Zone is Crippled, you get one extra Damage Point in a different Zone. So while the legs might not seem like the best target, they often have more Damage Thresholds, helping you to carry over free damage to the rest!
But how does it get destroyed? Well, you have to completely destroy 2 of the 3 Zones. Once that happens, it goes big boom, either damaging, or straight up removing anything close by.
That’s it!
That’s right, there’s not much more to the standard rules than that. Of course, with loads of different Damage Thresholds and a whole bunch of unique weaponry, you’ll have a lot to learn about using and facing Behemoths. And that’s before you see some of the weirder unique rules as well!
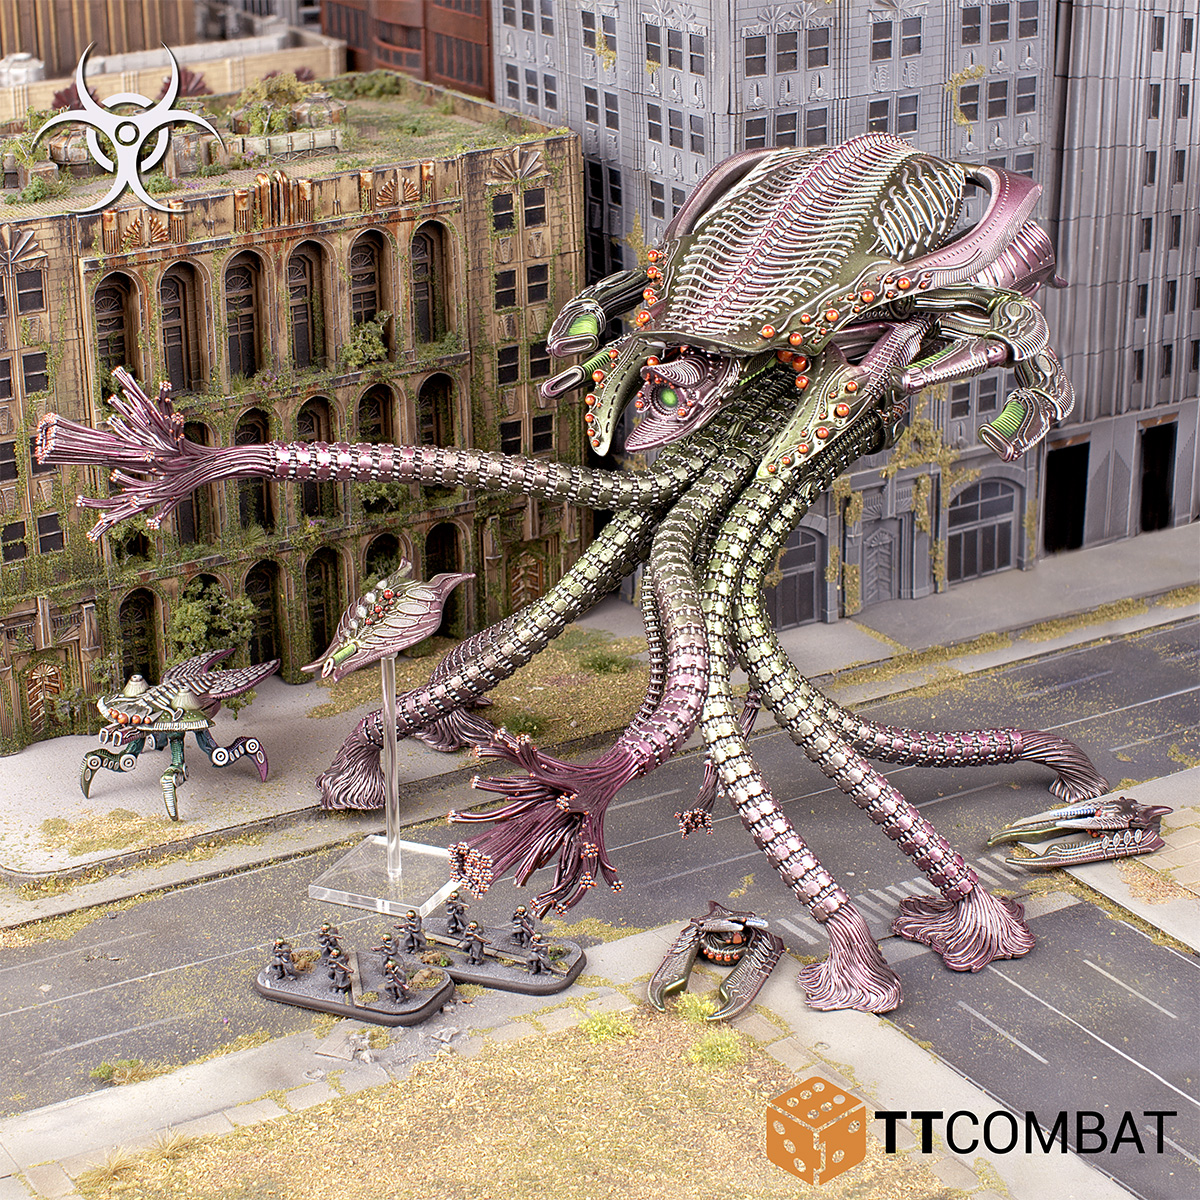
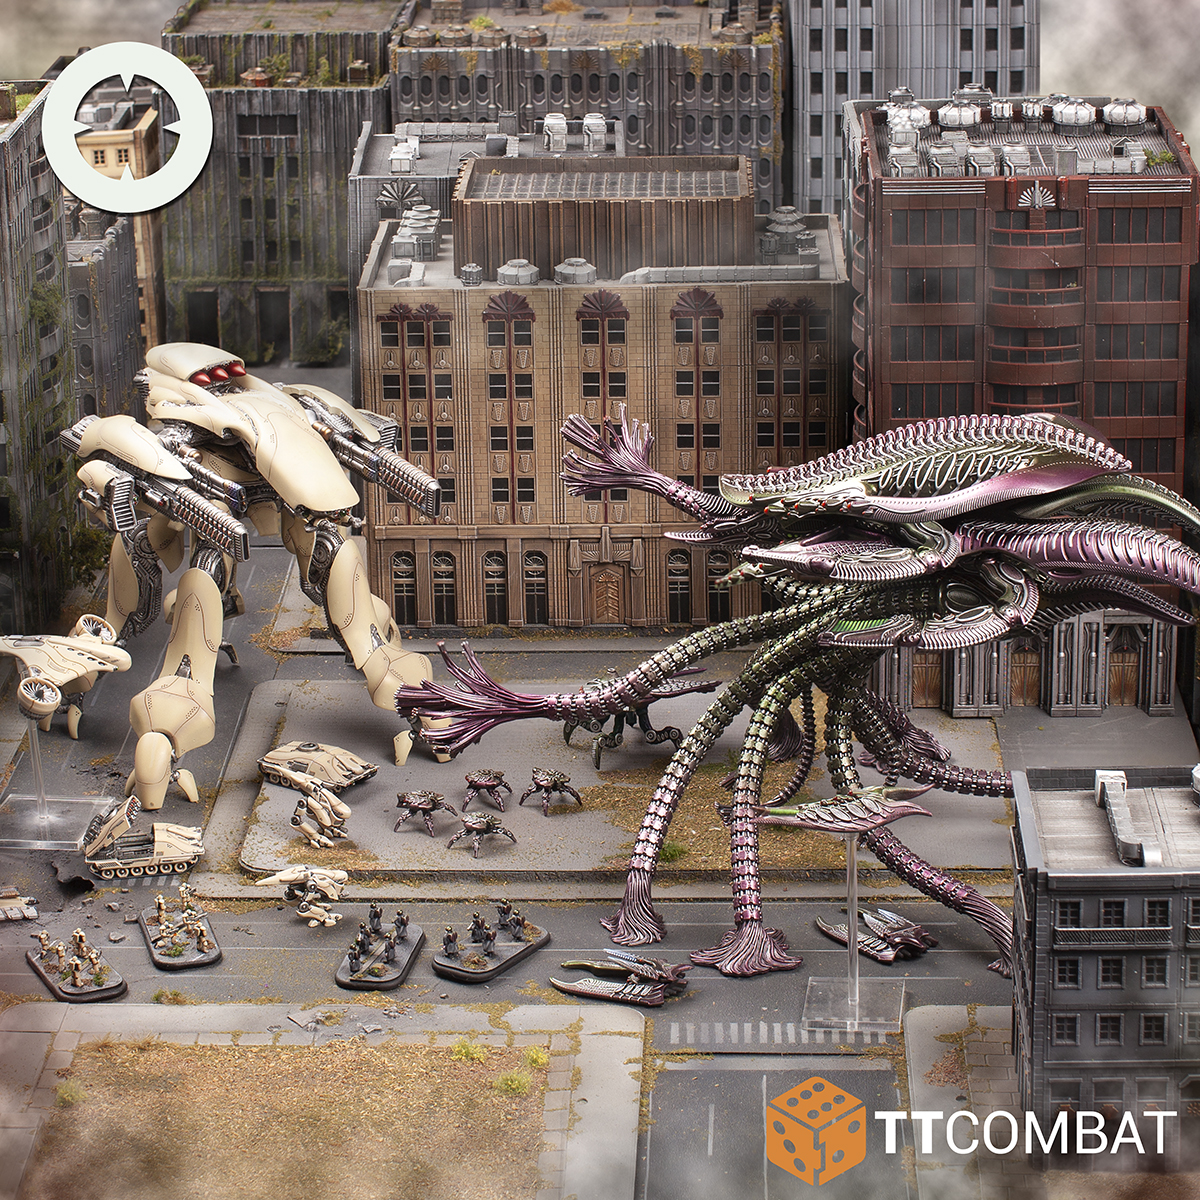
We’ll have lots more to say about both the PHR and Scourge Behemoths this week, so tune in then for all the information!
These two gargantuan walkers (can you call the Scourge one a walker? It probably slithers) are going up for pre-order this Friday on the TTCombat webstore. You can find the full rules for them in the Dropzone Commander rulebook, which is available as a small format paperback edition, and for free digital download in the Resources section too.