
Don’t be afraid of the big bad Shaltari Behemoth (unless you paint all the dots).
Image heavy painting blog post below!
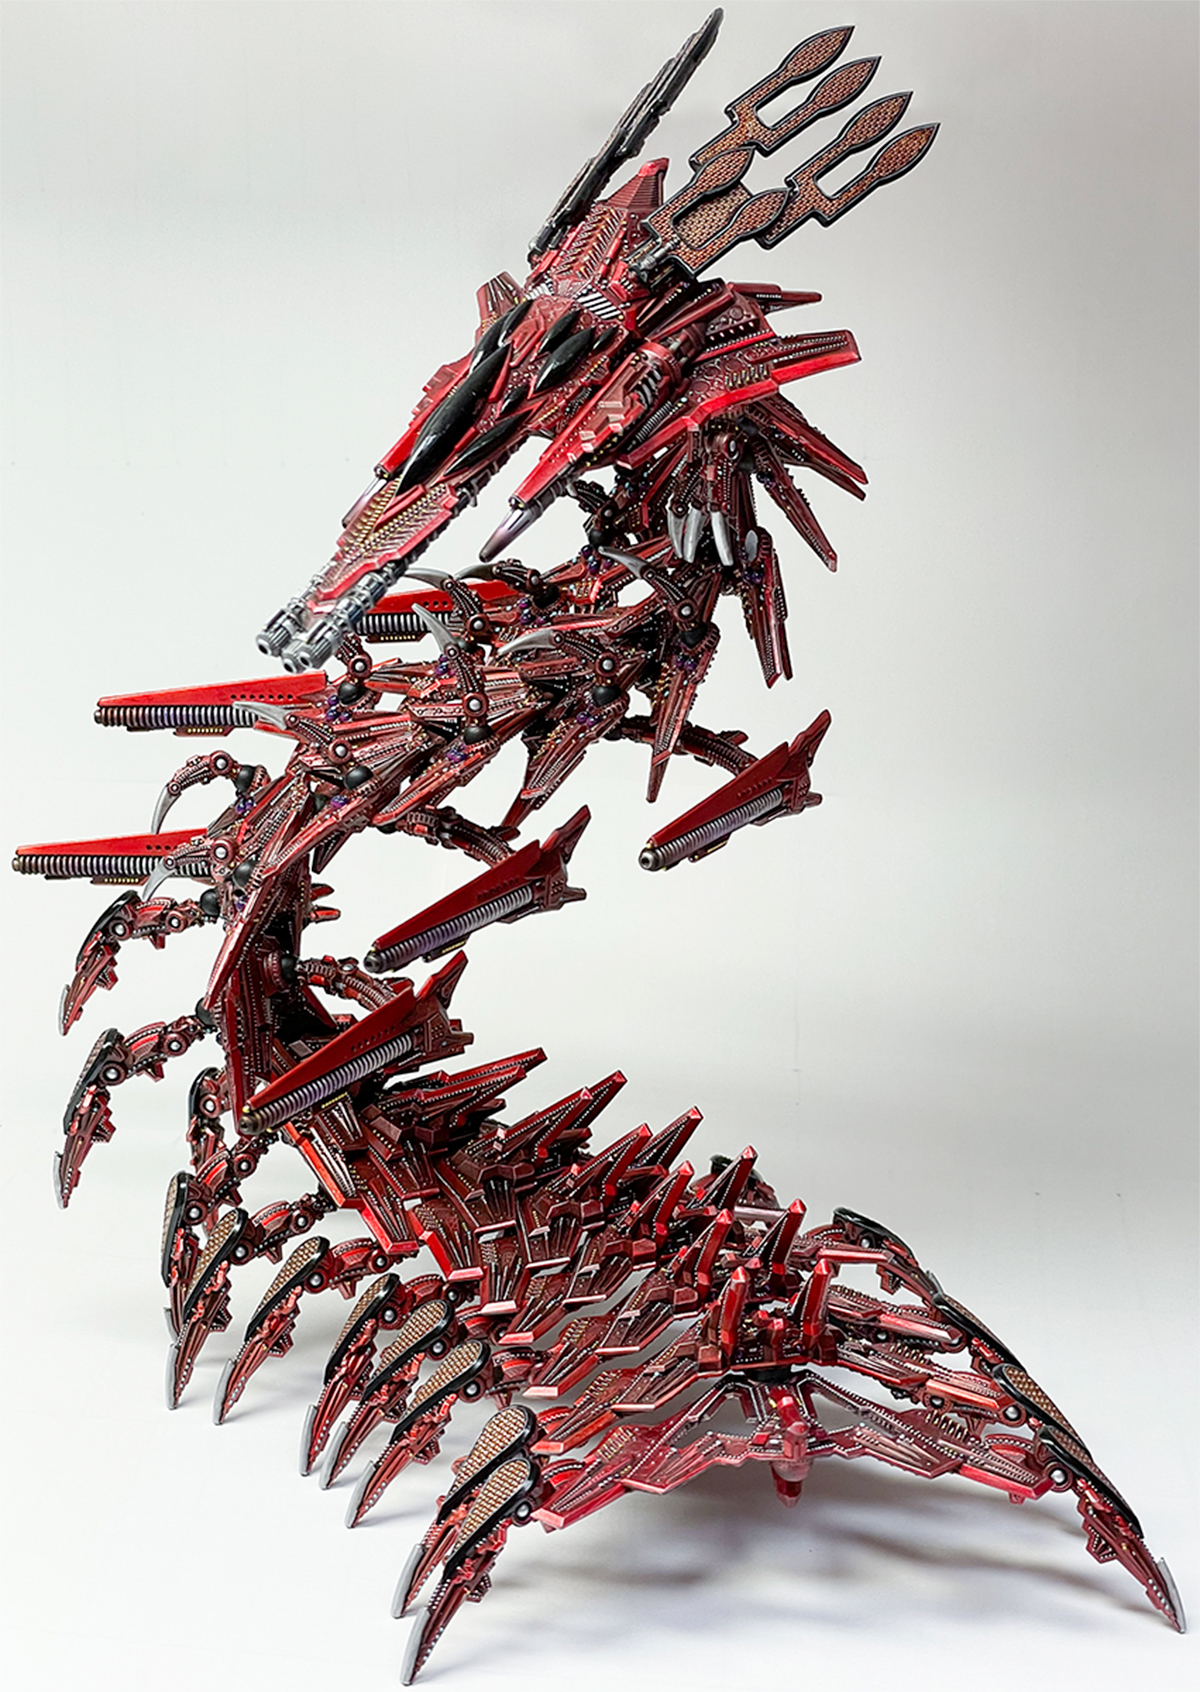
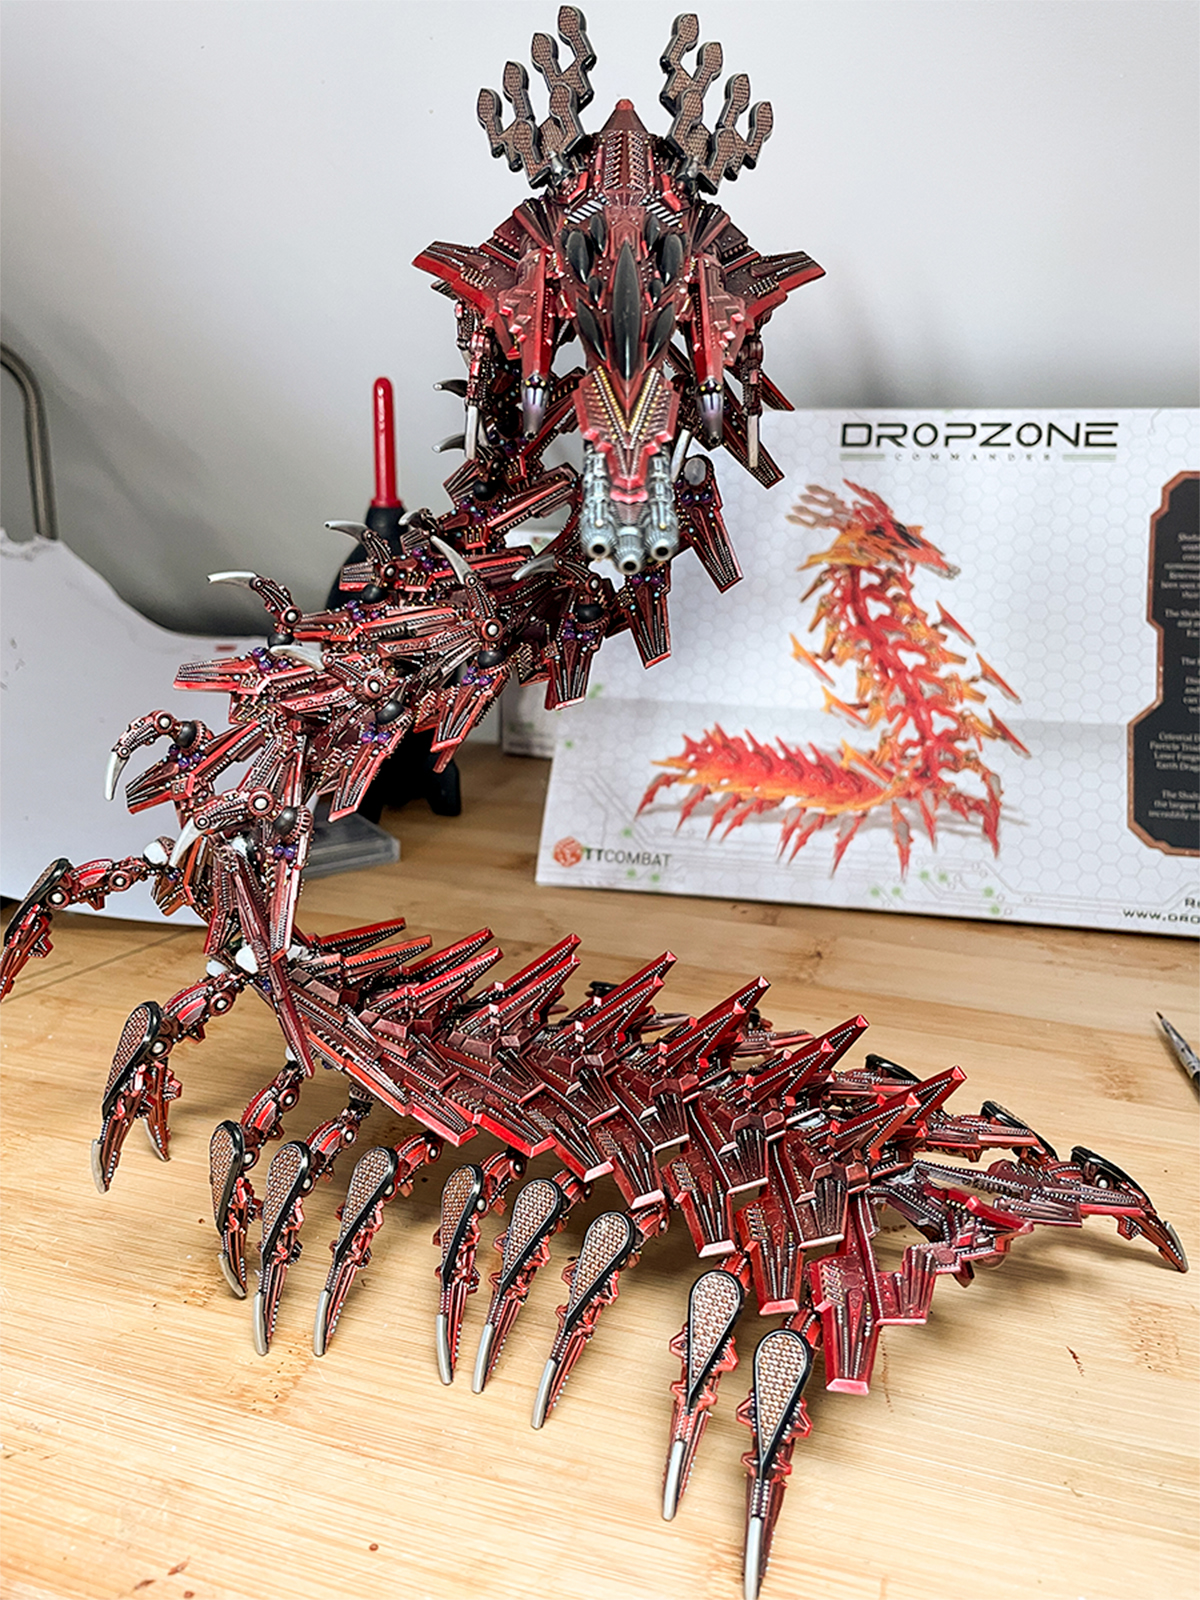
OK, I’ll admit it, the Shaltari Behemoth is bat-guano mental—that’s why it’s my favourite. It’s the essence of what these behemoths are: envelope-pushing, apex kits for lion-hearted hobbyists. I was going to do the UCM one next, but given this kit’s potential difficulty, I thought it best to get mine done in time for release. If you plan ahead and build accordingly, the Shaltari Behemoth isn’t the sanity-twisting nightmare it might appear—it’s quite straightforward. Ish.
When I first saw Fin’s paintjob in that recent video, I promised myself I would NOT be painting all the dots. Unfortunately for me, I lied. Halfway through, I thought, ‘Hey, it won’t be so bad, and it’ll look much better!’ Well it does, I think, but it cost lifespan. If you’re not blessed with undue patience and days, DON’T be tempted to paint all the dots. Just don’t. It will look great anyway. Honestly. With that public service announcement done, I’ll get cracking.
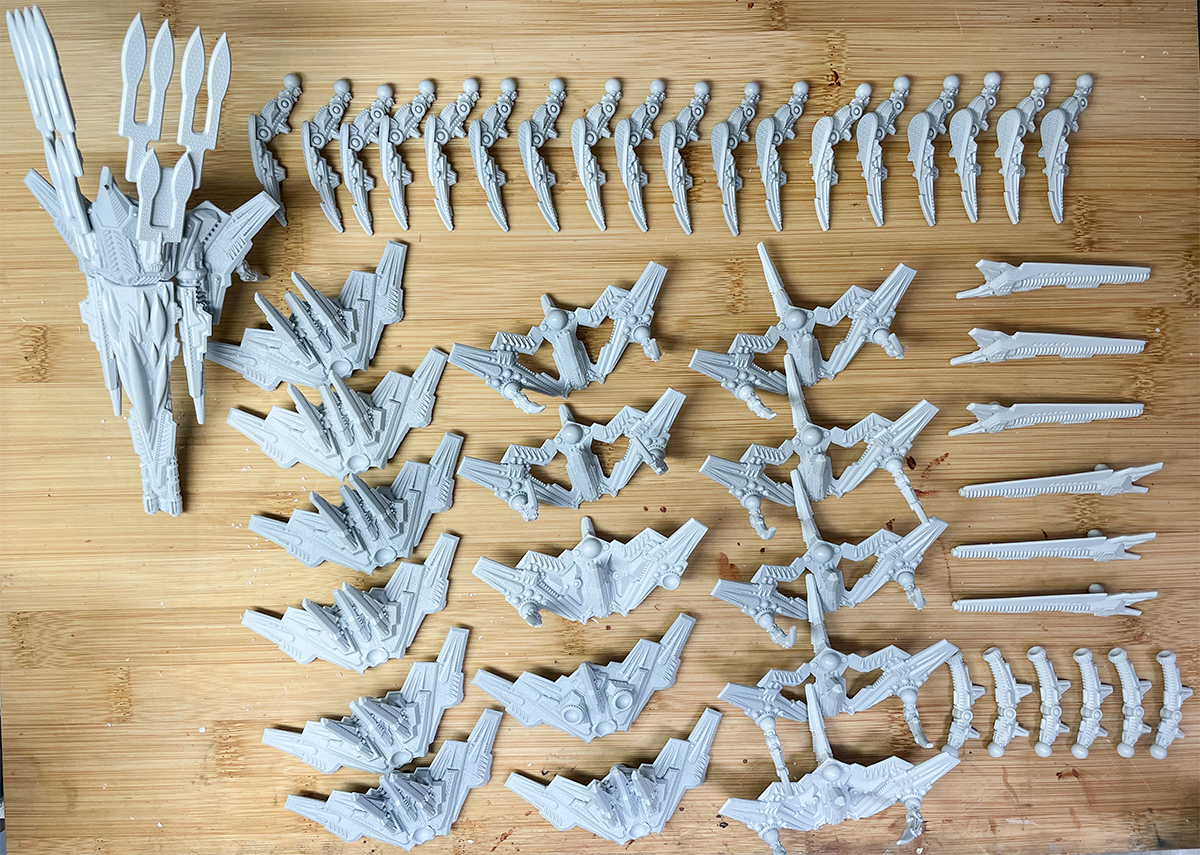
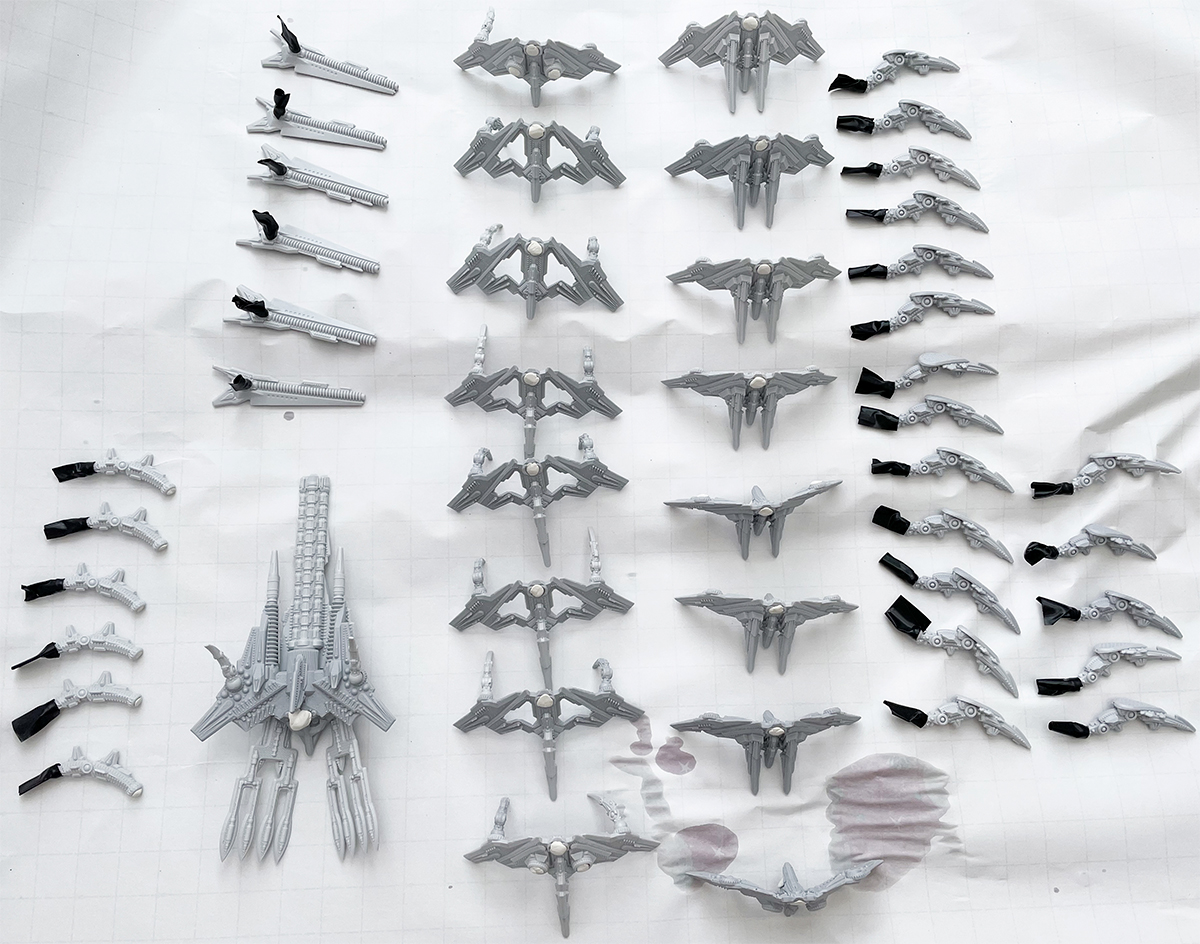
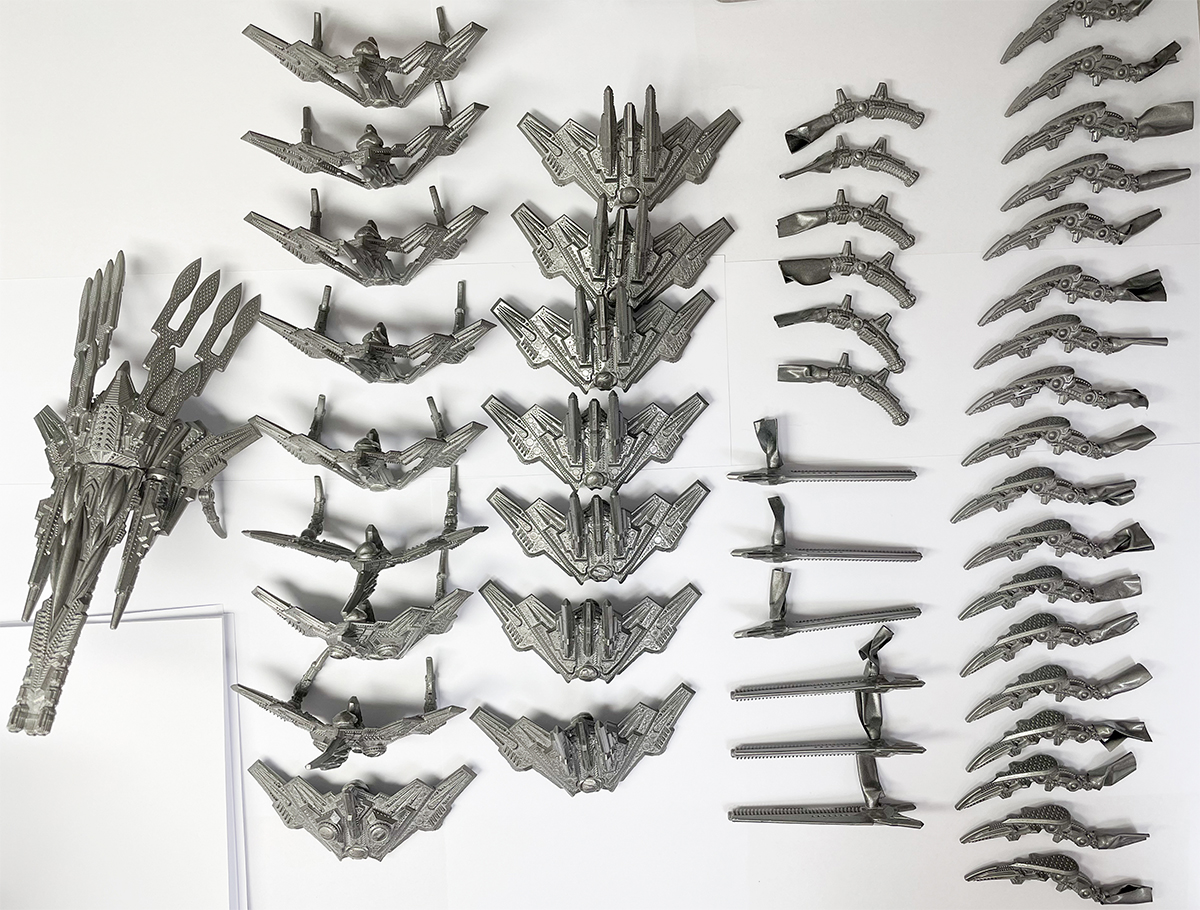
Cleanup and pre-assembly
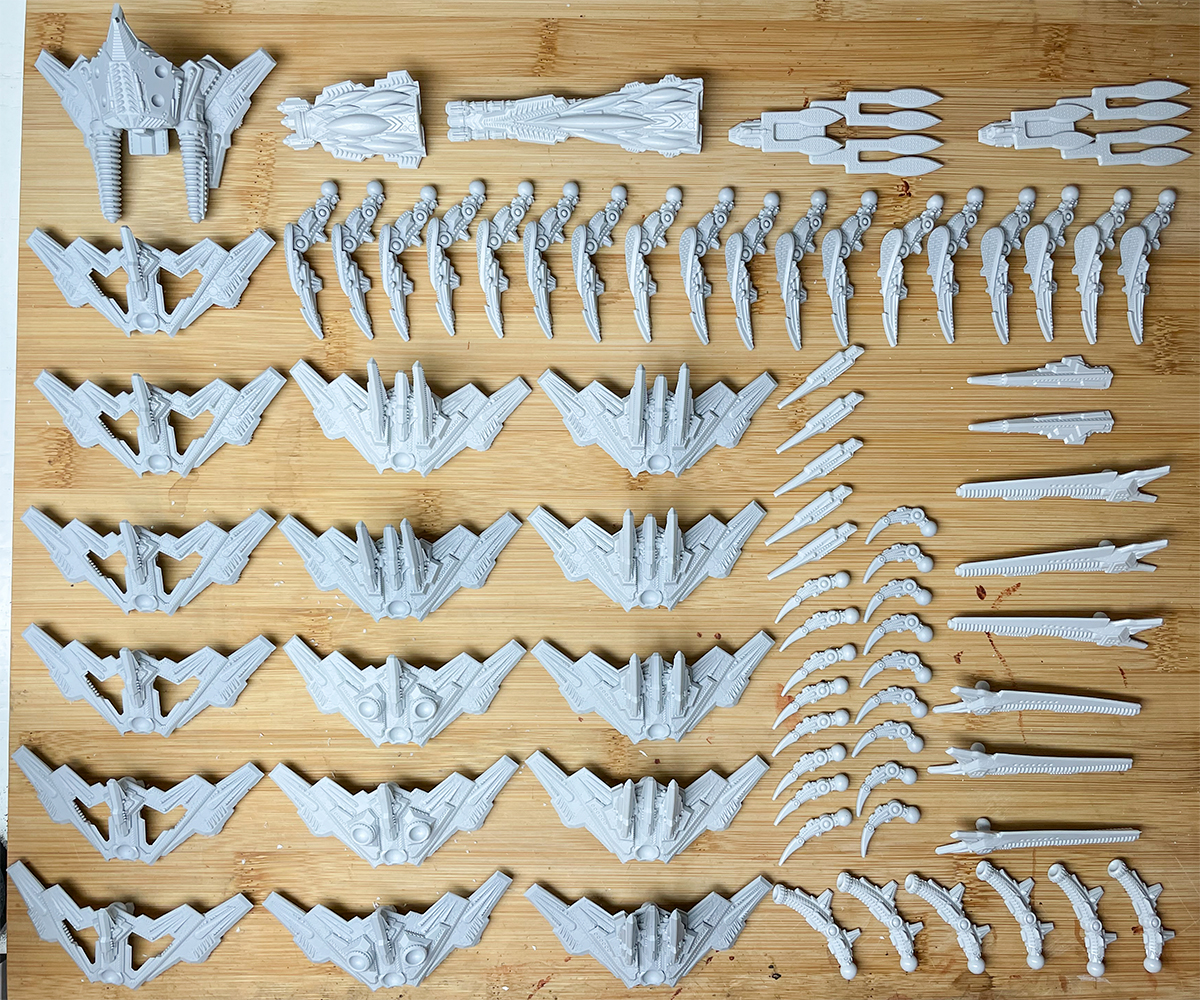
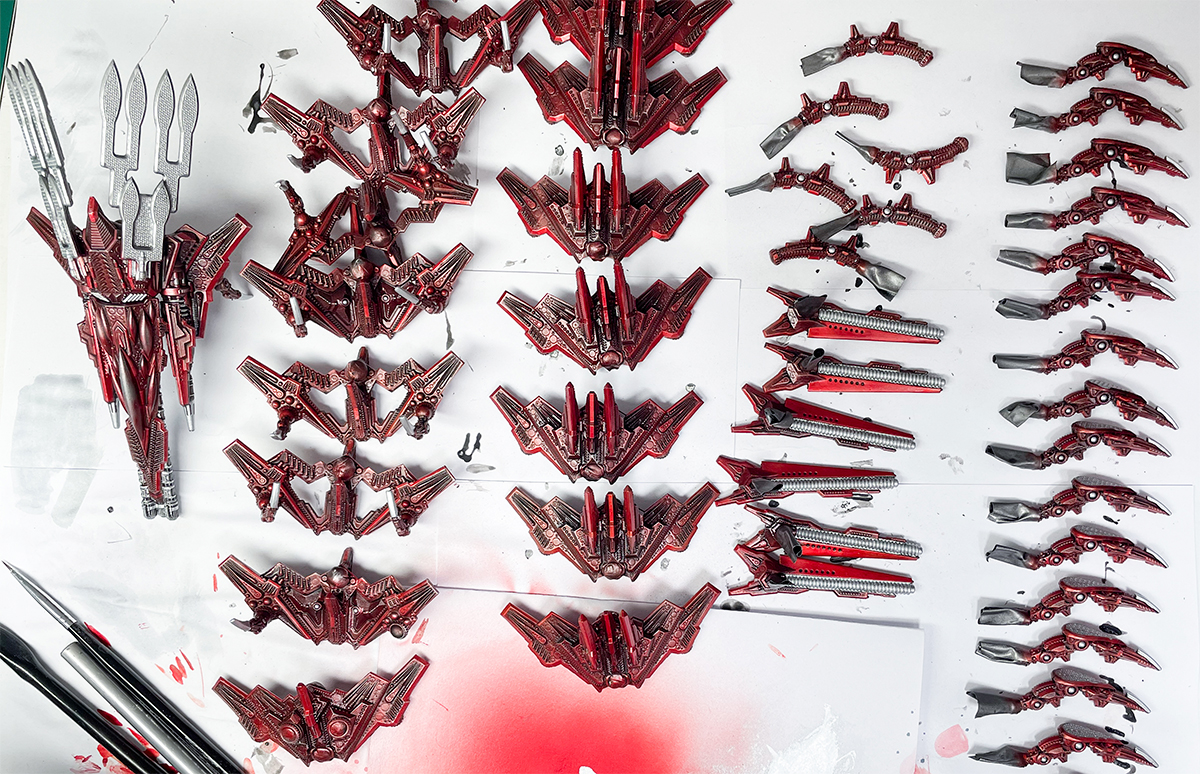
This took longer than the PHR behemoth due to the part count, but there wasn’t anything problematic. I used a scalpel, clippers and green stuff to fill the odd small bubble and straightened a few warped parts with just-boiled water, but that was it. Eagle-eyed viewers will notice my pictures show the wrong number of segments—I took a bunch of pre-production parts home with me for this build and when sorting out which to use, I forgot the tail segment. All the way though until final assembly my images are one segment short. Also, I took one too few of the little front arms, so you might notice an empty socket where that’s meant to go.
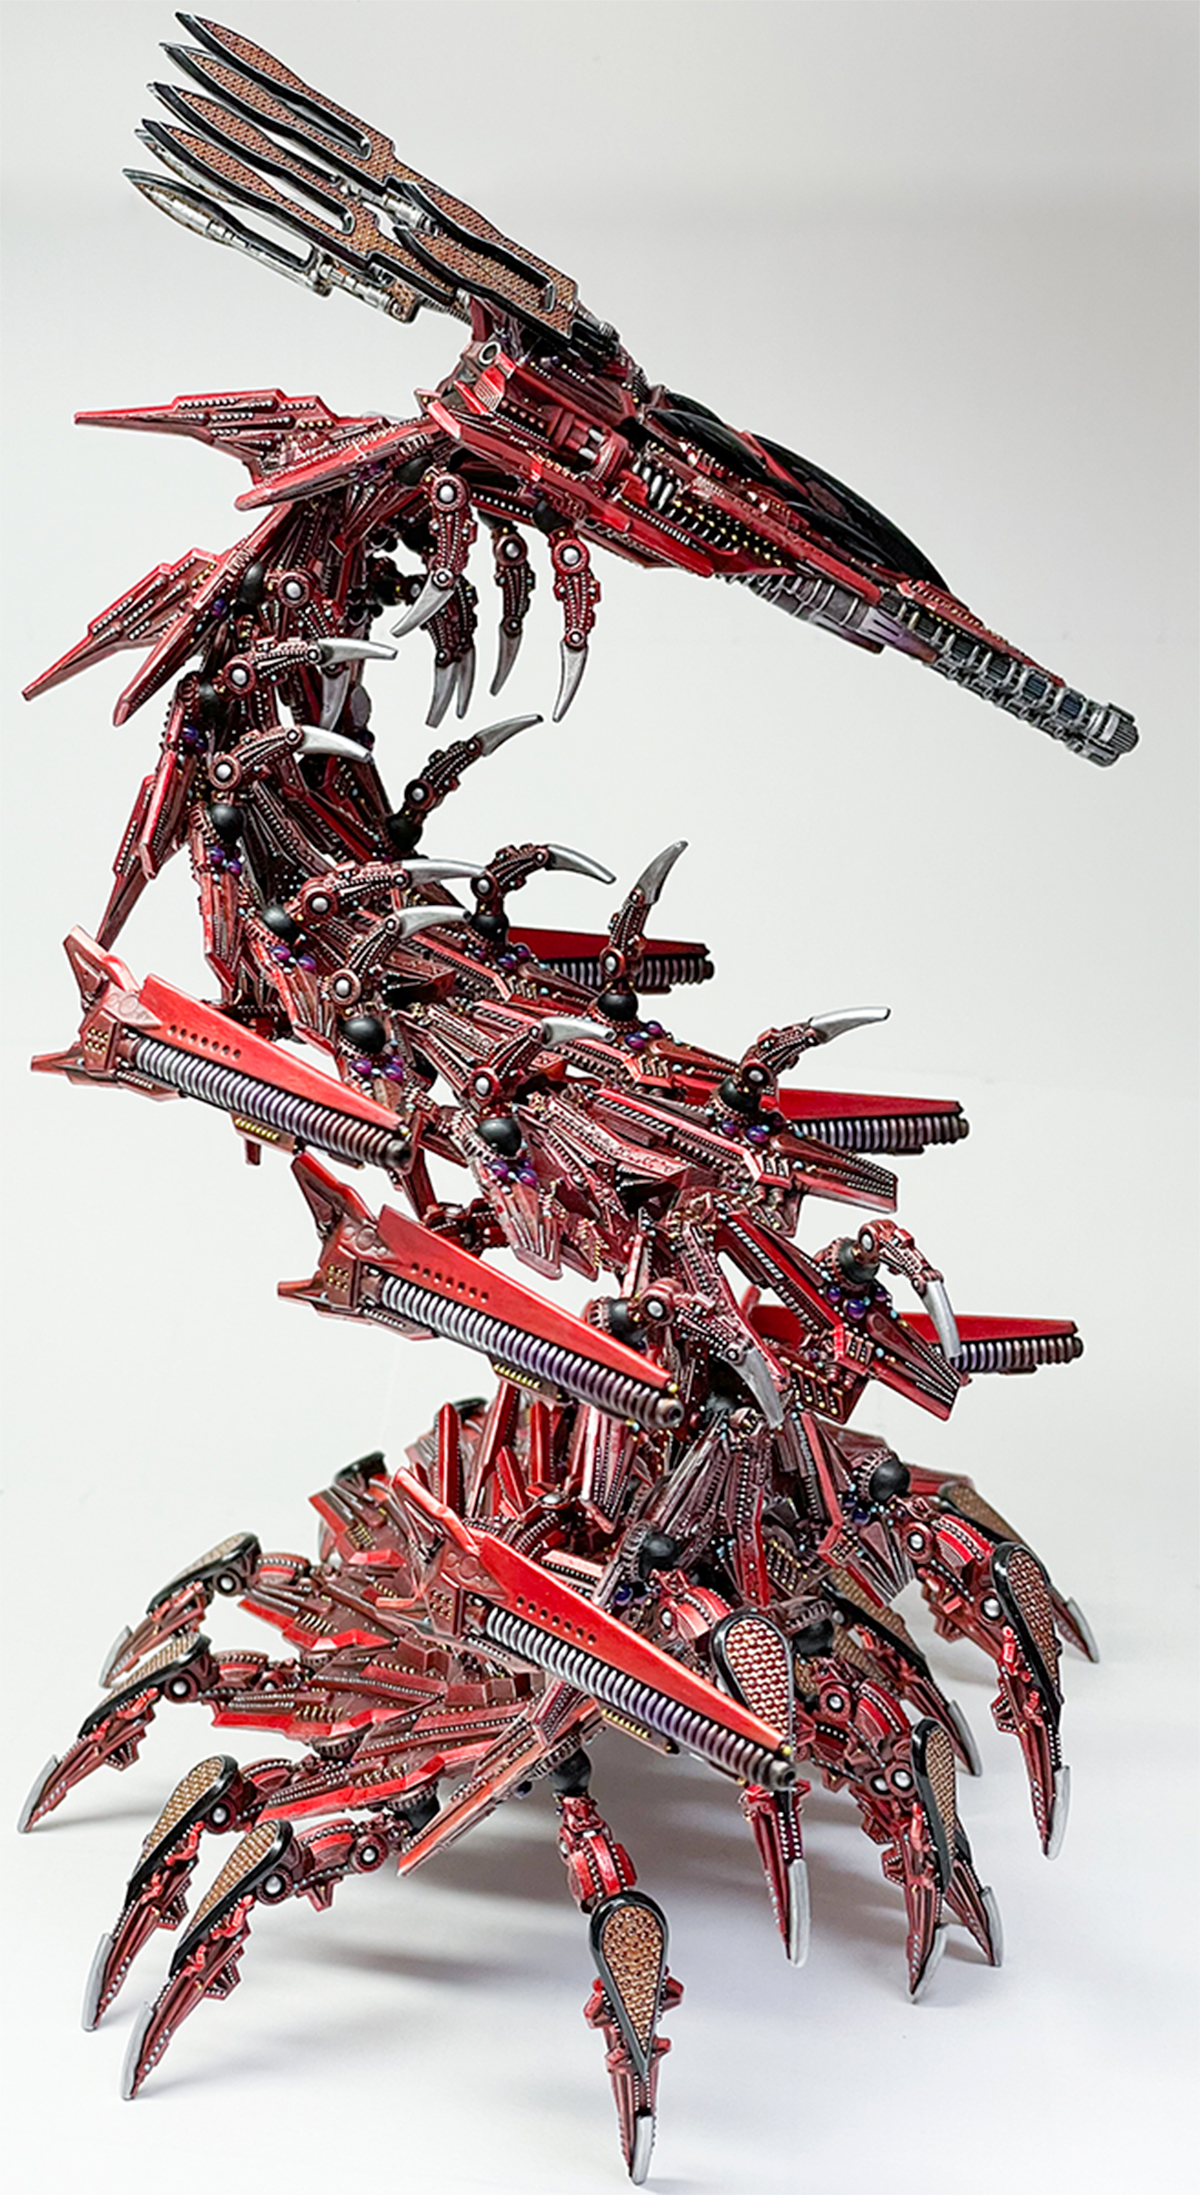
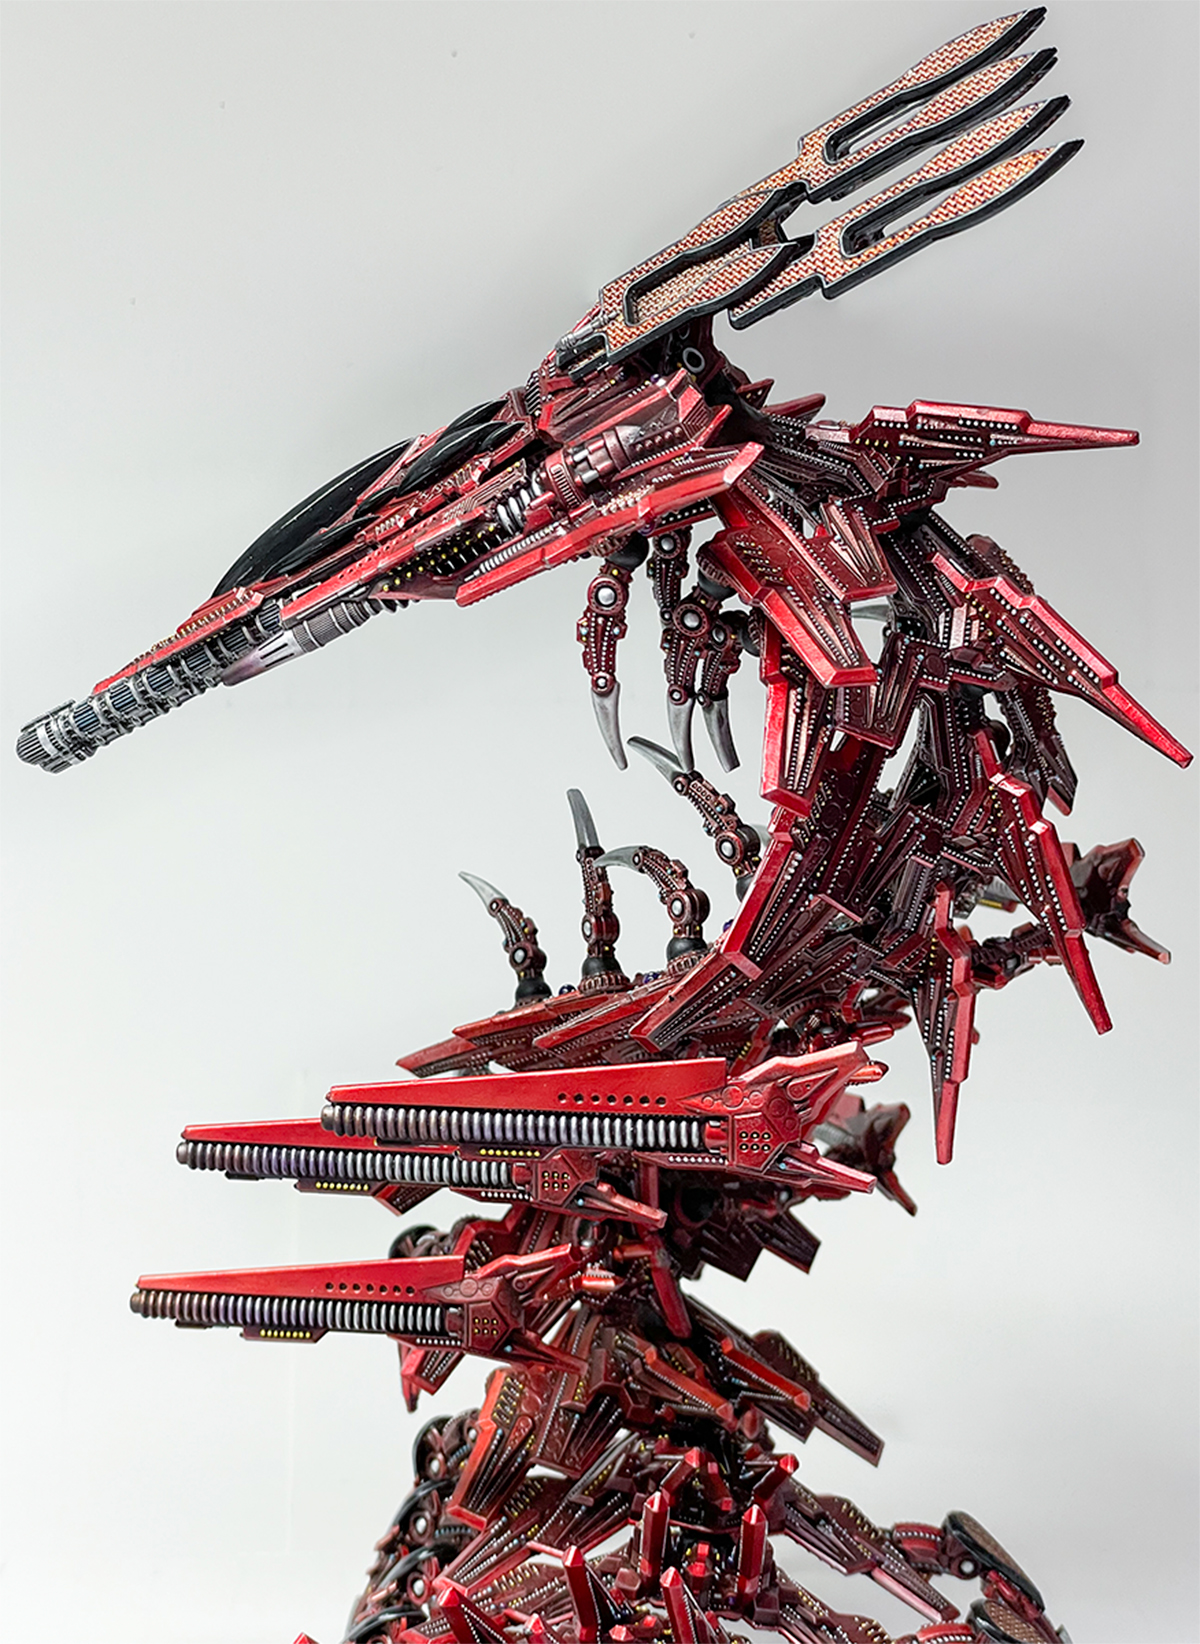
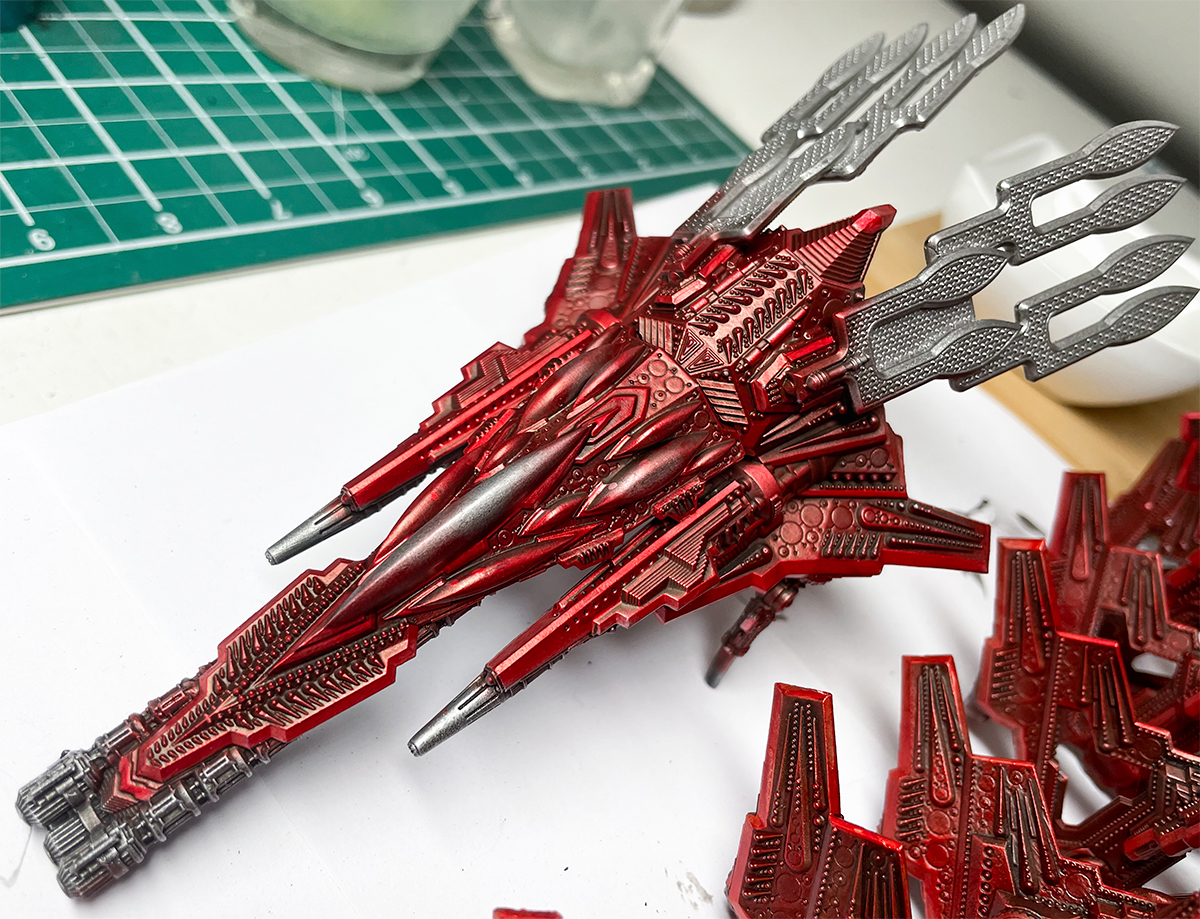
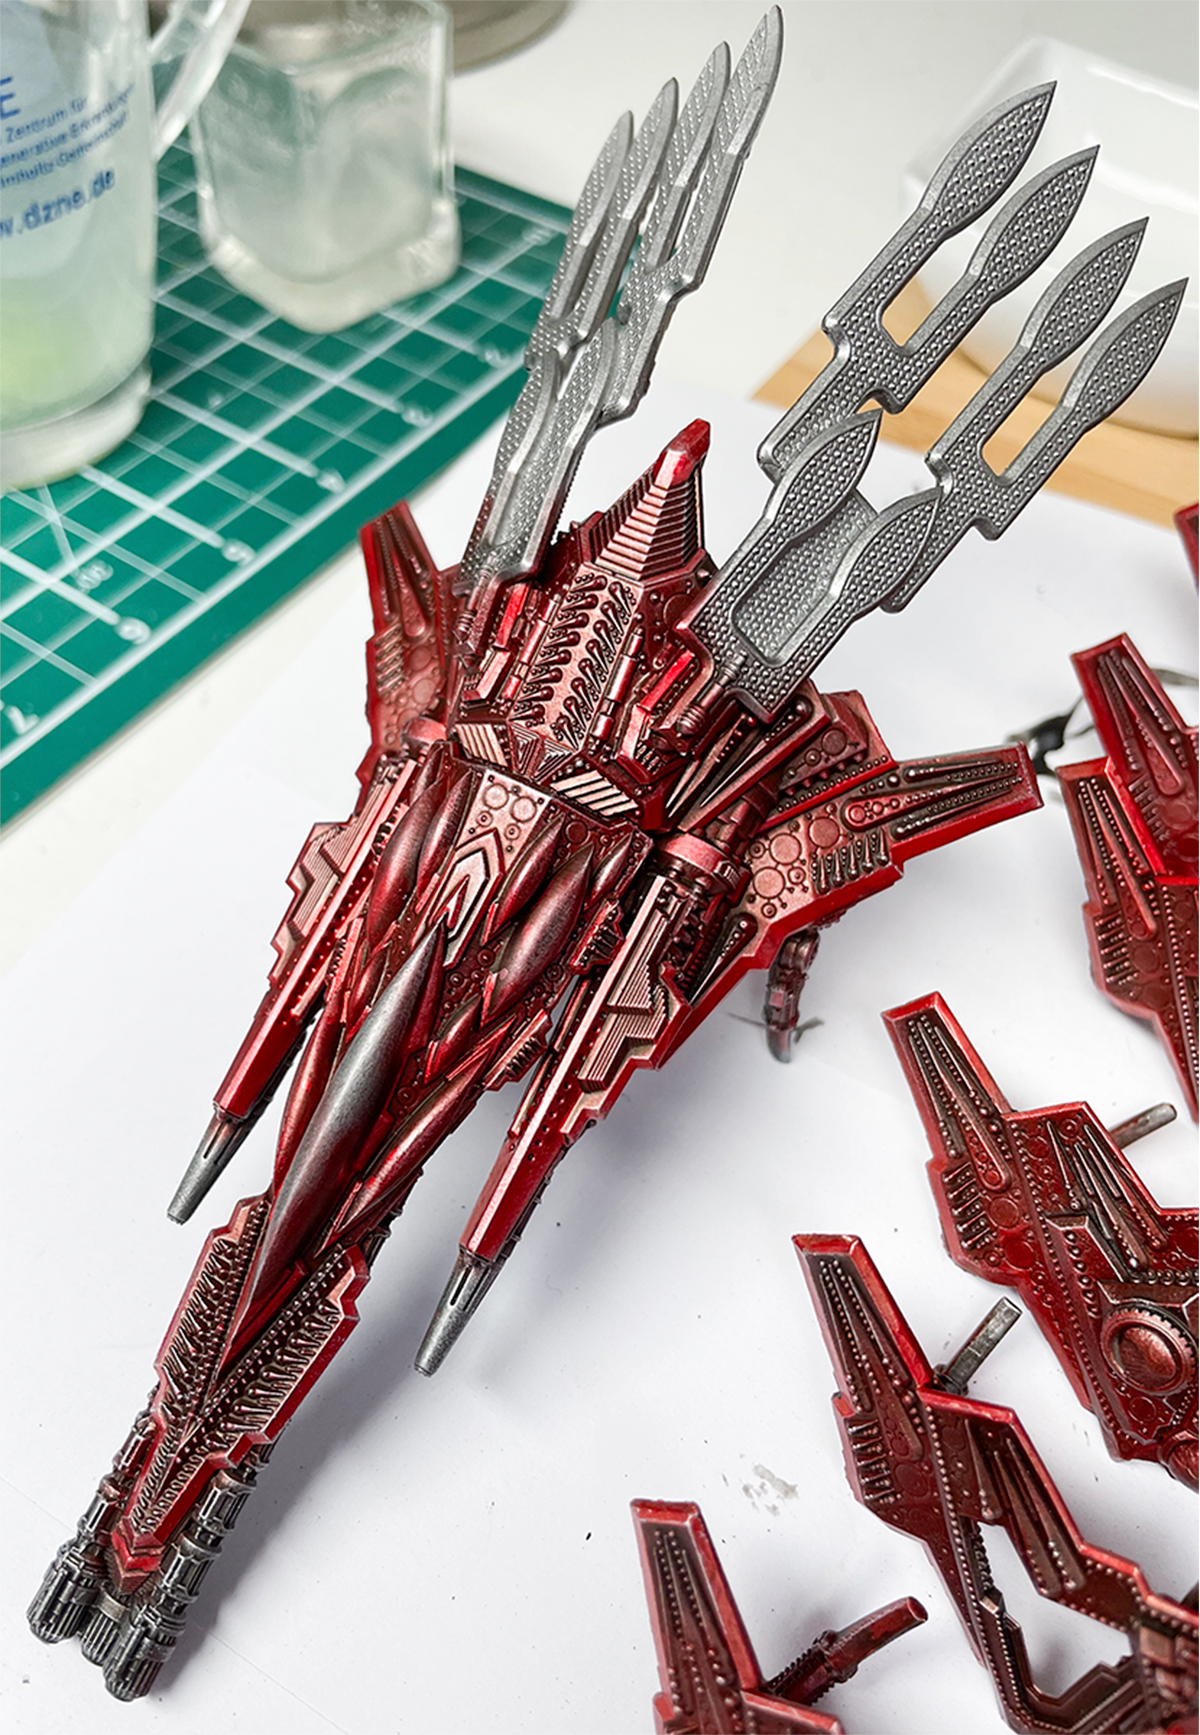
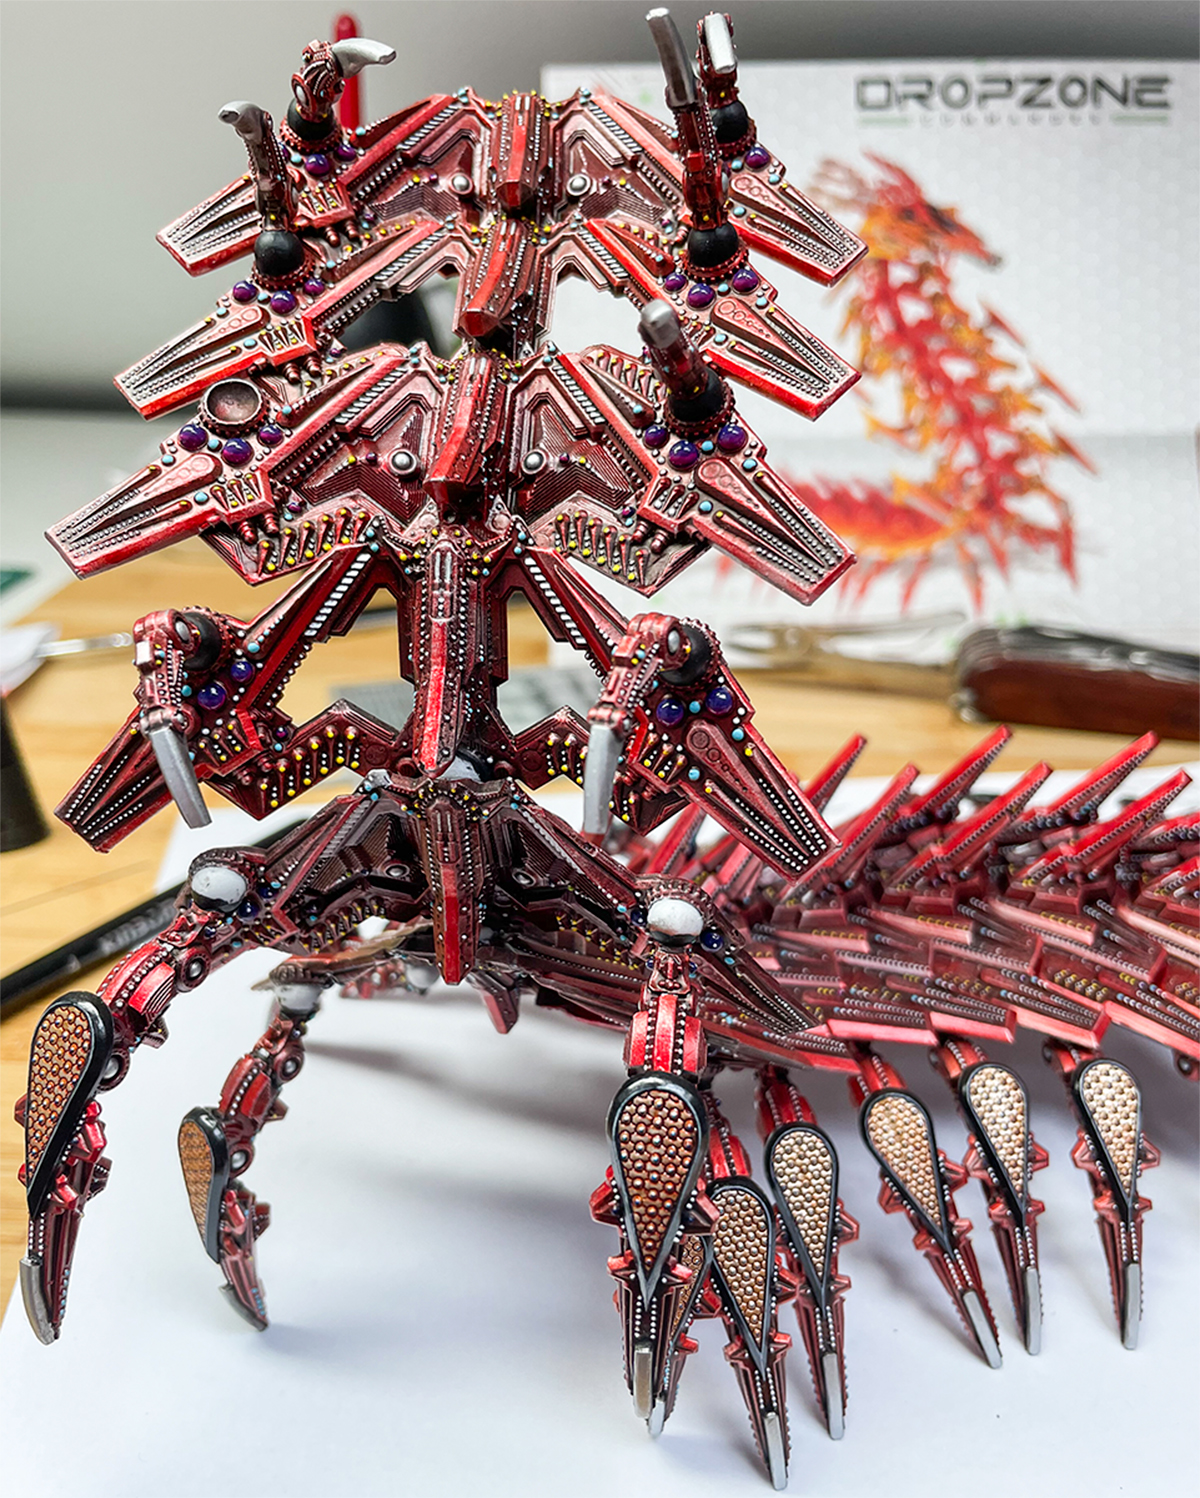
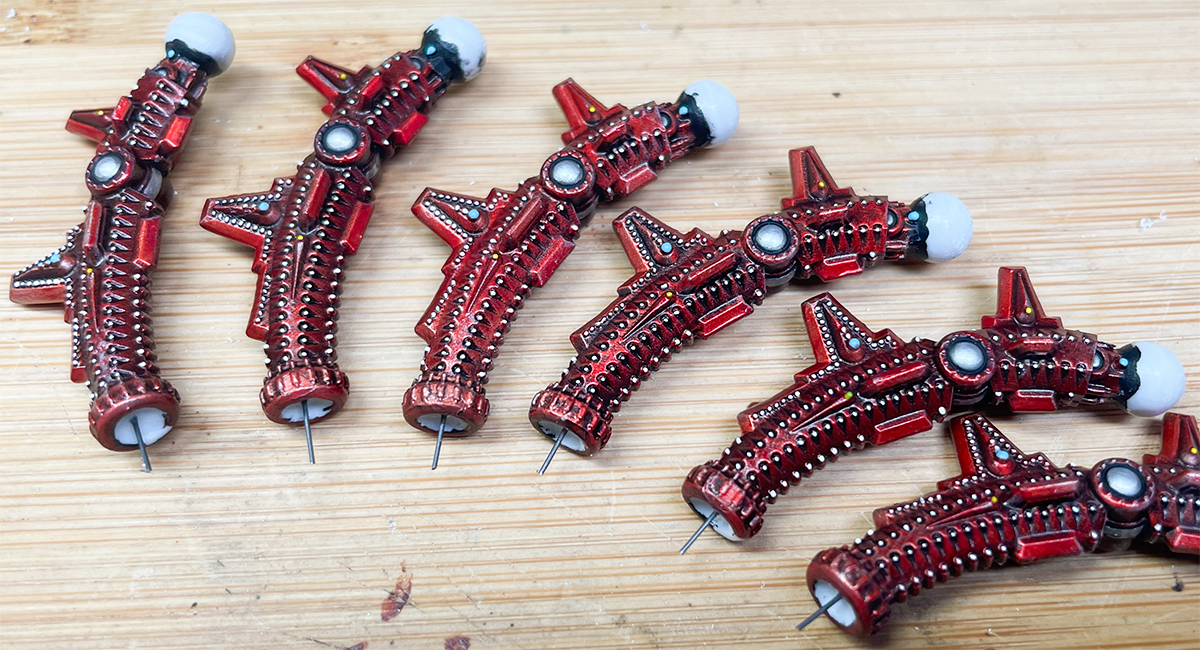
I prefer to build kits in a mostly assembled a state, but here, that’s daft. The only parts I thought I could get away with assembling early were the head parts, the lengthened spine on the top five segments and the little vestigial arms on the relevant segments—you could assemble these later and they might end up better positioned, but I decided a neater paint job with fewer fiddly parts to handle took precedence. I built the head permanently as the Celestial Dragon—I prefer the look of this, and since my model’s not for gaming, I didn’t magnetise.
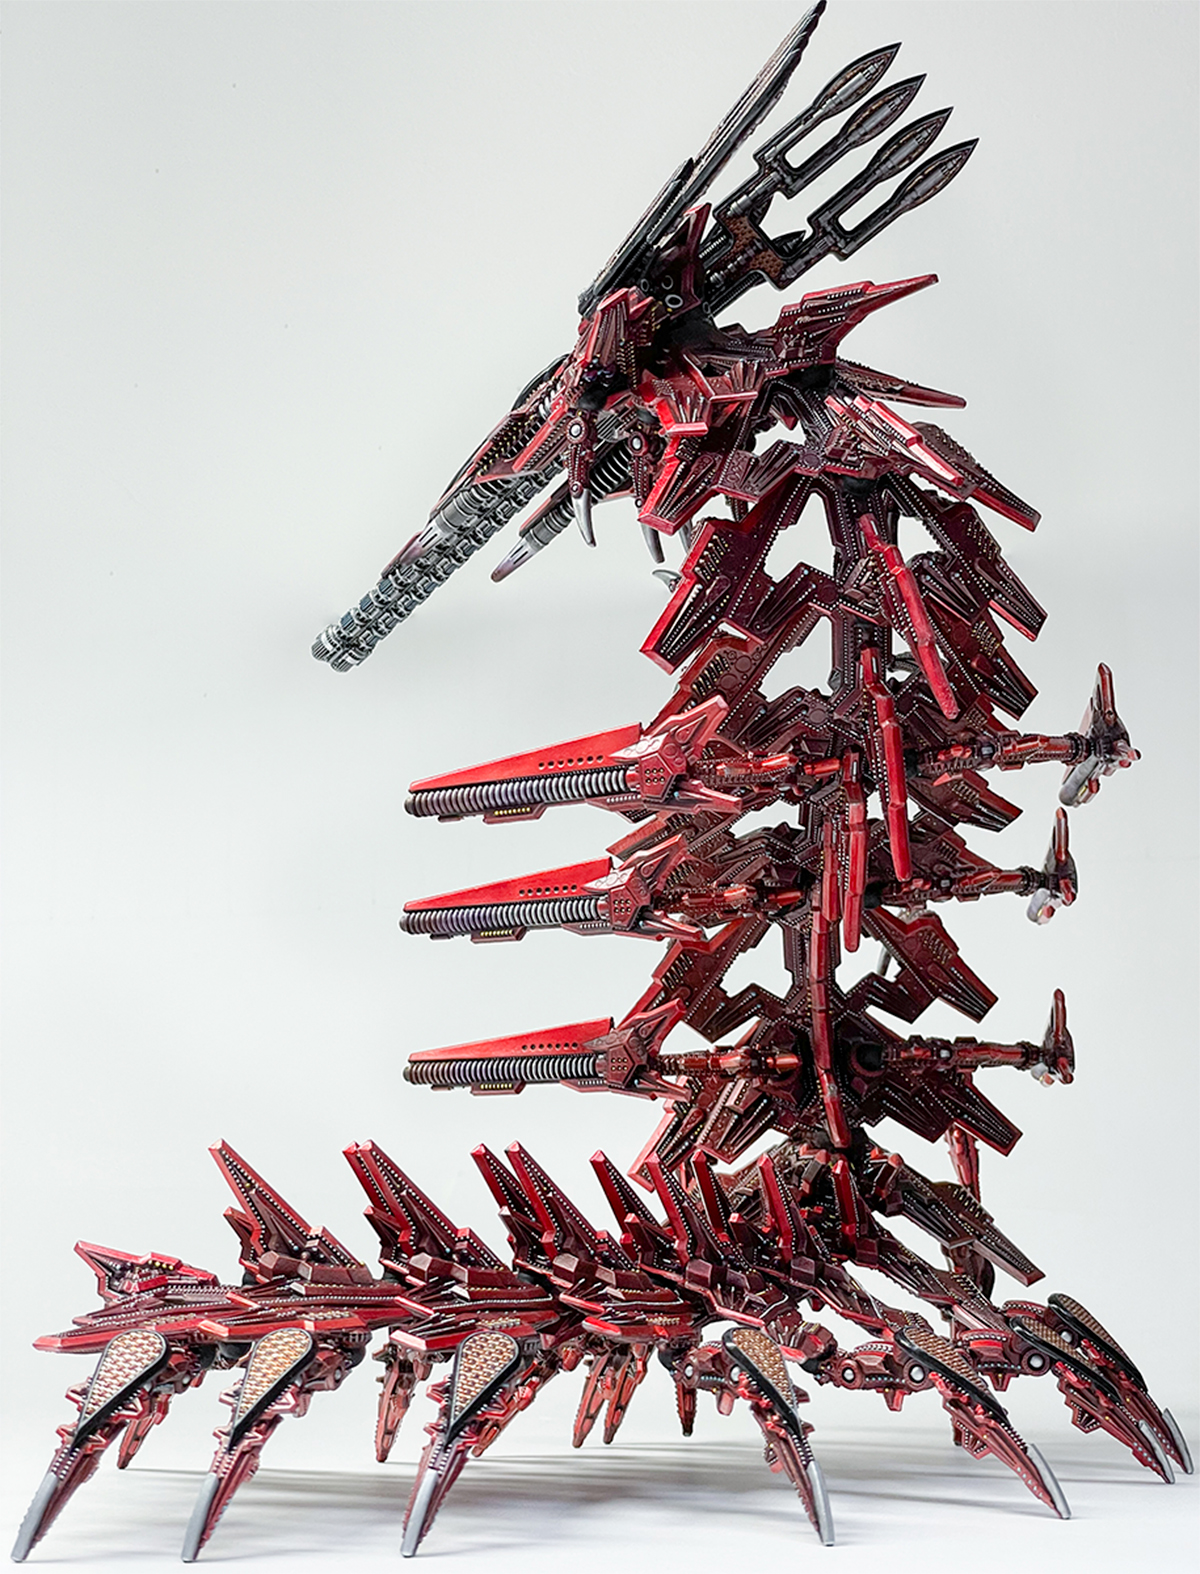
The potentially confusing part about this kit is which segments go where. You could build this differently, with the segments in a different order, but this is officially correct:
Head Segment + 2 little arms
4x Segments with holes in + elongated back spines + 2 little arms each
Gun arm segment (the one with the rear-facing ball joints) + elongated back spine + 2 little arms
Segment with holes in + 2 little arms
Gun arm segment + 2 little arms
Segment with holes in + 2 little arms
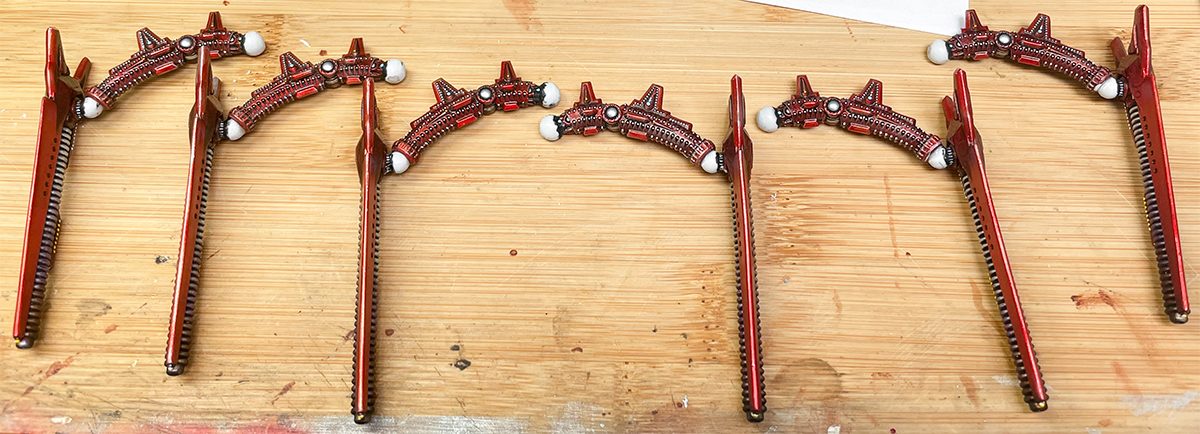
Gun arm segment + 2 legs
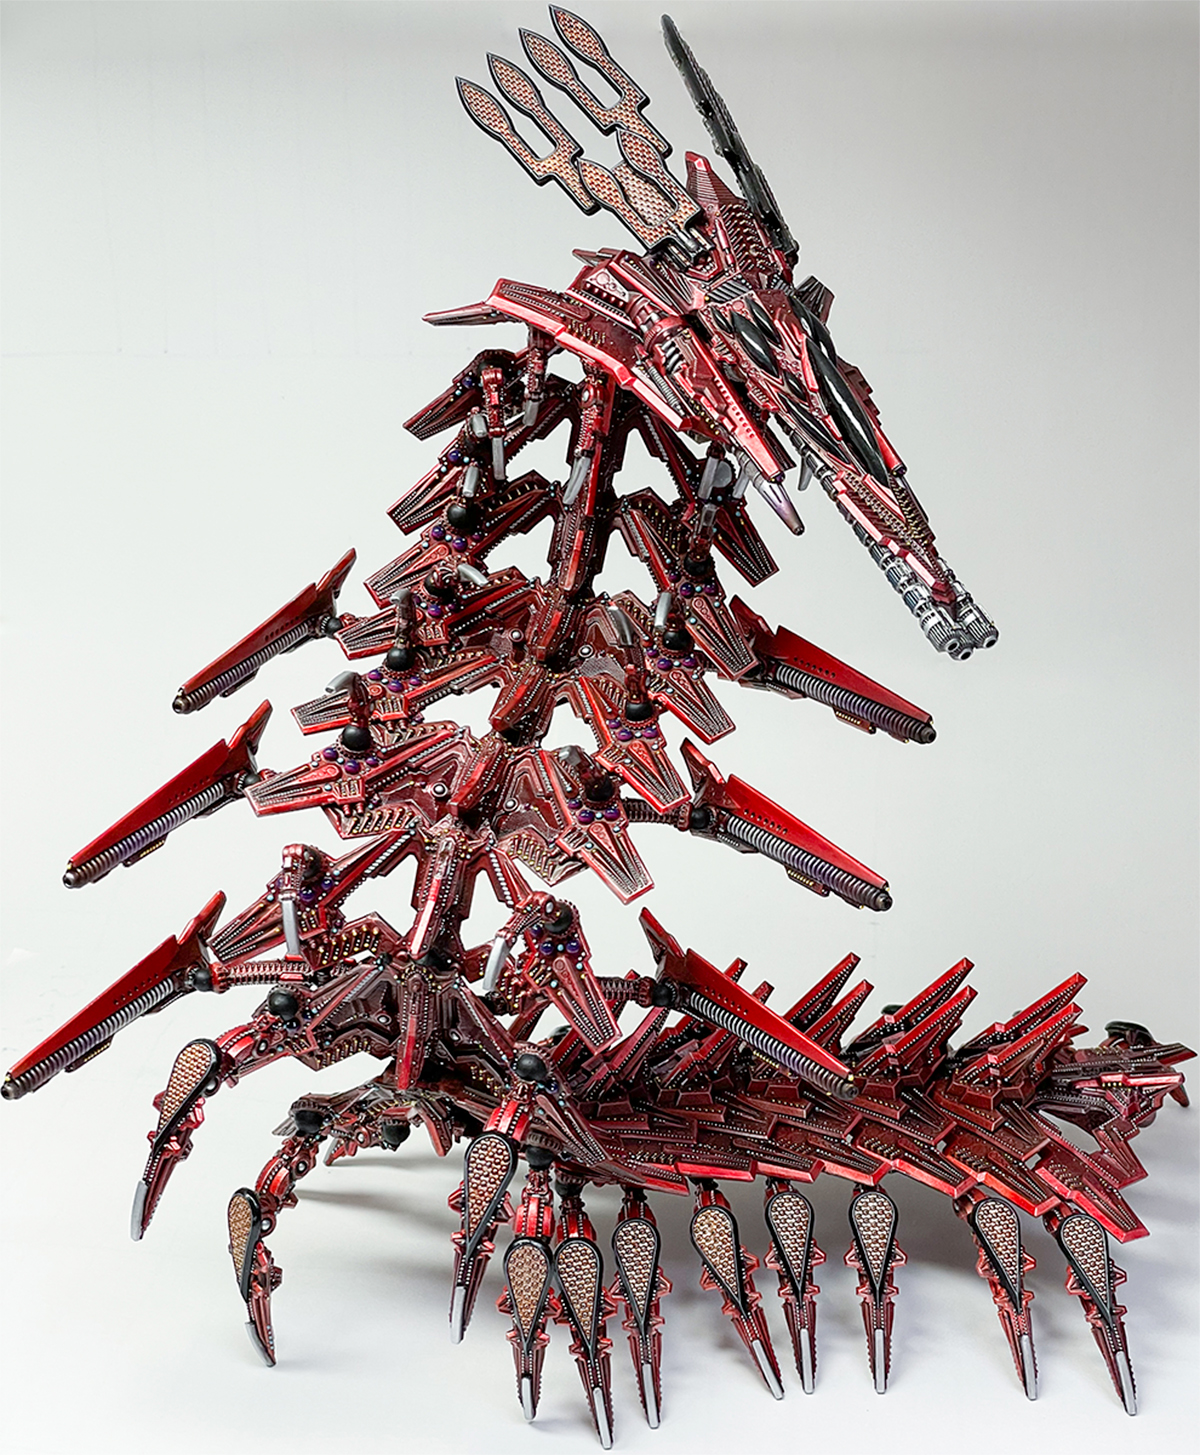
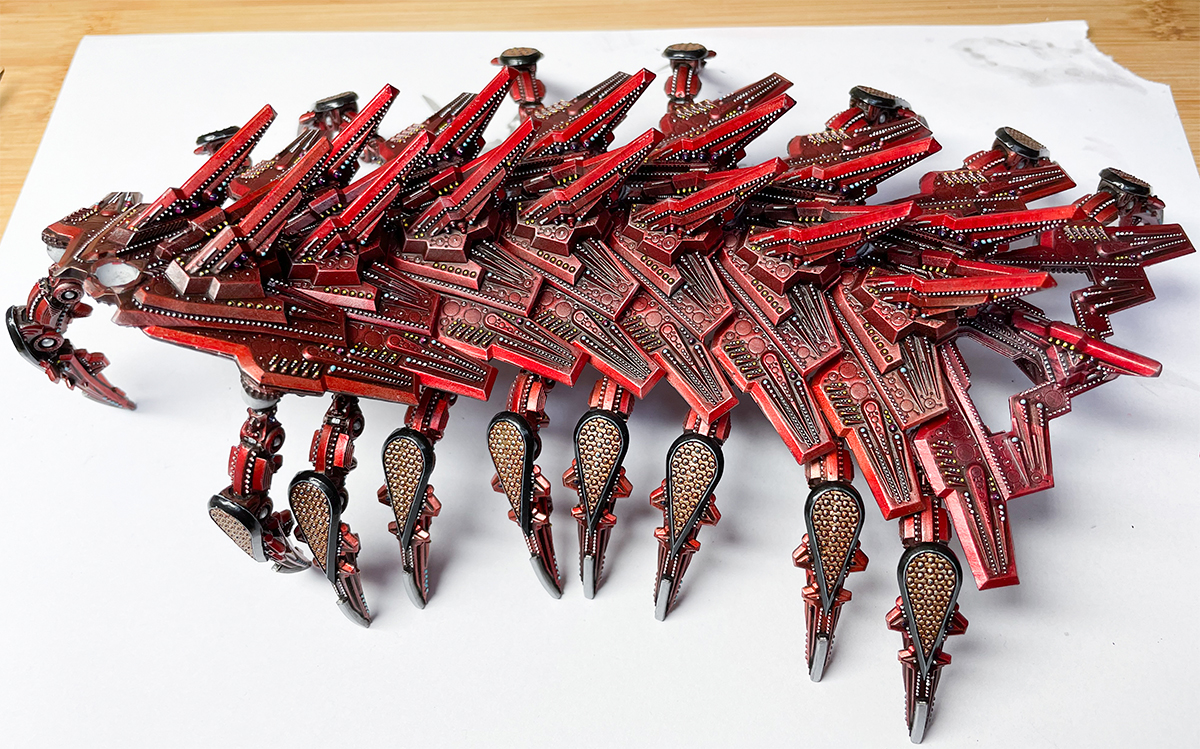
7x Leg segments (the ones with the 3 big back spines) + 2 legs each
Segment with holes in + 2 legs (that’s the tail, the one I forgot).
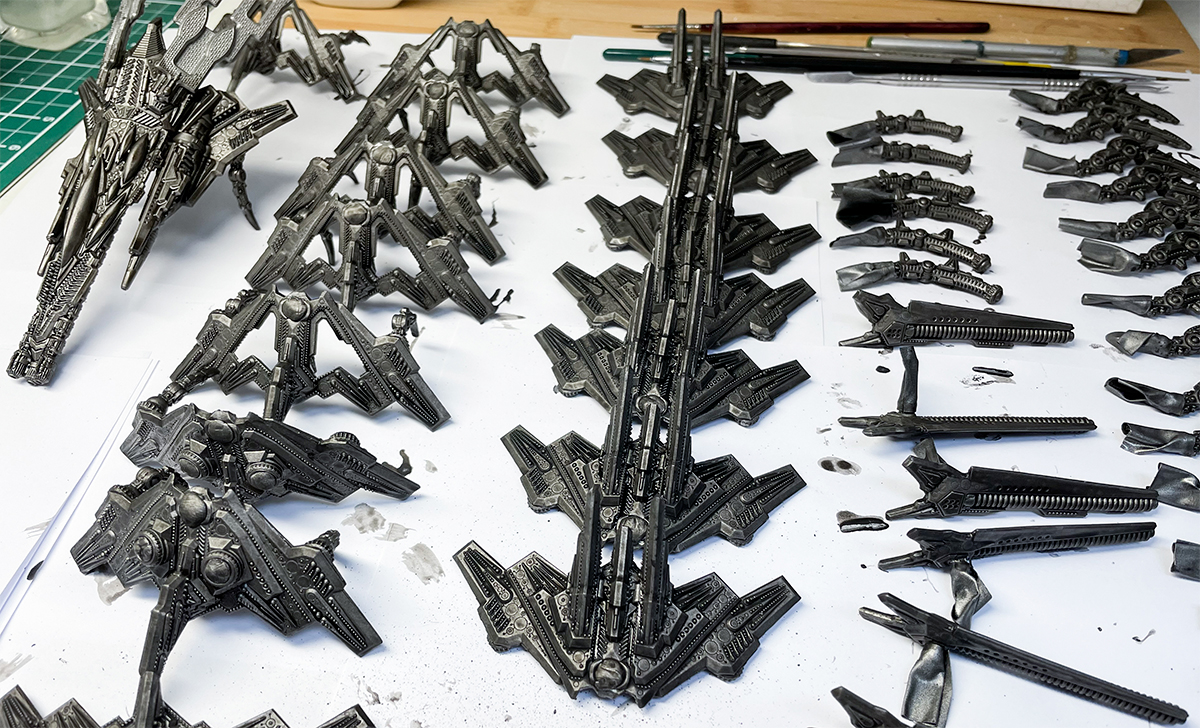
Base Colours
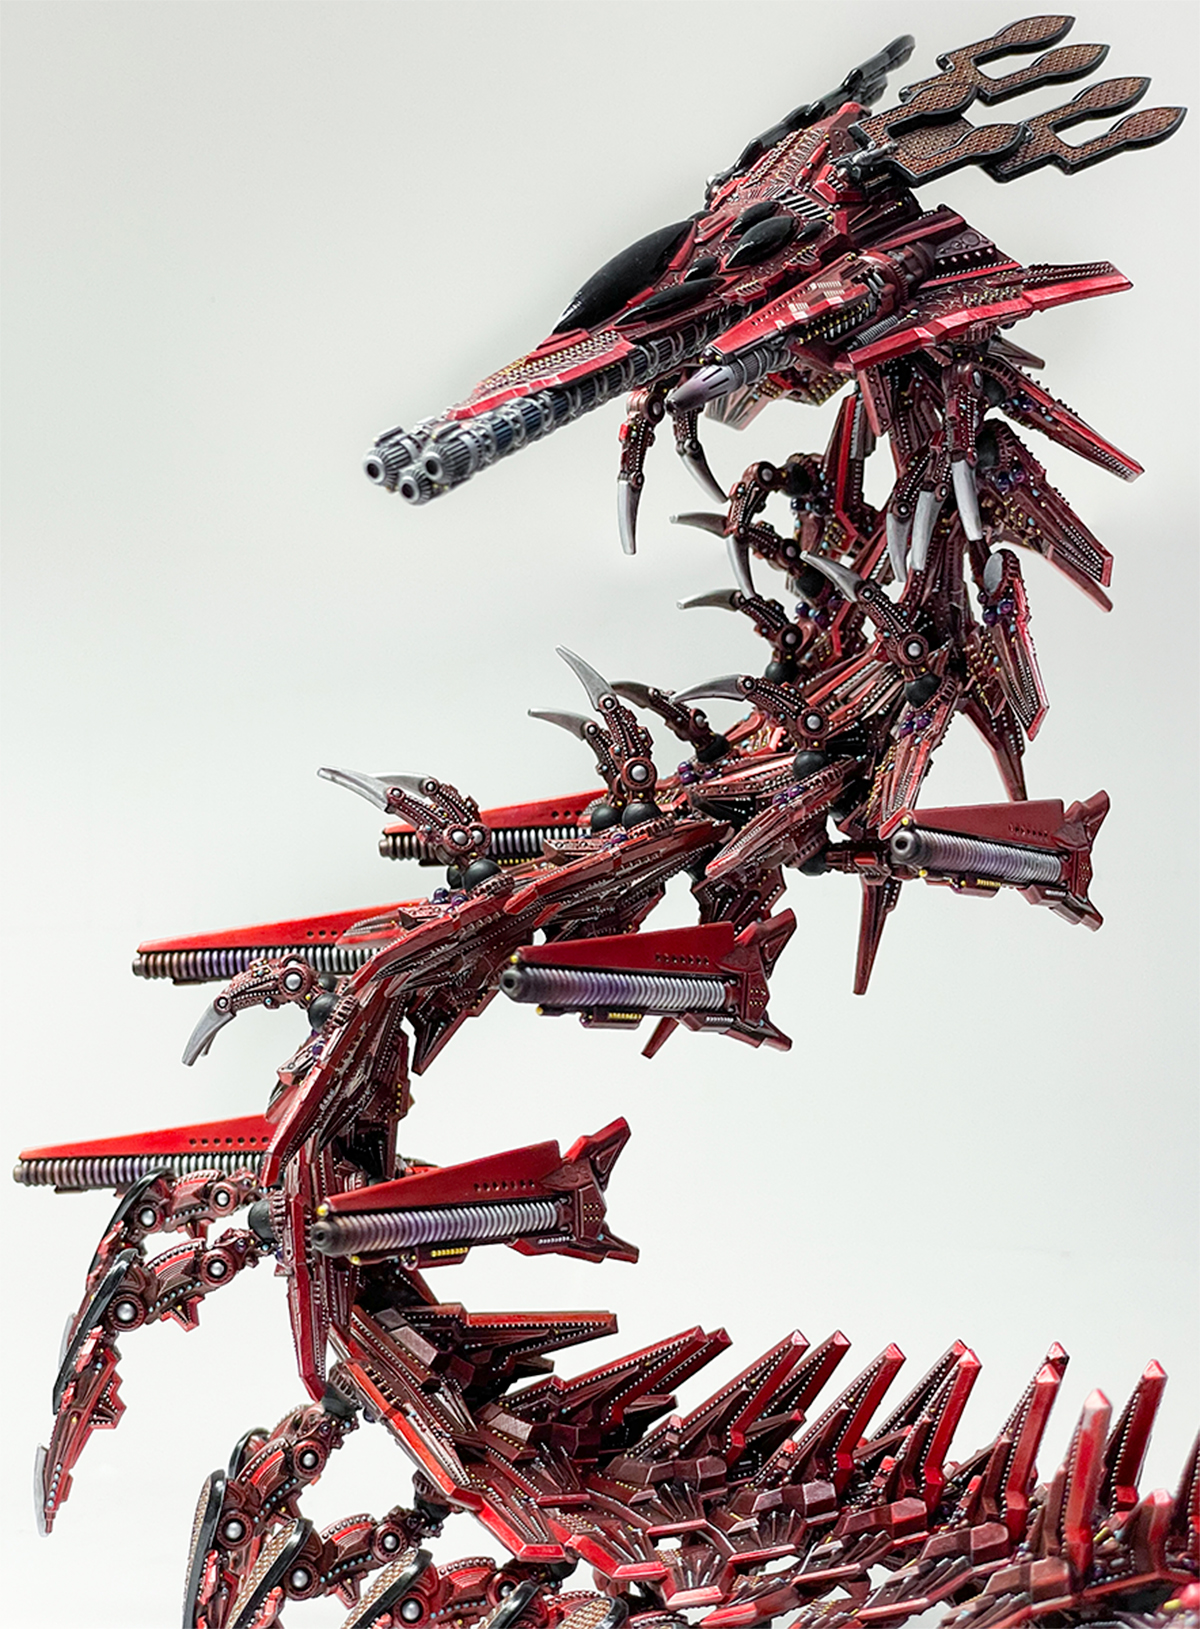
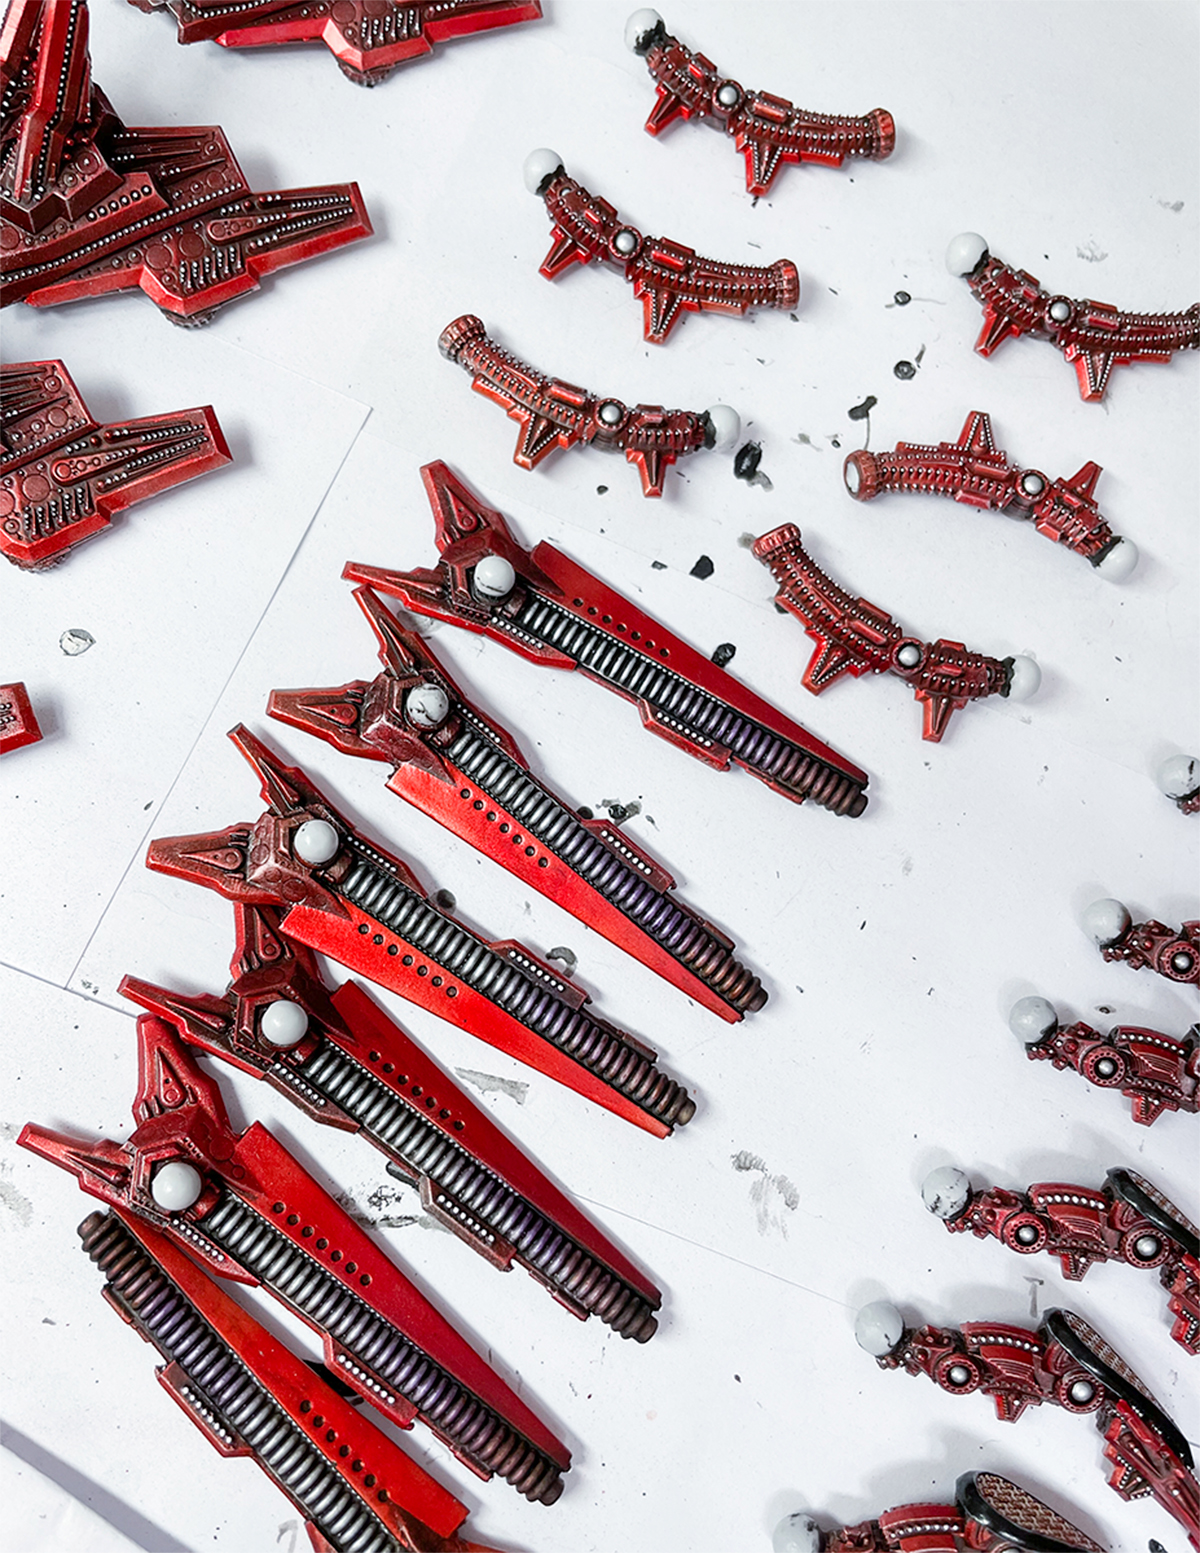
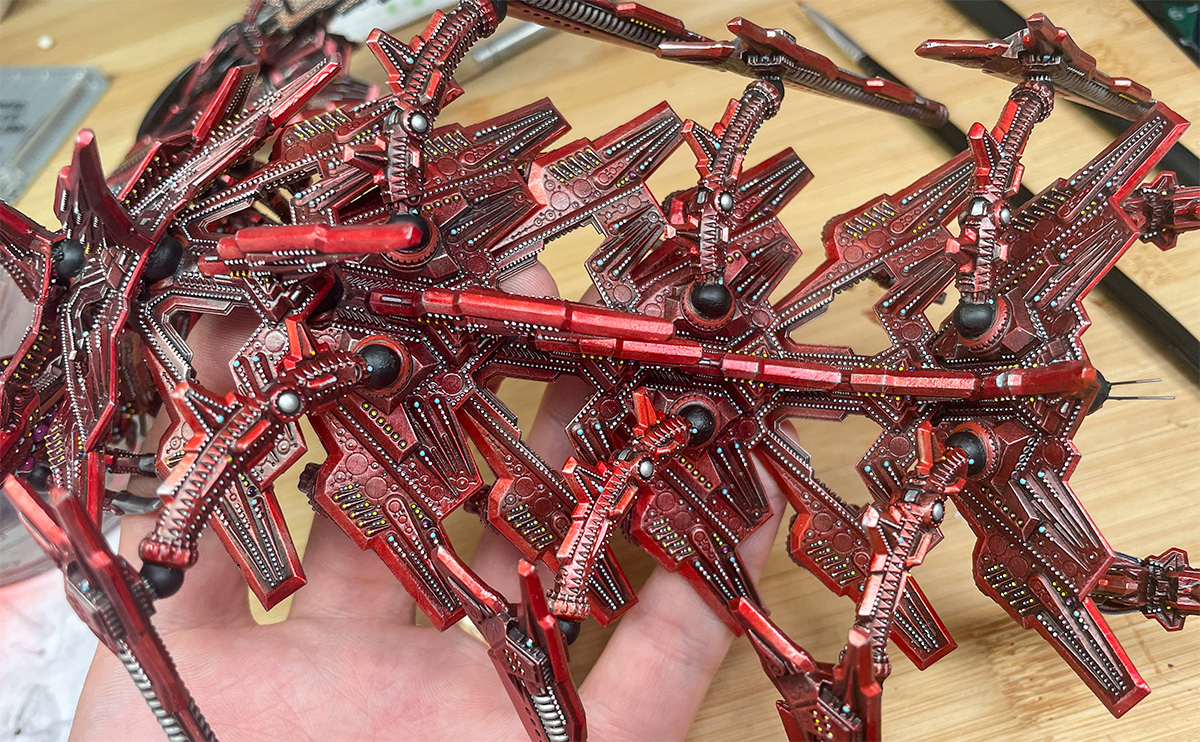
It’s crucial that any joining surface is paint-free—gluing by the paint will result in breakages, and these joints must be strong. So, I masked off all the joining surfaces with white-tac or electrical tape—I’d usually use Humbrol Maskol, but when I opened my ancient pot, I discovered a fossilised lump. Thus prepared, I primed all the parts with gunmetal spray, the end goal being ‘Iron Man metallic red’—loud, very Shaltari but distinct from the standard scheme.
Next came 2 liberal coats of black wash, applied with a fat, speedy brush. On the subject of speed, think of this as batch-painting an army, and that efficiency results in a faster job for the amount of features, relatively speaking. Next, I did a fairly heavy drybrush with chrome over all the parts then brush-painted the leading surfaces of fins and segments pure chrome.
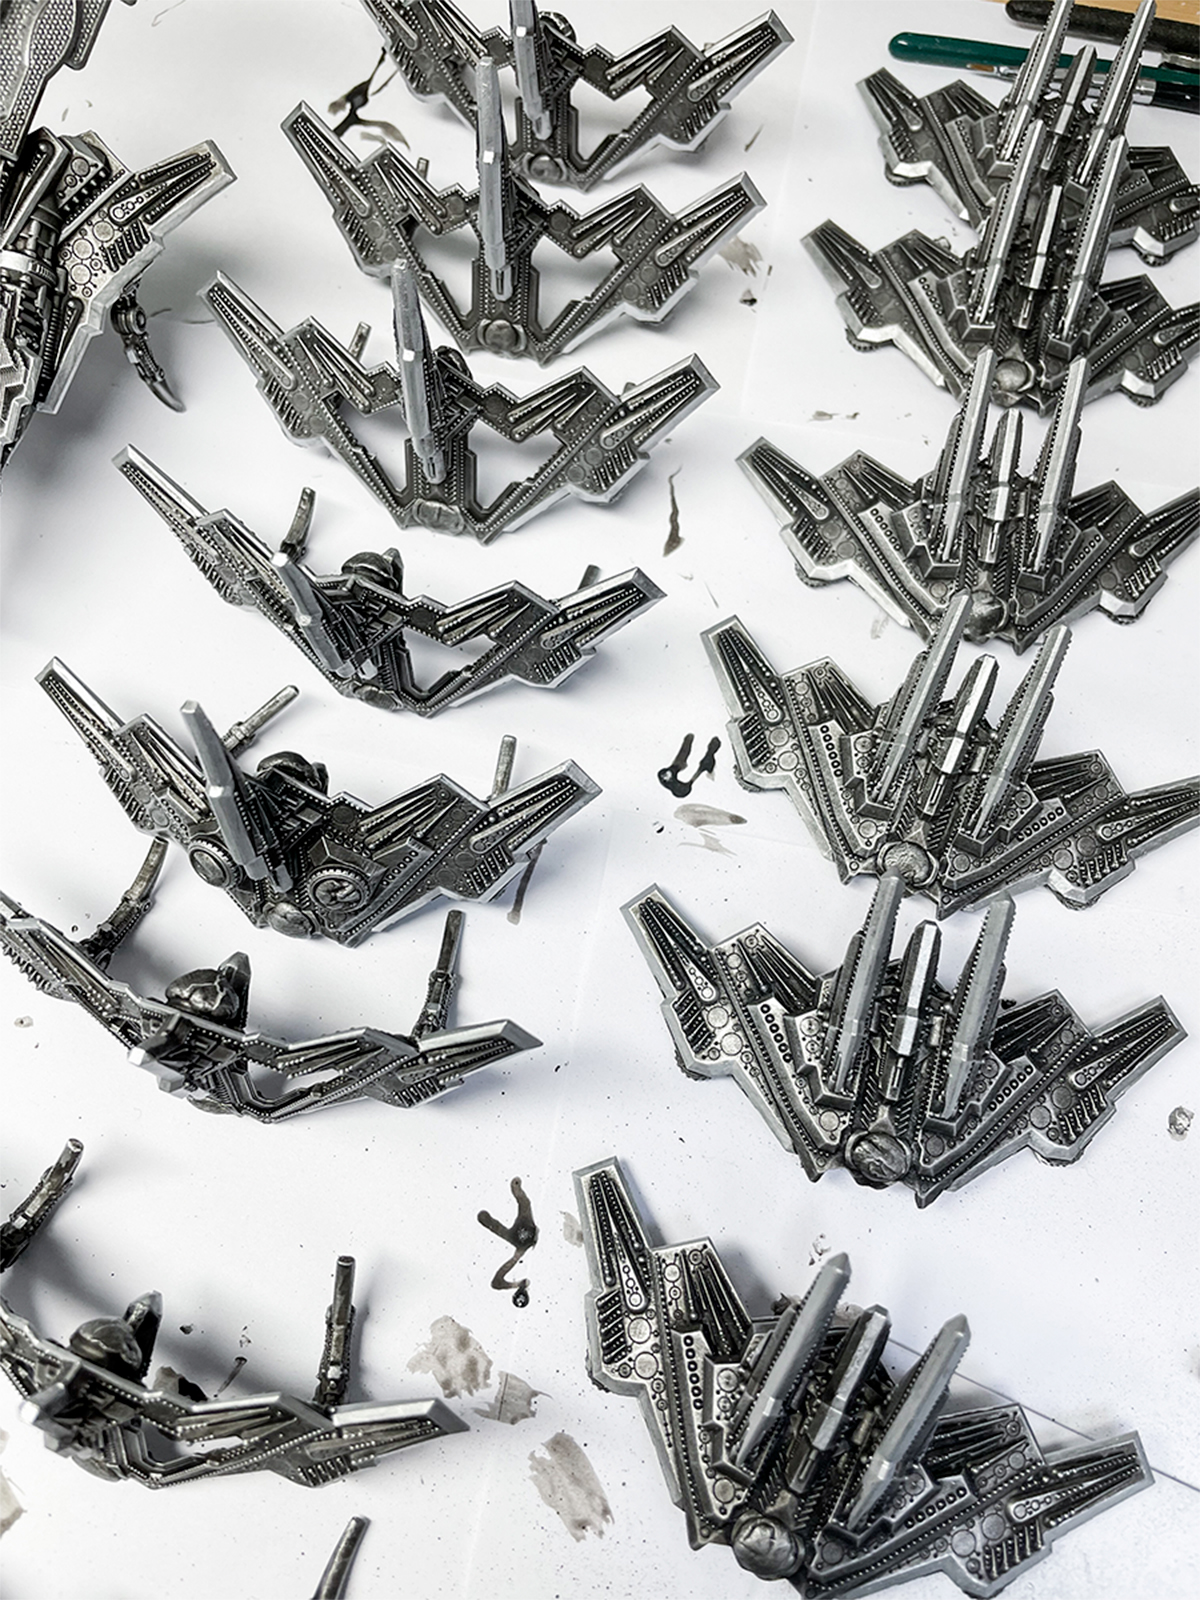
Next was airbrush time. The paint I’d intended to use (Fresh Blood Badger airbrush tint) had, like all my paints, sat unused for five years, and it’d separated permanently. I needed an ink as the metal would show through and remain metallic, but the only usable red ink I had was a really, really old GW red ink, and not much of it. It looked wonderful on a test piece, so I gulped and got cracking. That proved stressful—it quickly depleted, and running dry would have left me dead in the water in need of a vintage, near-unobtainable pot. I got away with it, just.
Next, I did an extremely light drybrush over all the parts with chrome, focusing on sharp, leading edges. It was crucial to keep it light and somewhat-targeted; otherwise the parts would dull, losing their inky, metallic sheen. The last foundation stage was to airbrush blue-black tint (Badger Oil Discharge) into some of the major recesses, like between the segment’s horns.
Feature Painting
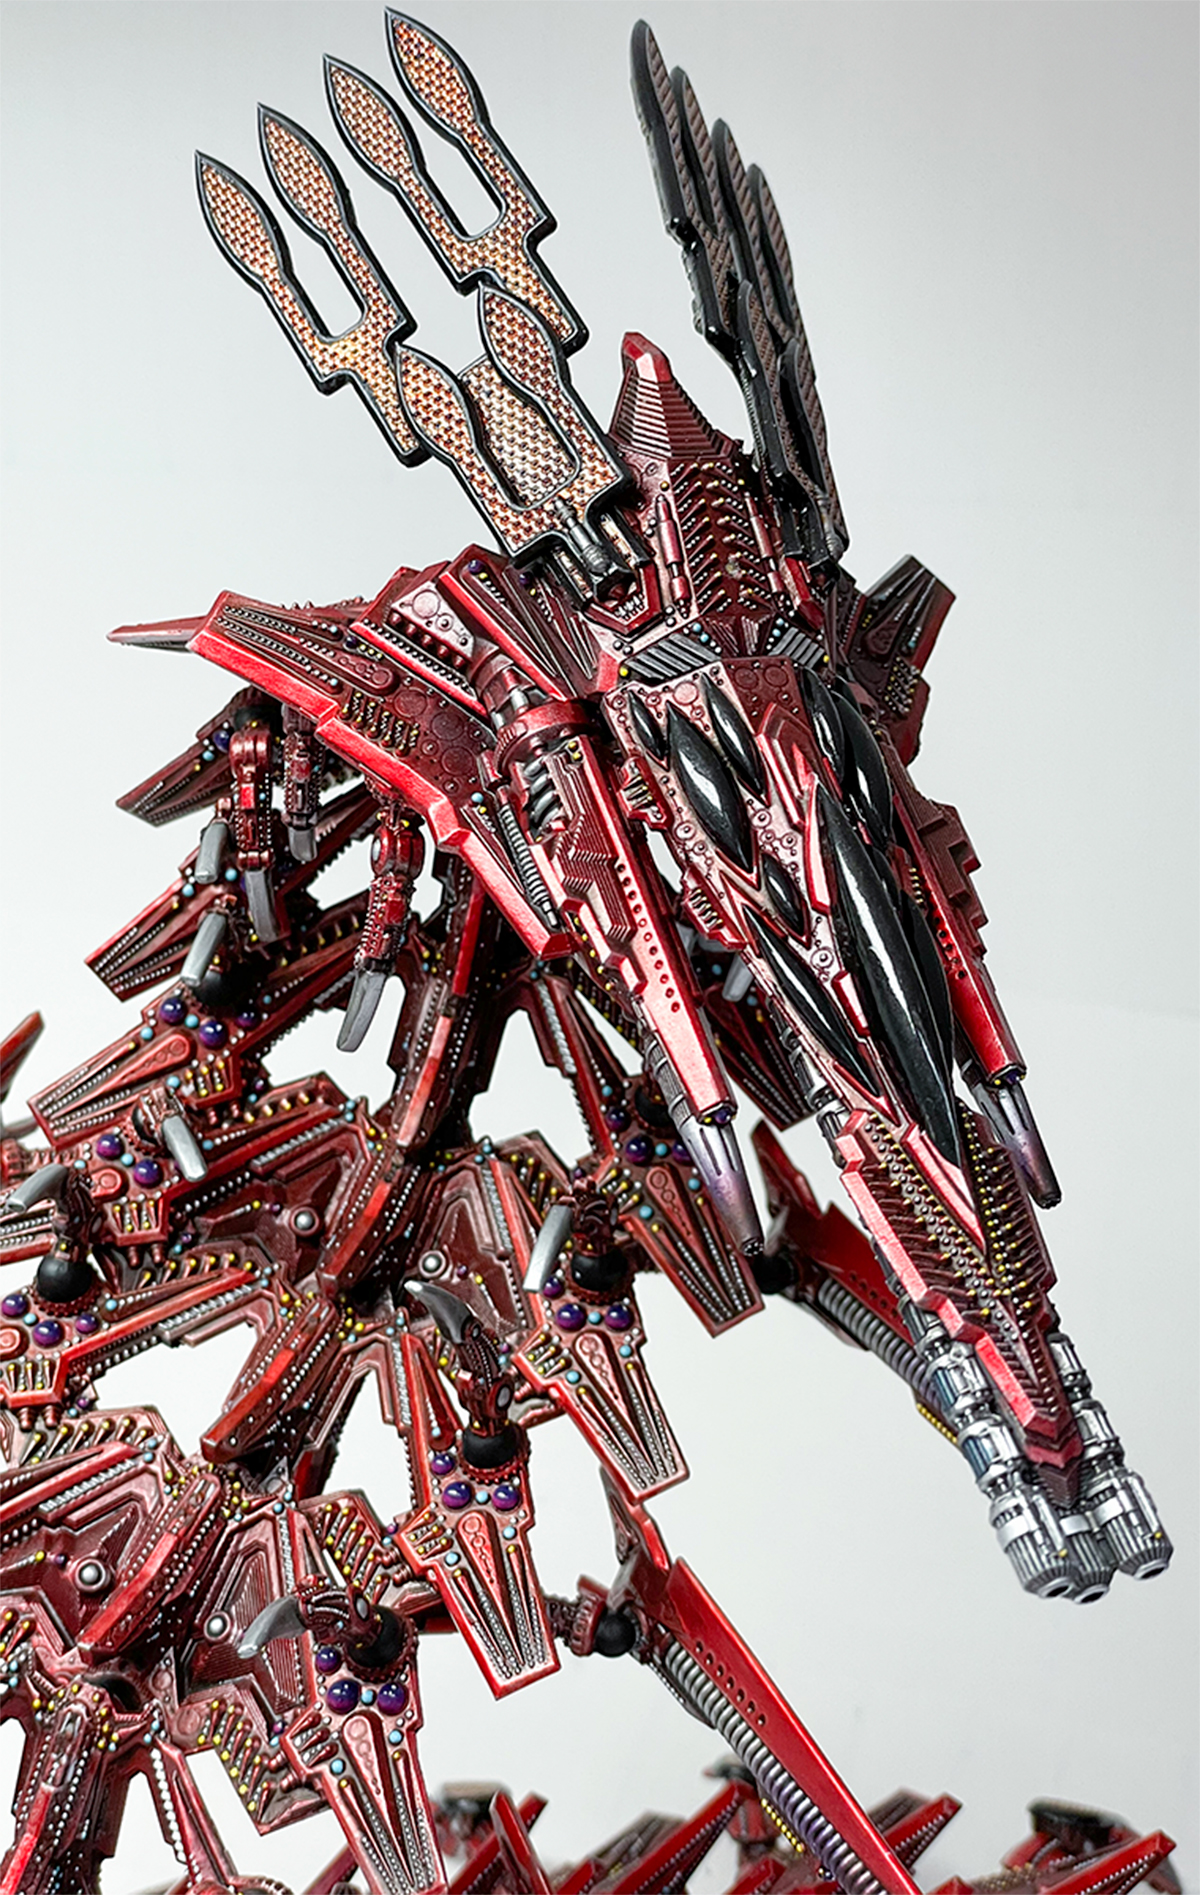
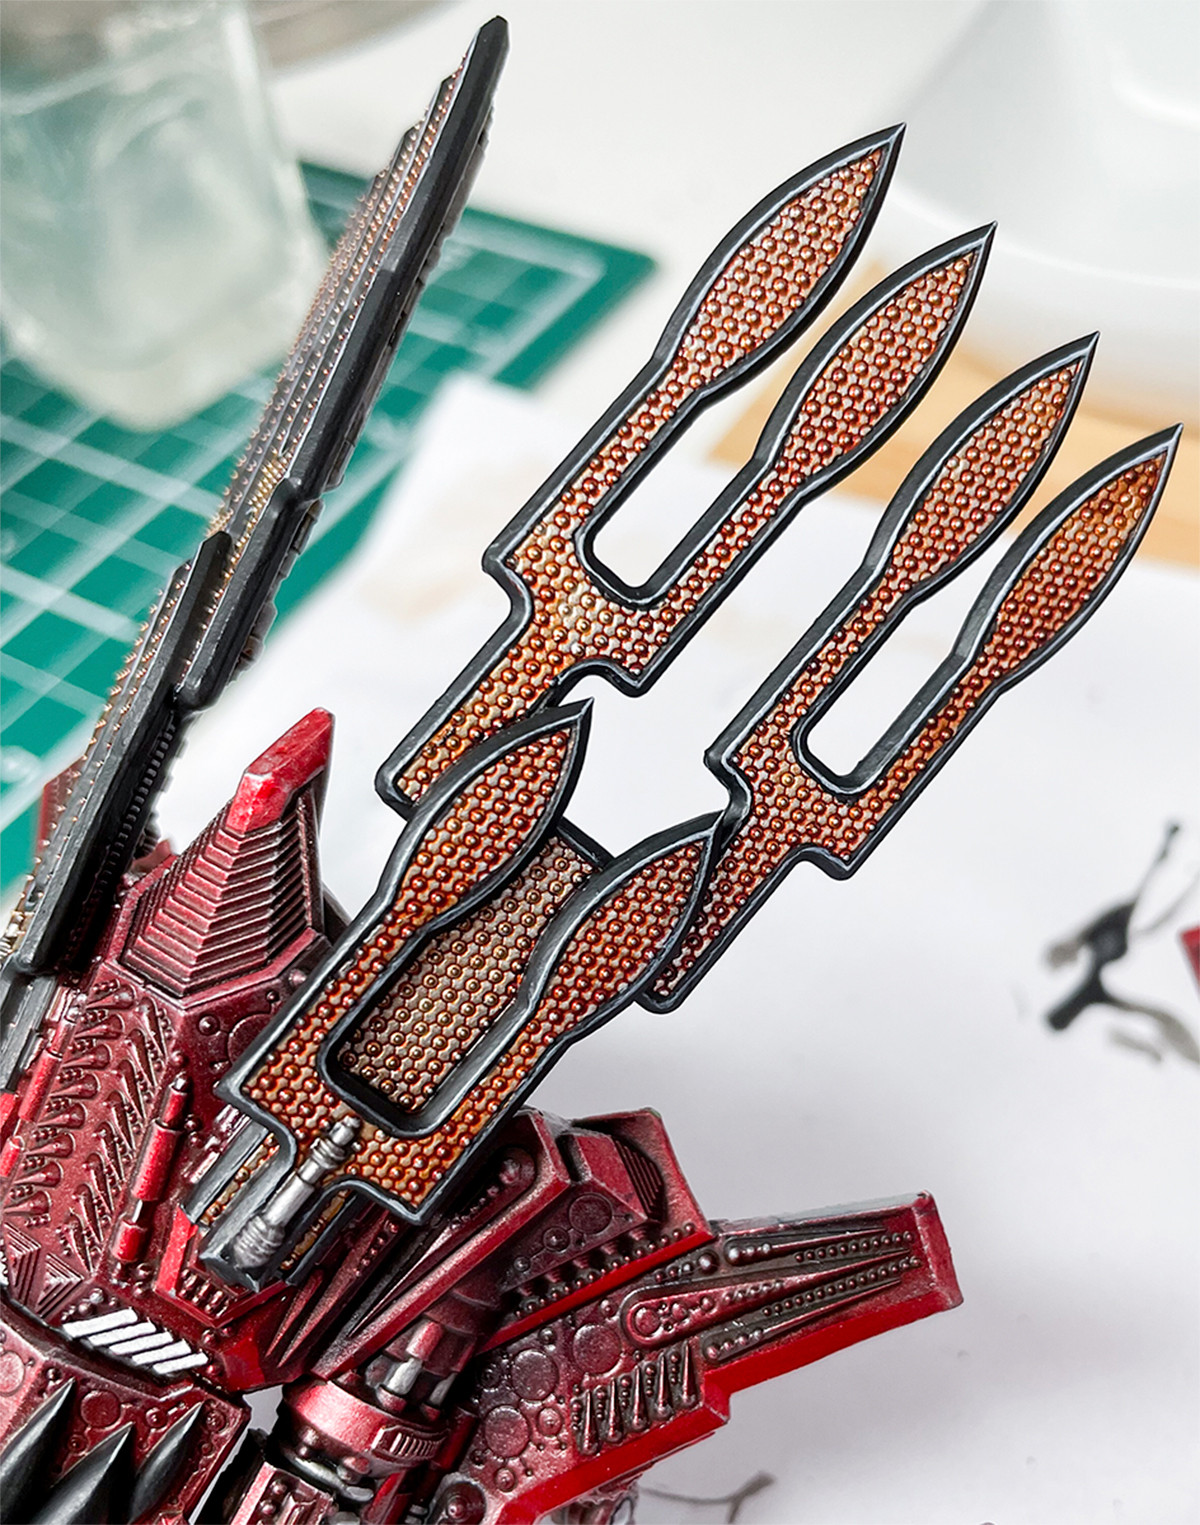
Next, the ‘plain metal’ areas needed a coat of bright chrome, a dose or two of black wash then a brushing back to chrome on the raised areas. The ‘anti-grav pattern’ surfaces (on the leg pads and antlers) also started out bright chrome, but they got a single, undiluted coat of Flesh Wash, another ancient favourite, resulting in gold/bronze finish with all the recesses strongly shaded.
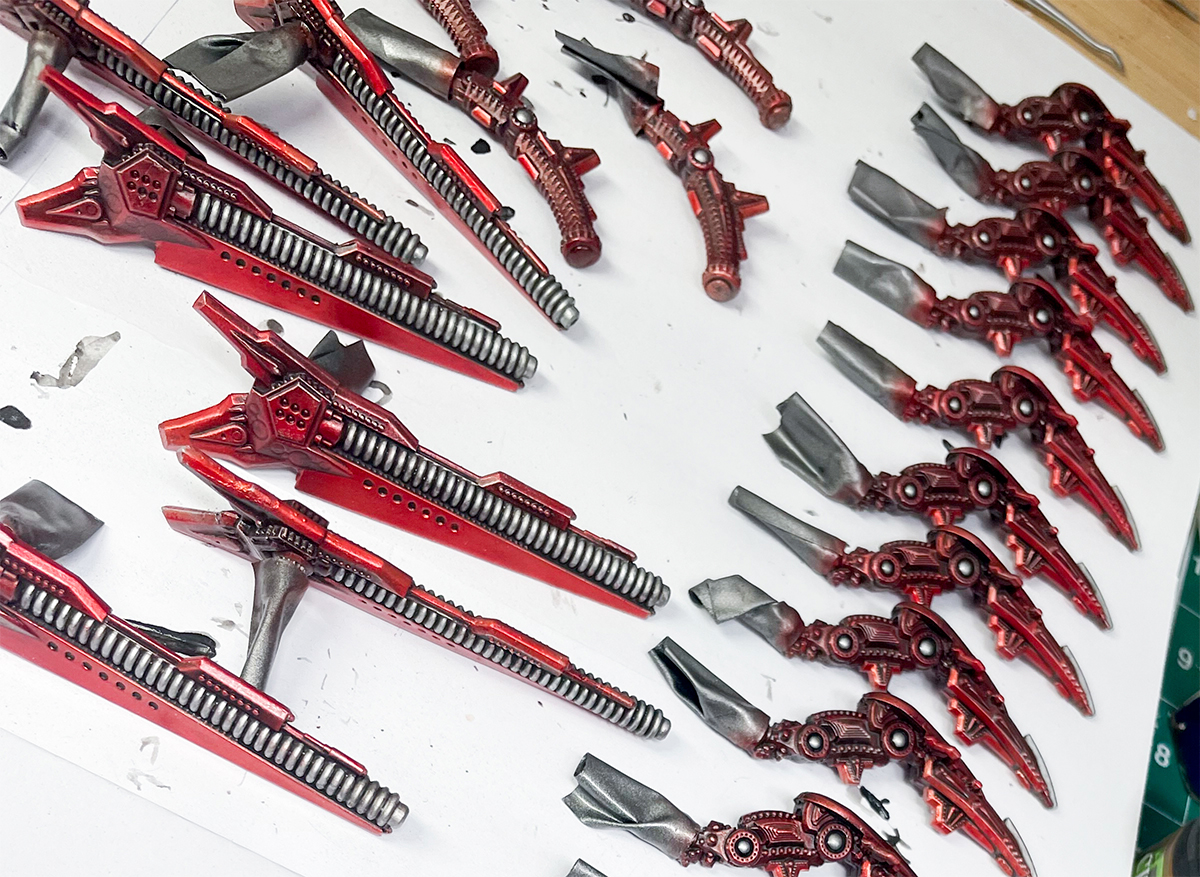
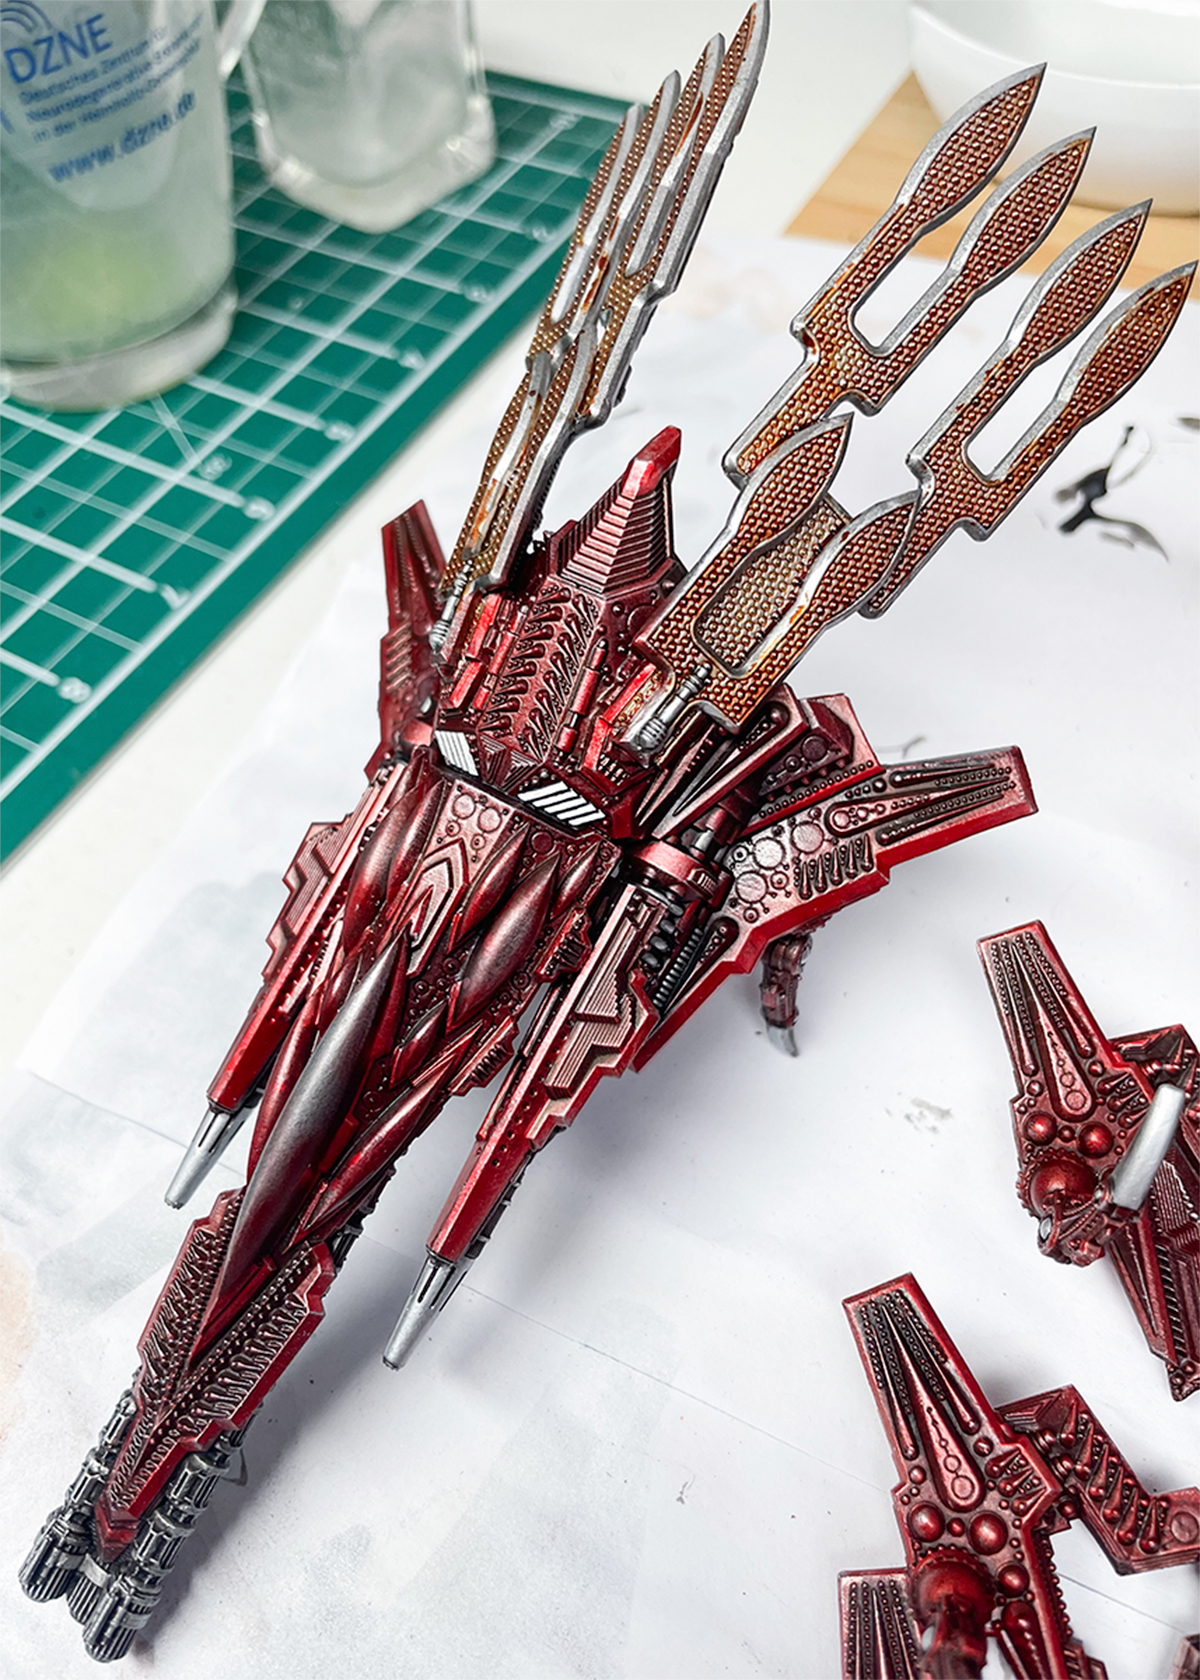
After that, I painted the canopies and the surrounds of the ‘anti-grav pattern’ areas black, highlighted the edges grey—the only sharp-edge brush highlighting I did—then gave them a 50/50 coat of gloss/matte varnish, resulting in a smooth, satin finish. I also gave the gun barrels a heat-scorched effect by successively airbrushing purple wash, sepia wash and finally black wash, as I’d done with the PHR behemoth.
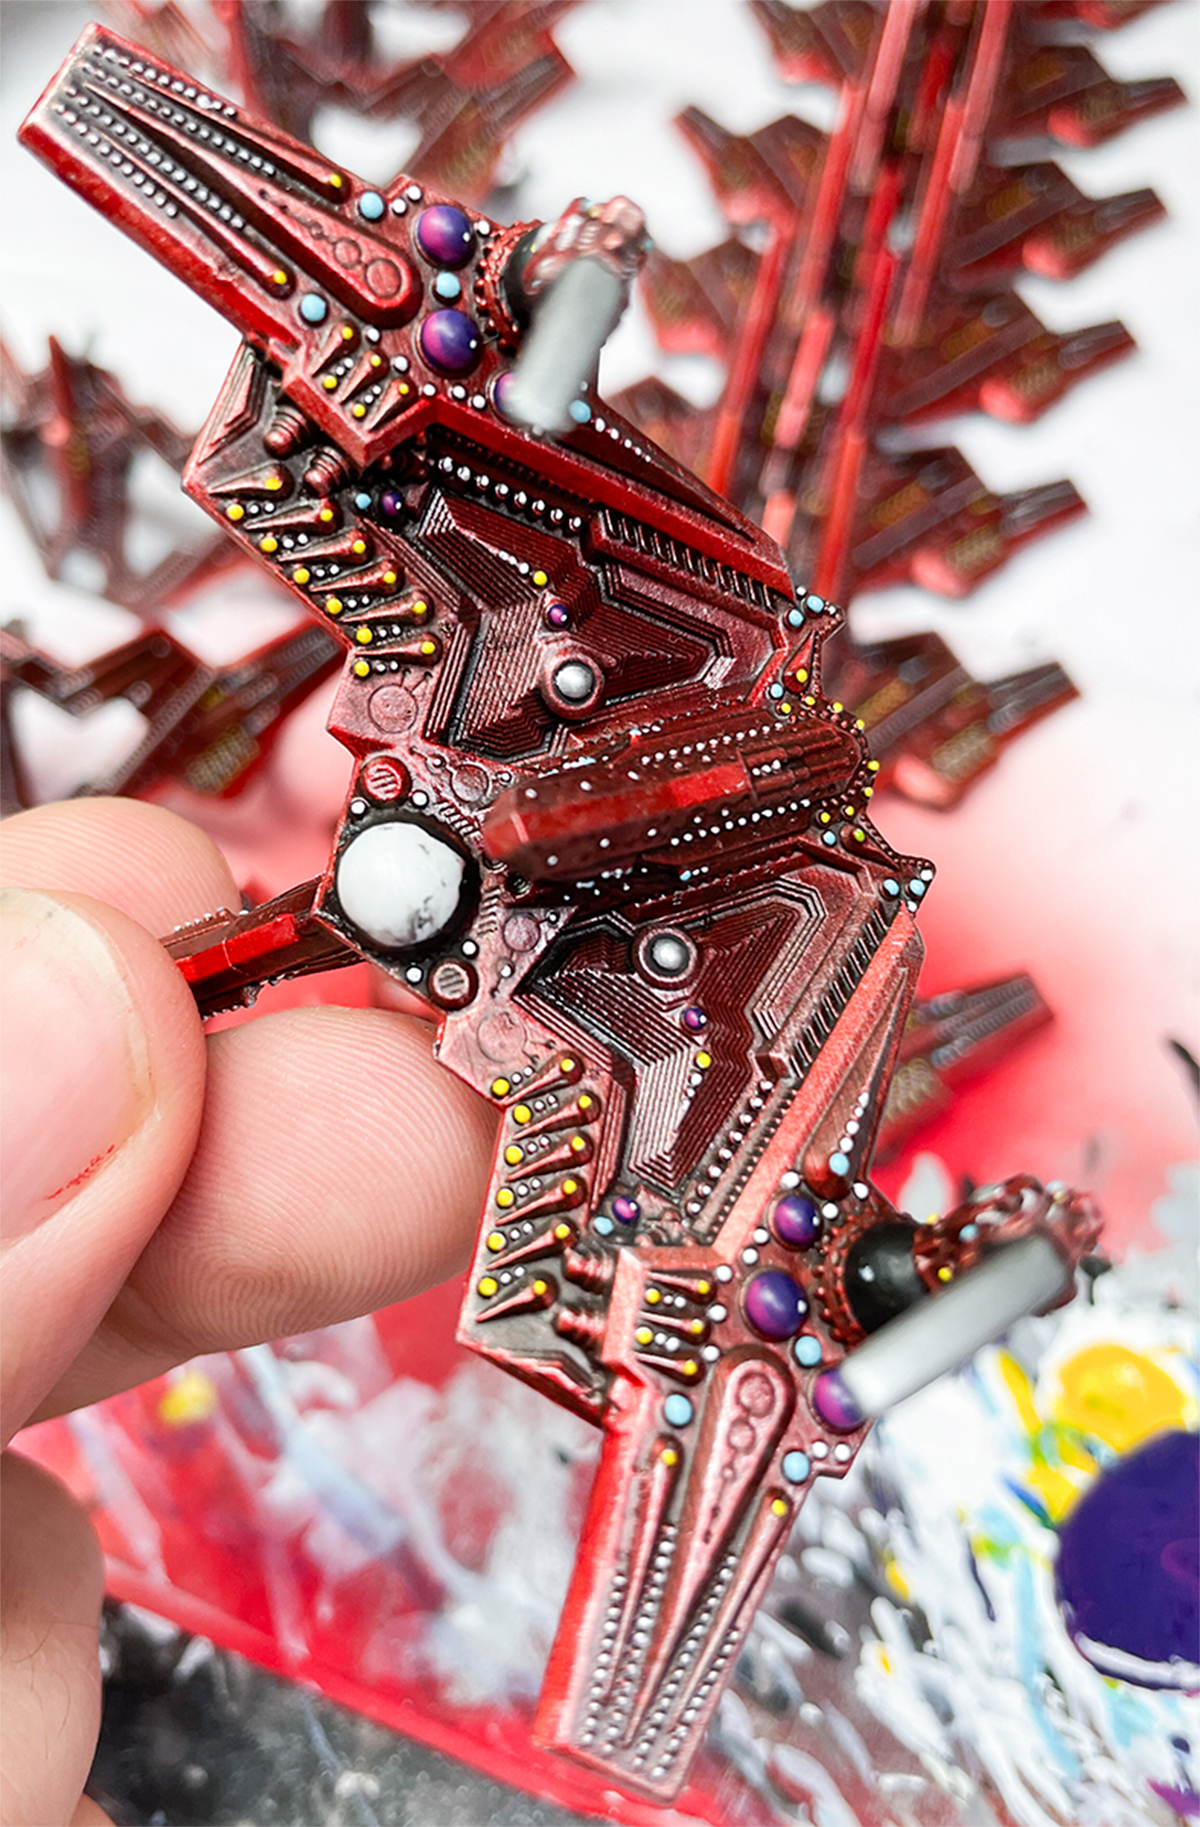
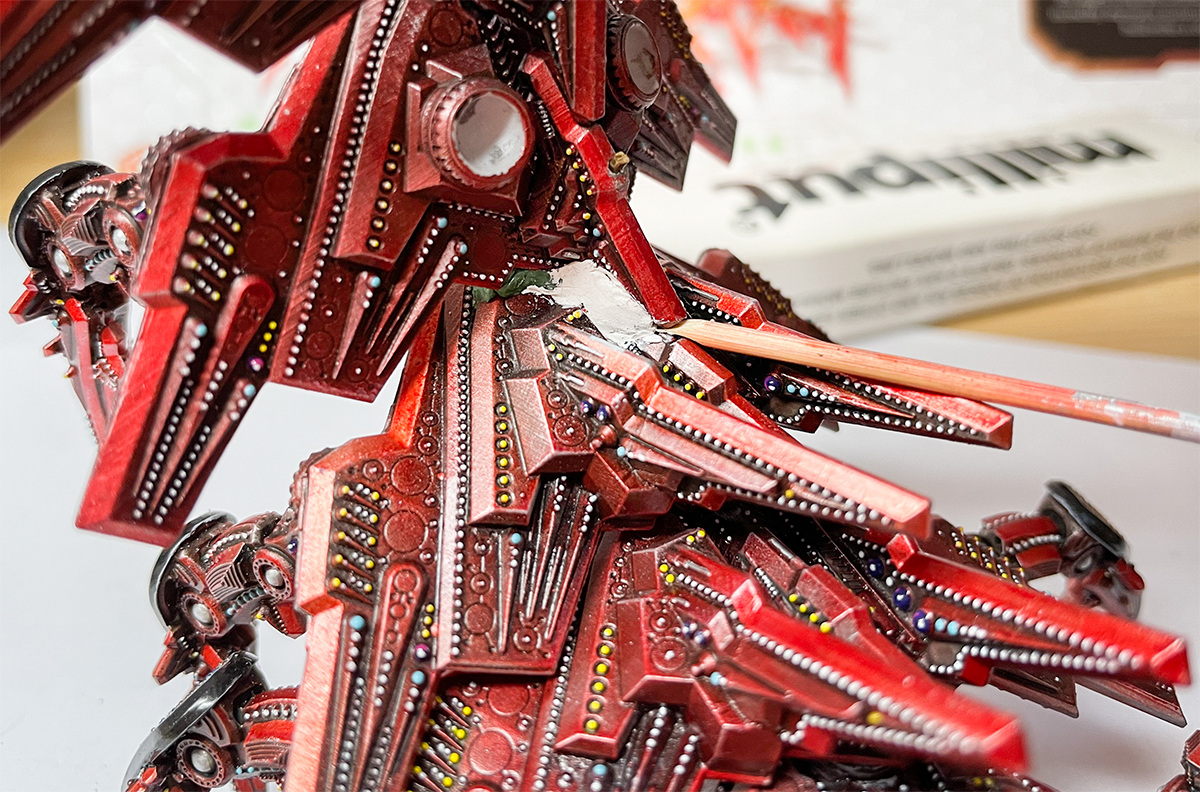
Dots. The horror!
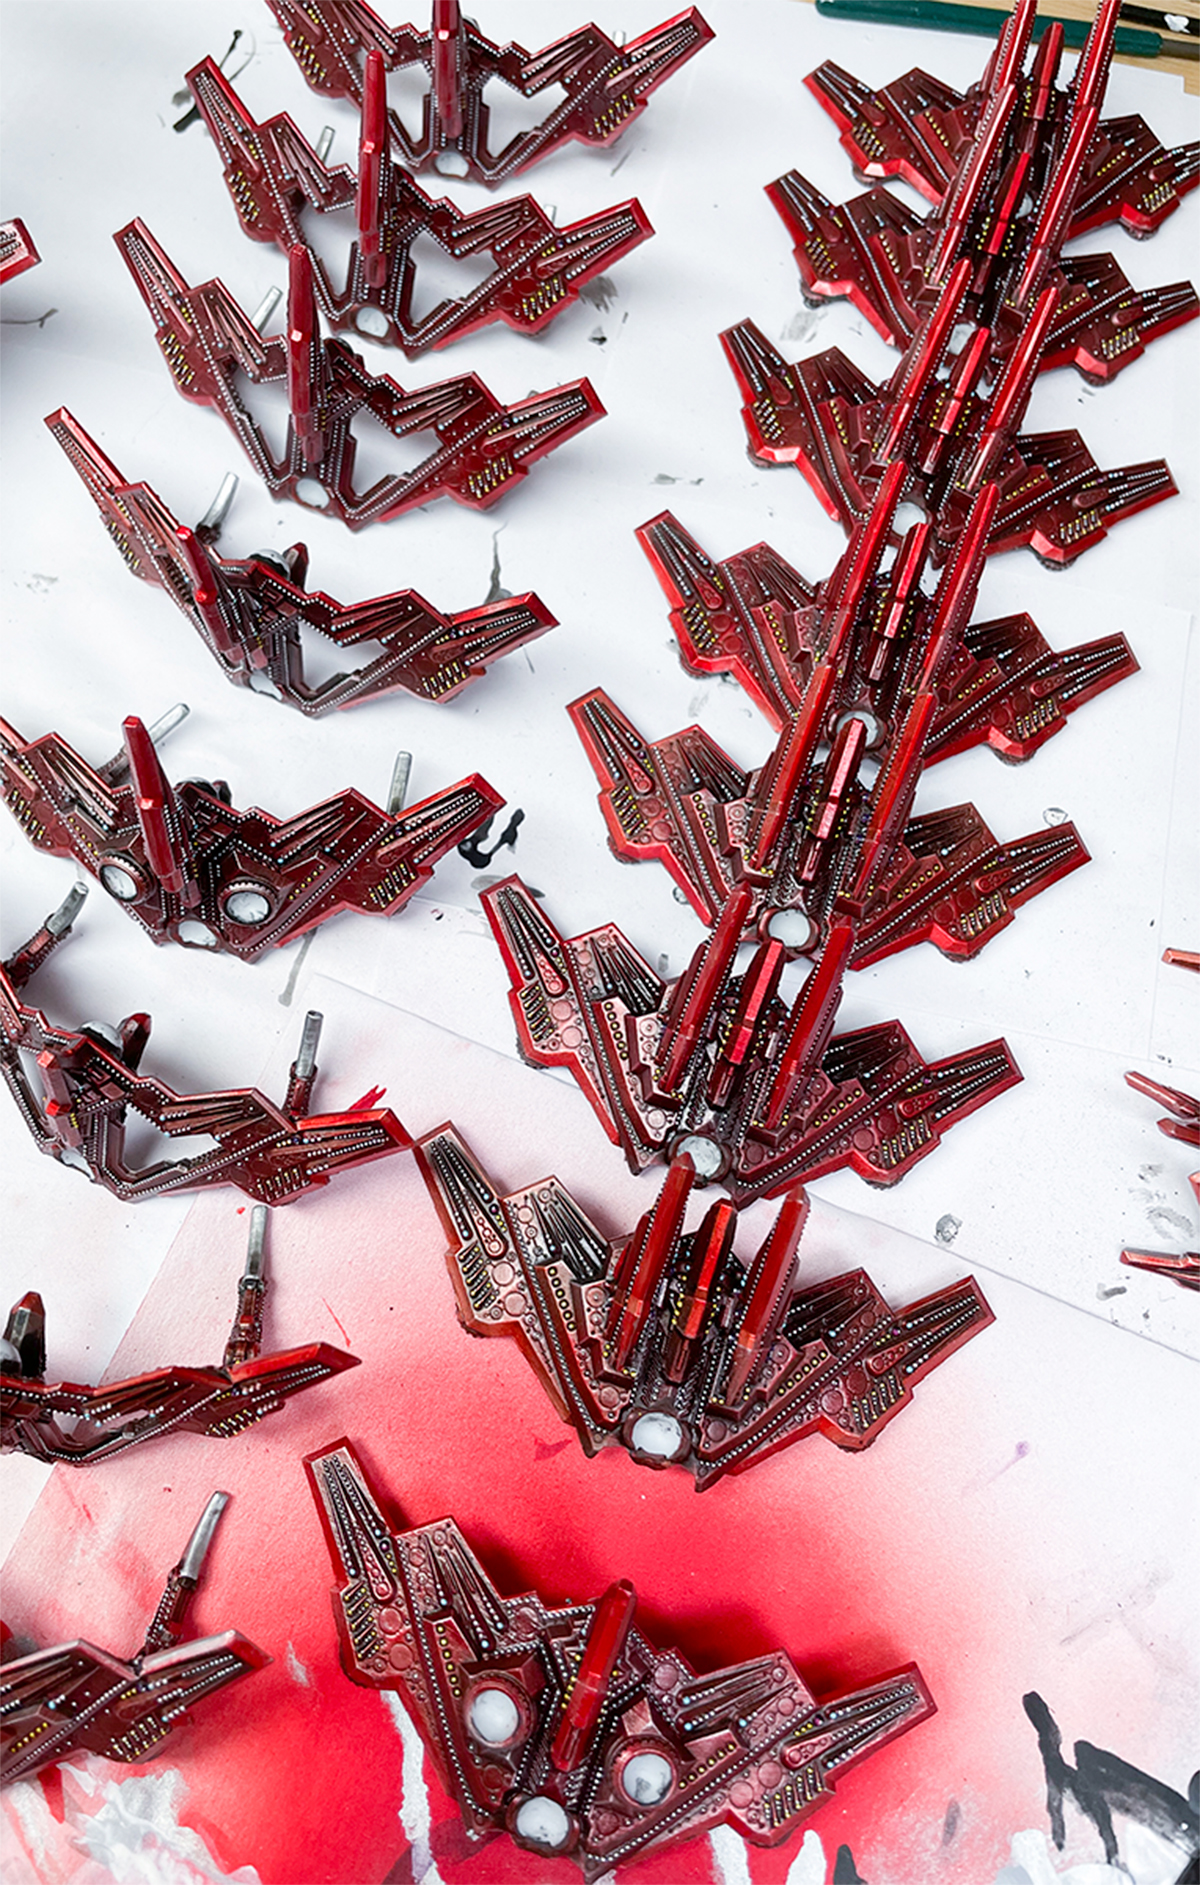

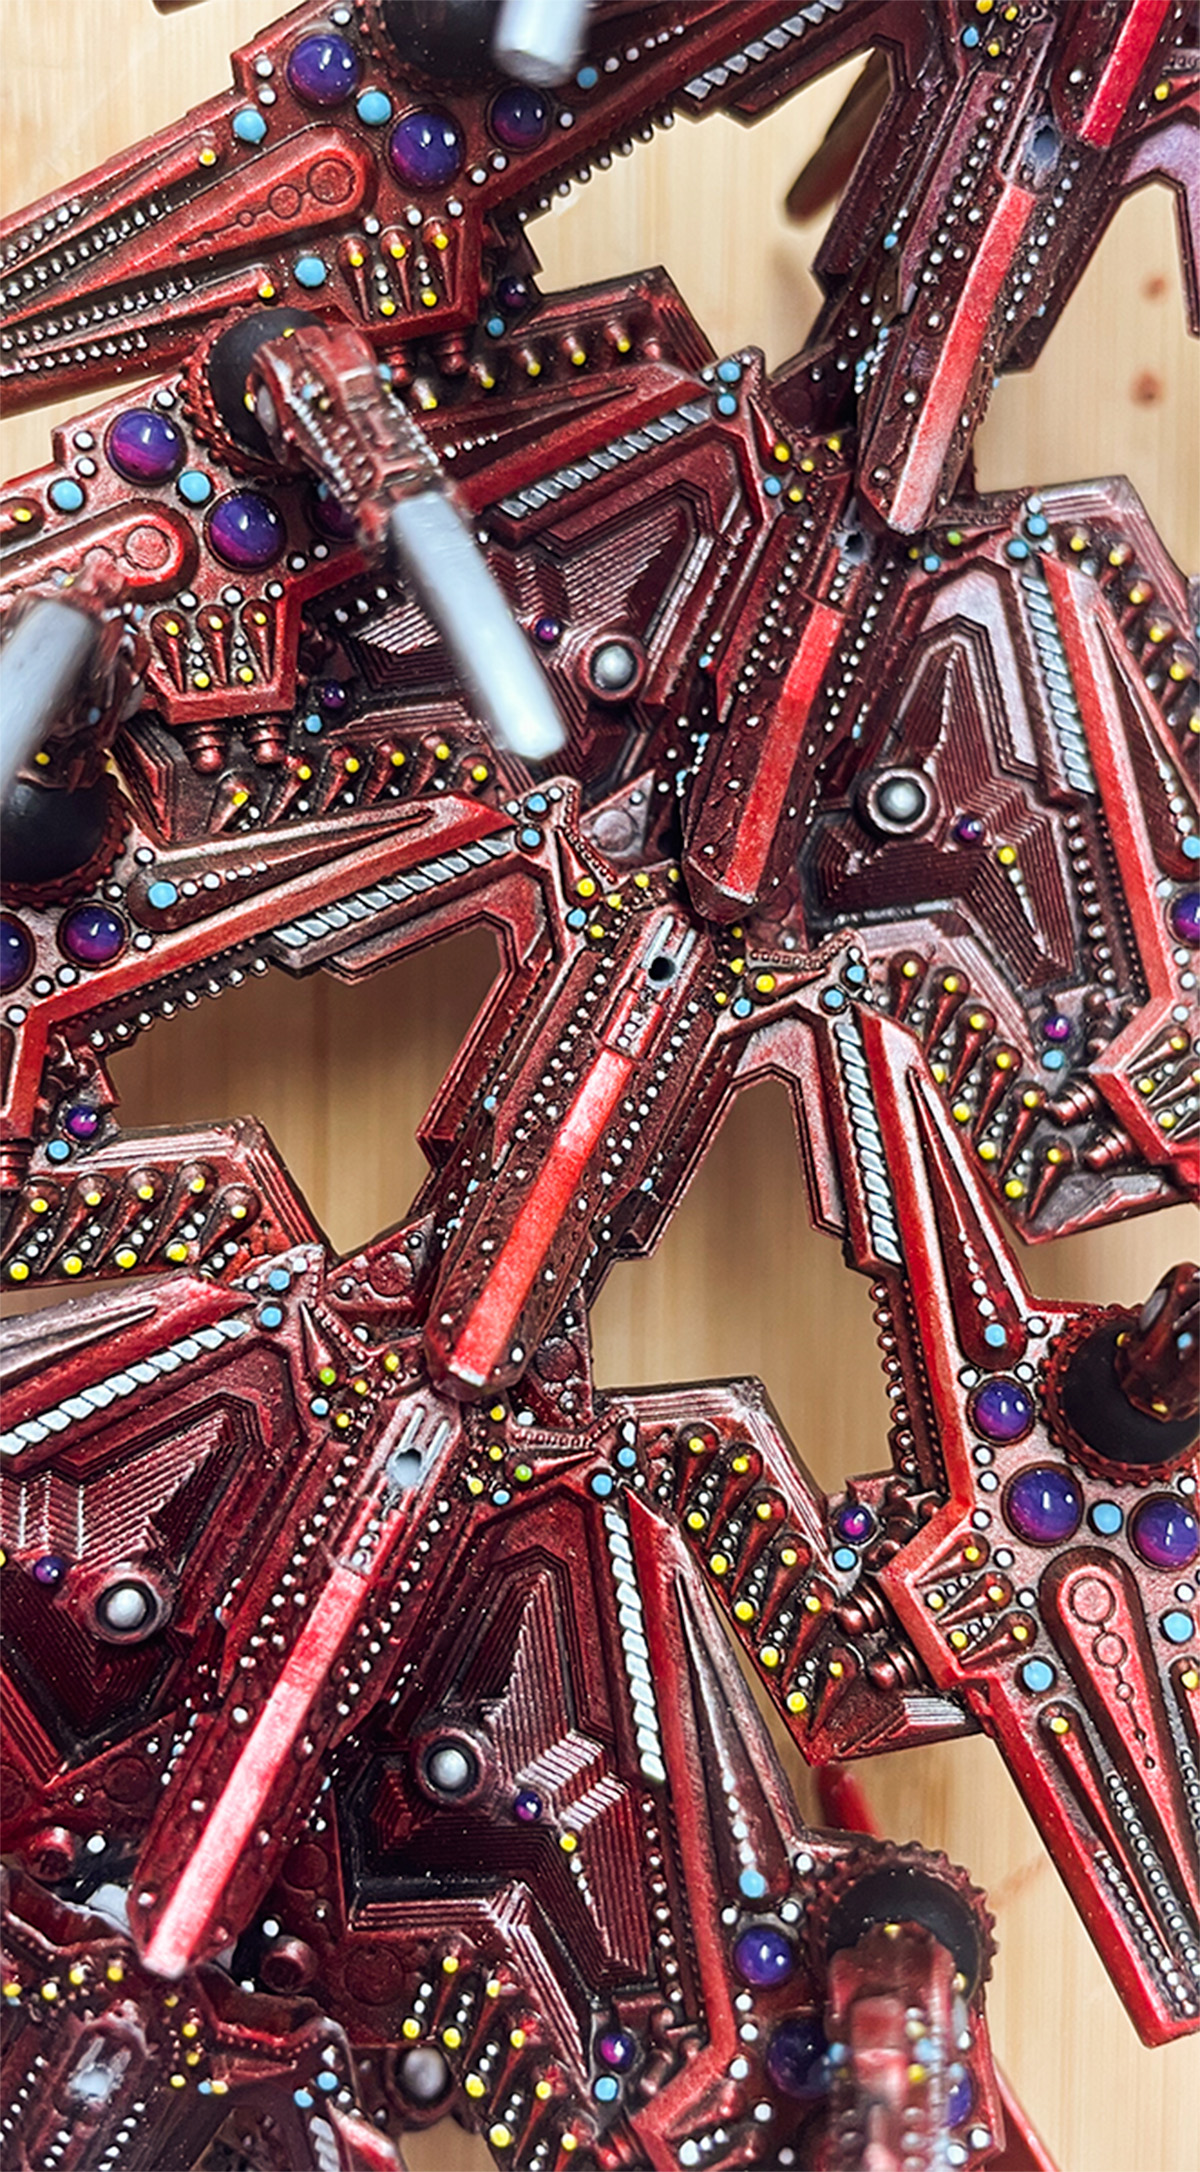
Here, I scuppered myself. It wouldn’t be TOO bad to paint all the dots, would it? I’d try it with one leg, didn’t seem excessively tedious, it looked great—why not? 14 hours later, I knew why. Again, do yourself a favour: don’t do this! Pick some key ones and show sane restraint. I didn’t paint the ones you can’t see under the leg segments, I’m not a total masochist, but still. Oh, and I just counted how many I painted with the help of multiples and Excel: roughly 15,722 dots. Yup. That’s a rate of 3.2 dots/second, actually quite speedy. Right. For all those who do this and thus curse my name to eternal hellfire, you can rest your RSI-riddled hands knowing I went through this too.
So you’ve read the above and still want to know what I did? OK. First, I base-coated most of them white. Some of the larger ones would be light blue, so I didn’t bother base-coating those to save double-handling. I was soon verging on despair and decided they worked mostly staying white. I did pick out a few choice ones in bright yellow to add variety and painted the larger blue ones block-turquoise. Real turquoise is monotone, so I could get away with no highlighting or layers on those. After painting the tiny ones on the ‘anti-grav patterns’ blue, I did the largest ones in purple using the typical ‘gemstone technique’ (dark purple to pink), followed by a thick coat of gloss varnish. I also gloss varnished the canopies on the head. If I hadn’t done the dots, it would have been a simple, fast and effective paint job. Take heed!
Assembly
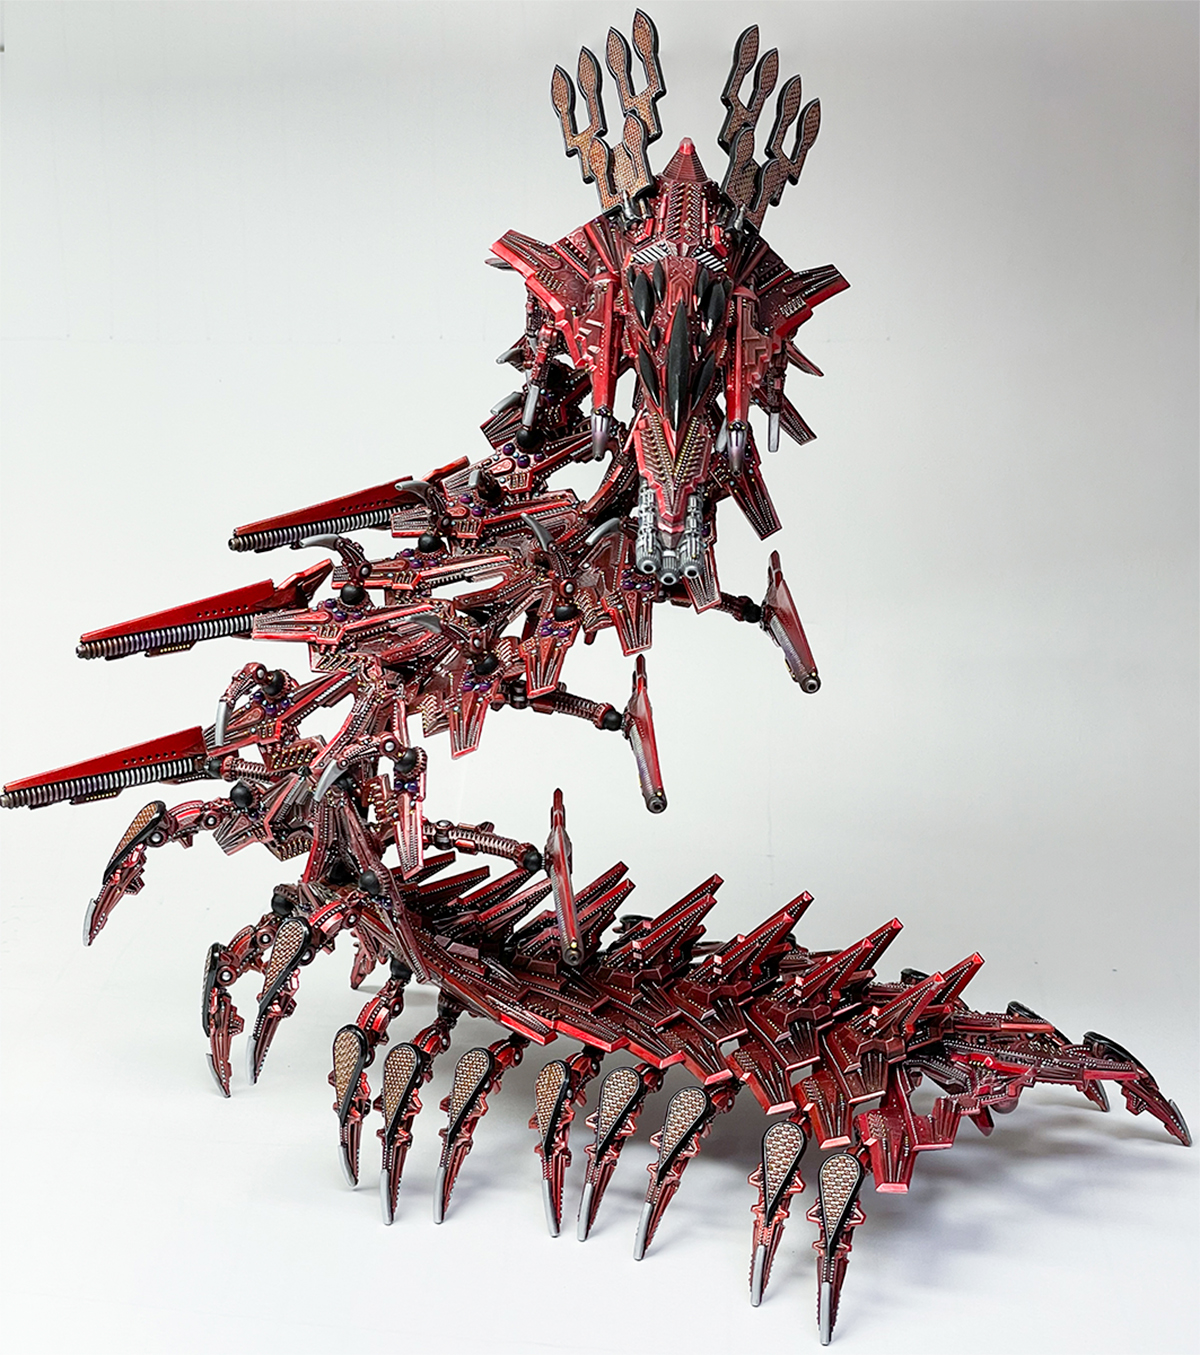
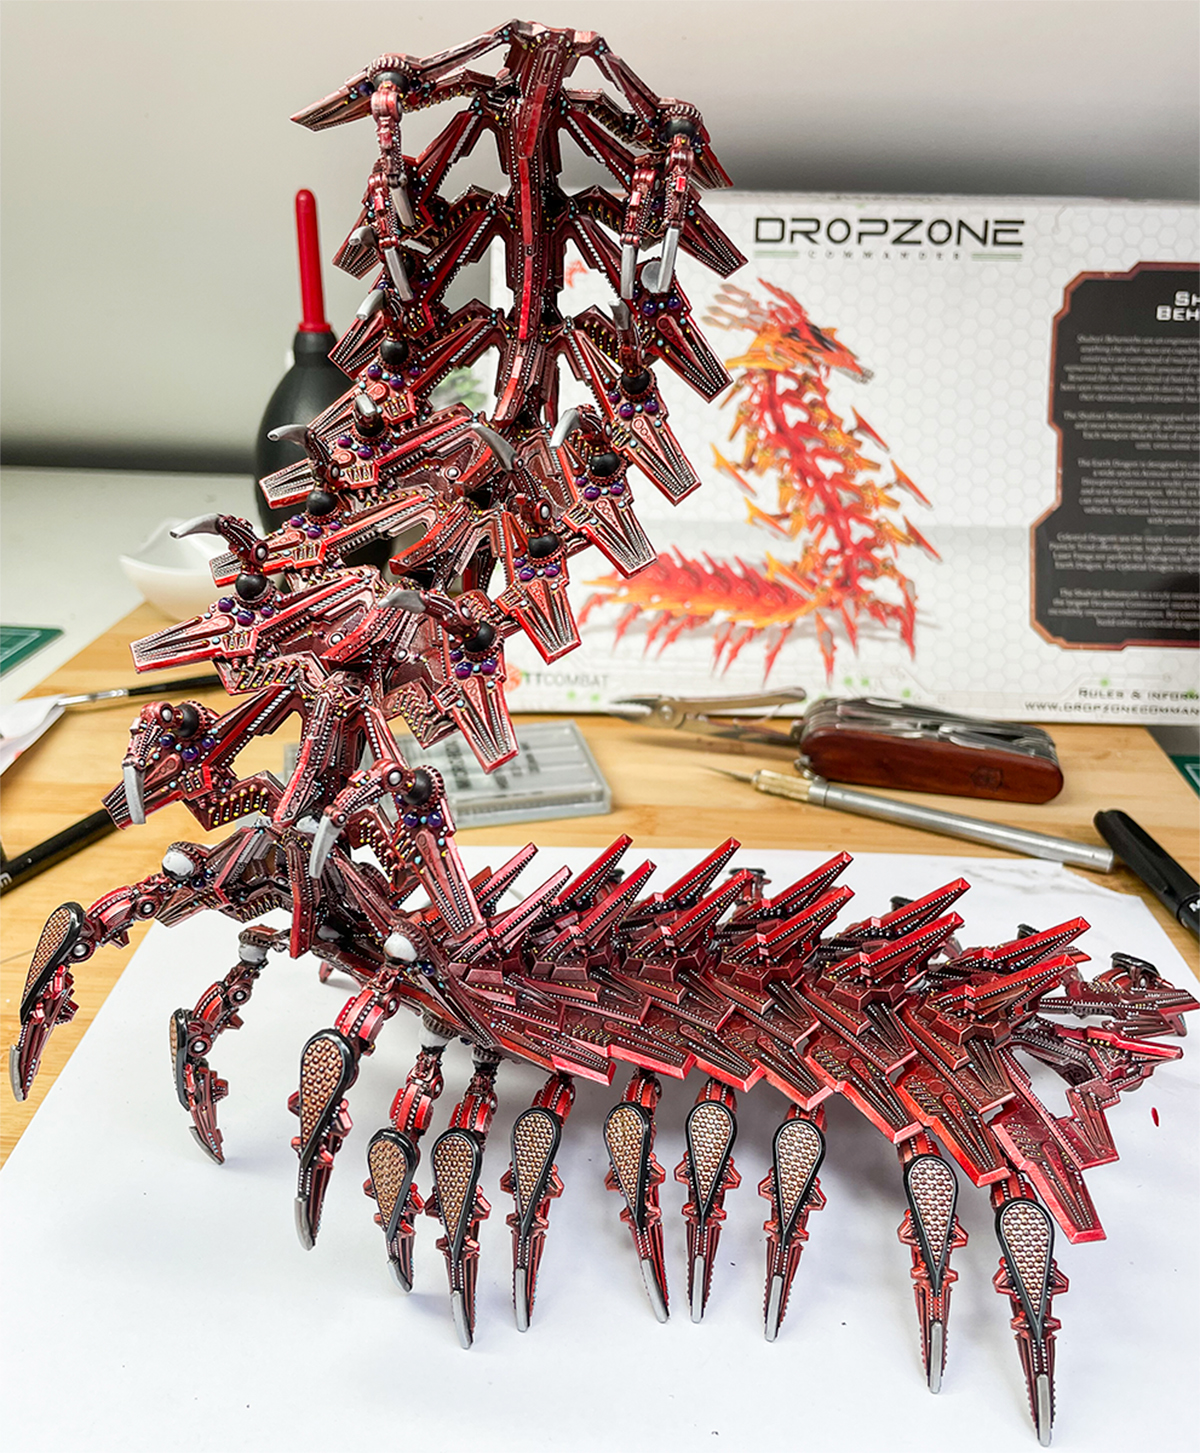
This is the bit that matters most with this kit. Some have commented that the Shaltari Behemoth isn’t a practical gaming piece. Certainly it’s not garden-variety, but it can be sturdy if built right, built well and if you include a few takedown points to aid in transport. The main thing in this model’s favour is its lightness—with the head removed, most of the joints are under minimal stress.
First, I ran over all the joining surfaces with a file, emery cloth or bullet-shaped dremmel tool for the sockets (held in the hand). This adds surface area and microtexture for glue to key into, leading to stronger joints.
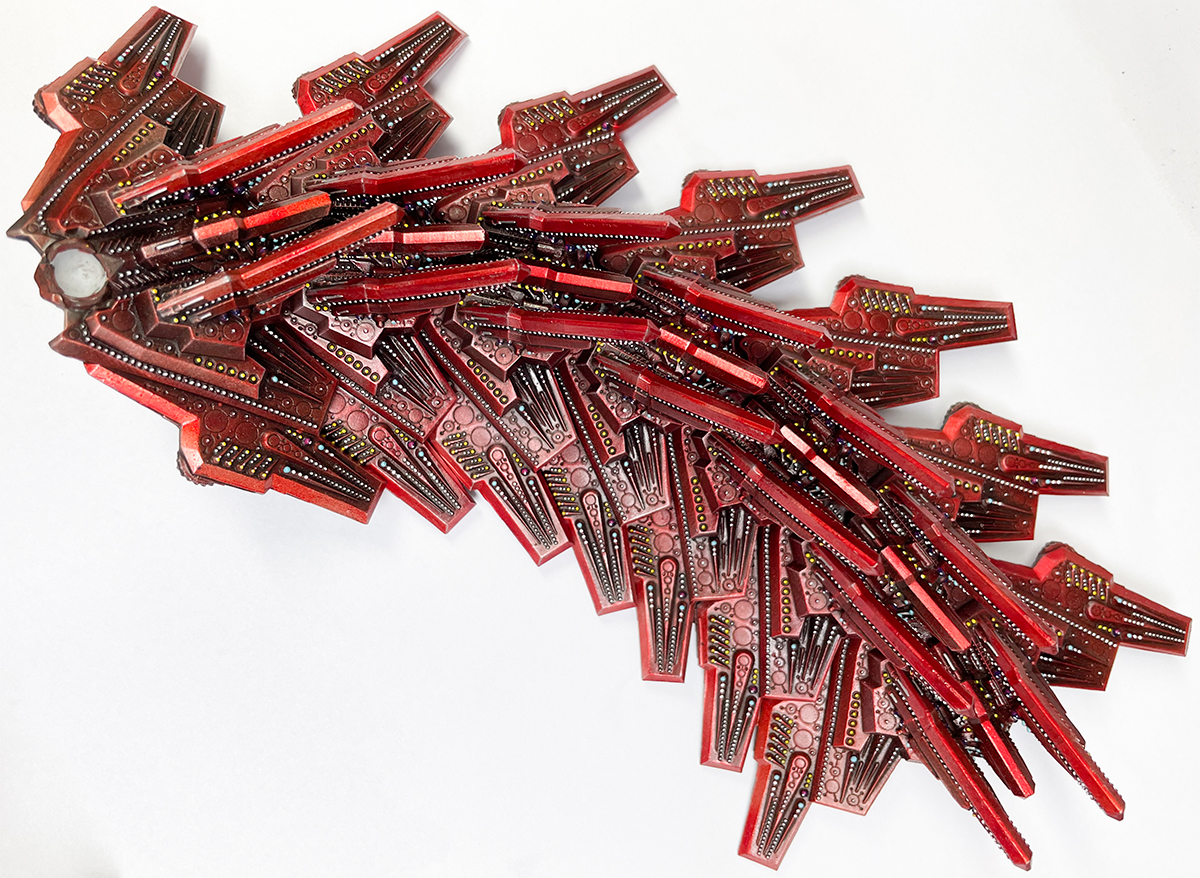
The first step was easy: glue all the leg segments together. I wanted a gentle, consistent curve here, incorporating a slight climb towards the most forward segments. Here, I realised I was missing the tail segment, swore profusely and went back to the painting desk to paint one of my spares, which meant MORE F-ING DOTS. I added it to the assembly, glued on a front leg, a back leg, then another back and front leg. This got the leg section’s height and angle sorted. I could now glue on all the other legs while planting the model on a solid, flat surface, laying down a healthy amount of superglue on both surfaces, being sure they were well covered and saturated for maximum strength. Use the best quality superglue you can get!
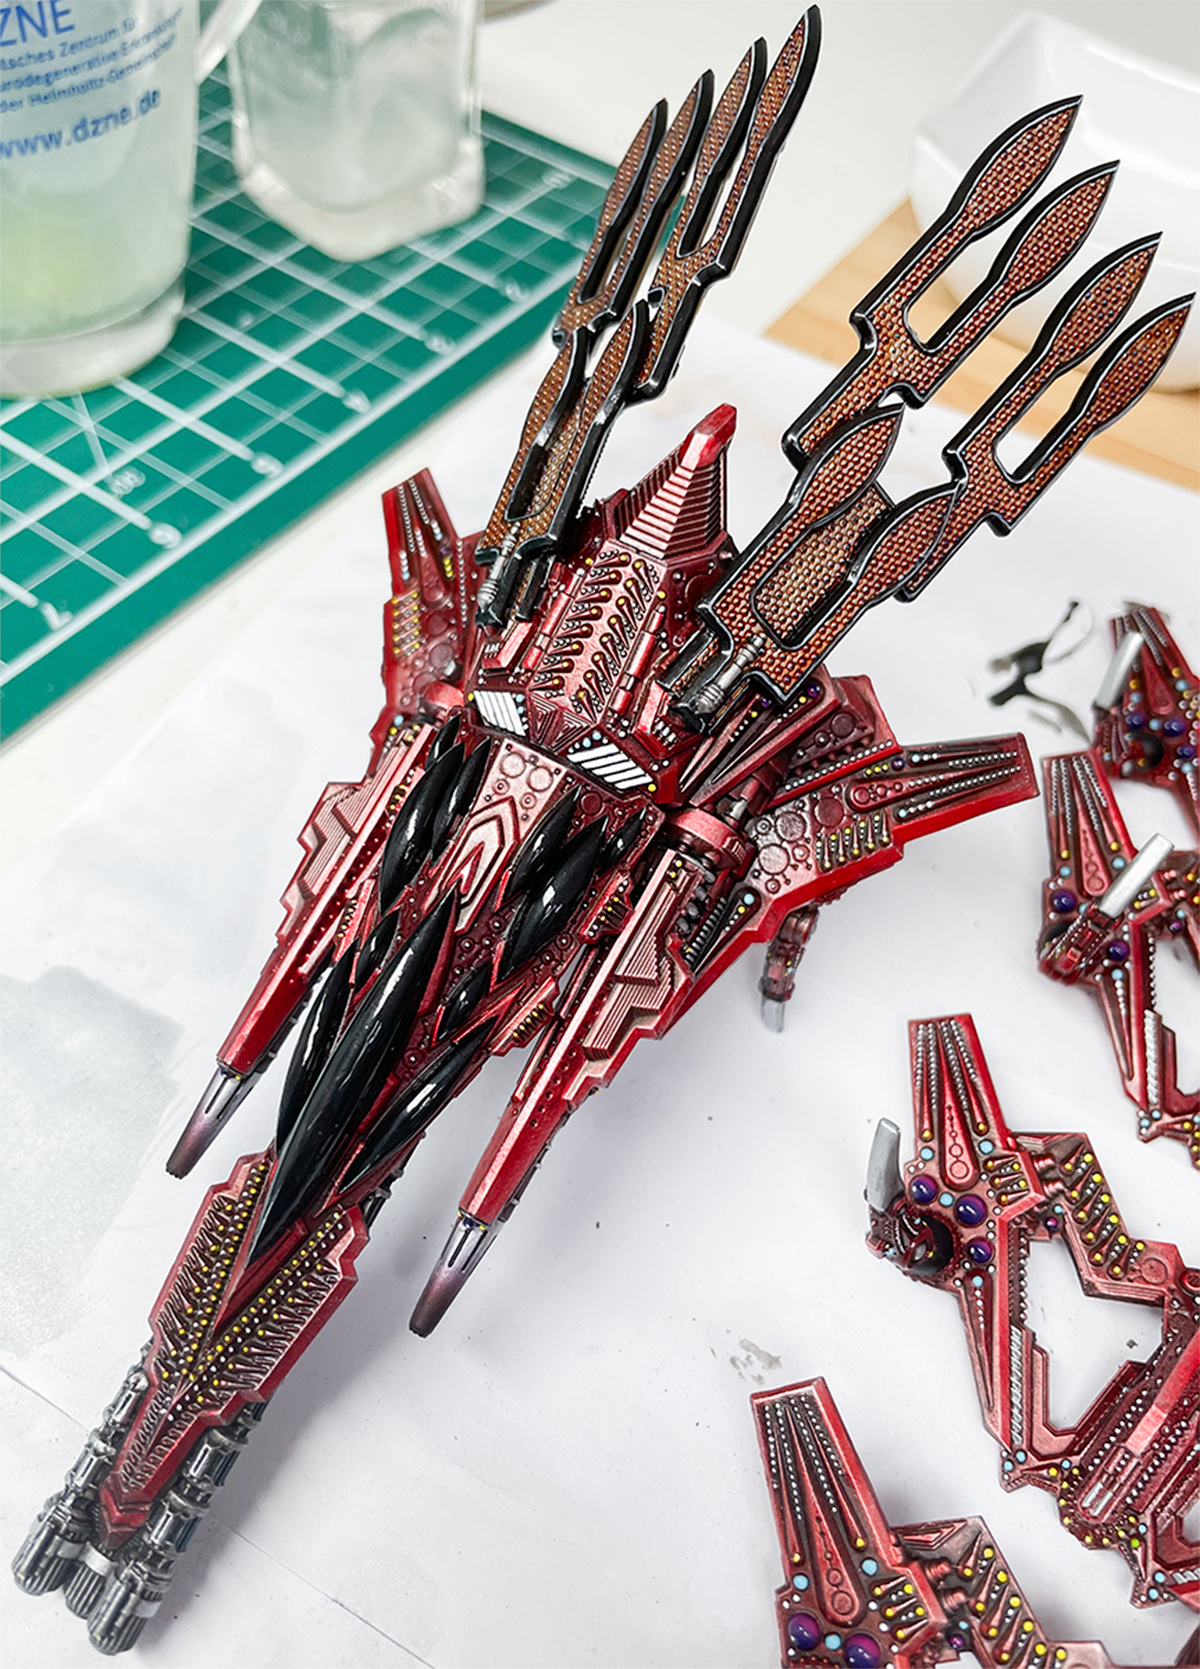
The next detachable part of the model would start with the lowest gun arm segment. First, I drilled in two pins so it would stay together during assembly—these would later prove insufficient, but they worked for this bit. I glued all the other segments in place right up to the neck, aiming for a variation on the ‘standard’ pose with a turned, downwards-facing head for dynamism, implying some motion. Arriving at the desired head angle was the trickiest bit and called for several dry runs. Take your time, it will come together.
Next, I drilled some thin pins into the gun arms and attached the guns to them—not necessary, but easy. I’d done a few dry tests to make sure the gun-arm angle wouldn’t make the final assembly impossible, but they’re forgiving—the arm-body ball joint has a ton of available movement.
At this point, I realised that with the weight of the head on it, my little pins joining these sub-assemblies weren’t enough to stop the joint rocking back slightly. So, I drilled a wider hole right through both for a removable 1.2mm diameter brass rod—better, but still not enough. So, I filled the front of the joint with green stuff after painting all the contact surfaces of the higher sub-assembly with oil to ensure it could be pulled free once cured. After, I decided green stuff might be too springy, so I added some white Milliput behind it, another epoxy putty, but it cures rock hard. I should have used that from the start. Once cured, the joint came apart nicely. None of this would be necessary if you just glued it all together, but I wanted it to be easier to move. I did a similar thing to make the head removable, this time using only Milliput to fix the head’s angle.
Next, I glued on the lowest two arms—easier for handling not to glue the other four arms on yet—they’d match the angle of the bottom two, so it wasn’t necessary to do them all yet. Importantly, the left trio had to match the head’s angle.

Once these were on, I separated the sub-assemblies. To add more strength, I drilled 1.4mm holes through each of the arm segment sub-assembly’s ball joints and pushed a 1.2mm brass rod into each, being careful not to drill all the way through. I glued in the rods using G-S Hypo Cement—used by watchmakers to glue crystals into watch cases, this cures slow-ish, doesn’t shrink much and sets rock-hard. The tube incorporates a super-thin applicator needle, great for ensuring a pinhole is filled with glue. It’s inexpensive and very useful for pinning. I did the same to the two forward segments on the leg segments sub-assembly—those which would encounter some loading stress. The last assembly job was to glue on the other four gun arms.
The last thing to do was paint any exposed resin on the ball joints black. Some areas needed repainting due to whitening from nearby superglue out-gassing or drilling, but nothing too onerous. I put the thing together, sighed in relief, and maybe felt a little glad I’d painted the dots. That was Past Dave’s problem.
I hope this has been helpful as you embark on your building of this, surely the craziest kit we will be releasing for the foreseeable future!
Dave