Resin miniatures are easy to assemble…
You’ll be surprised how easy Resin is to work with. Dropzone Commander is a predominantly Resin game, meaning you must learn how to prepare your miniatures before painting. Thankfully, Alex from Bottom of the Barrel is back on TTCommunity with an invaluable guide.
The following is written by Alex.
Working with resin miniatures
So, you’ve just unpacked that Dreadnought your not entirely understanding but very supportive partner got you for Christmas. Or the Dropzone starter box gave you a taste for tiny tanks, and you’ve got yourself an armour box. Or you’ve heard the siren call of the canals and have taken the plunge (hopefully not literally) into the canals of Venice.
You’ve unwrapped the packaging, grabbed your plastic cement, but… where are the sprues? What are these giant wedges of material attached to the models? And why is everything so… greasy? That’s right, you’ve just opened your first resin miniature kit. Don’t worry, it’s not as scary as it looks. Hello – I’m Alex from Bottom of the Barrel Battle Reports, here to walk you through how to prep, clean and work with resin models.
So, resin. These are a bit different to the plastic sprues a lot of models (such as the Dropzone starter boxes, and almost all of Dropfleet these days!) come on.
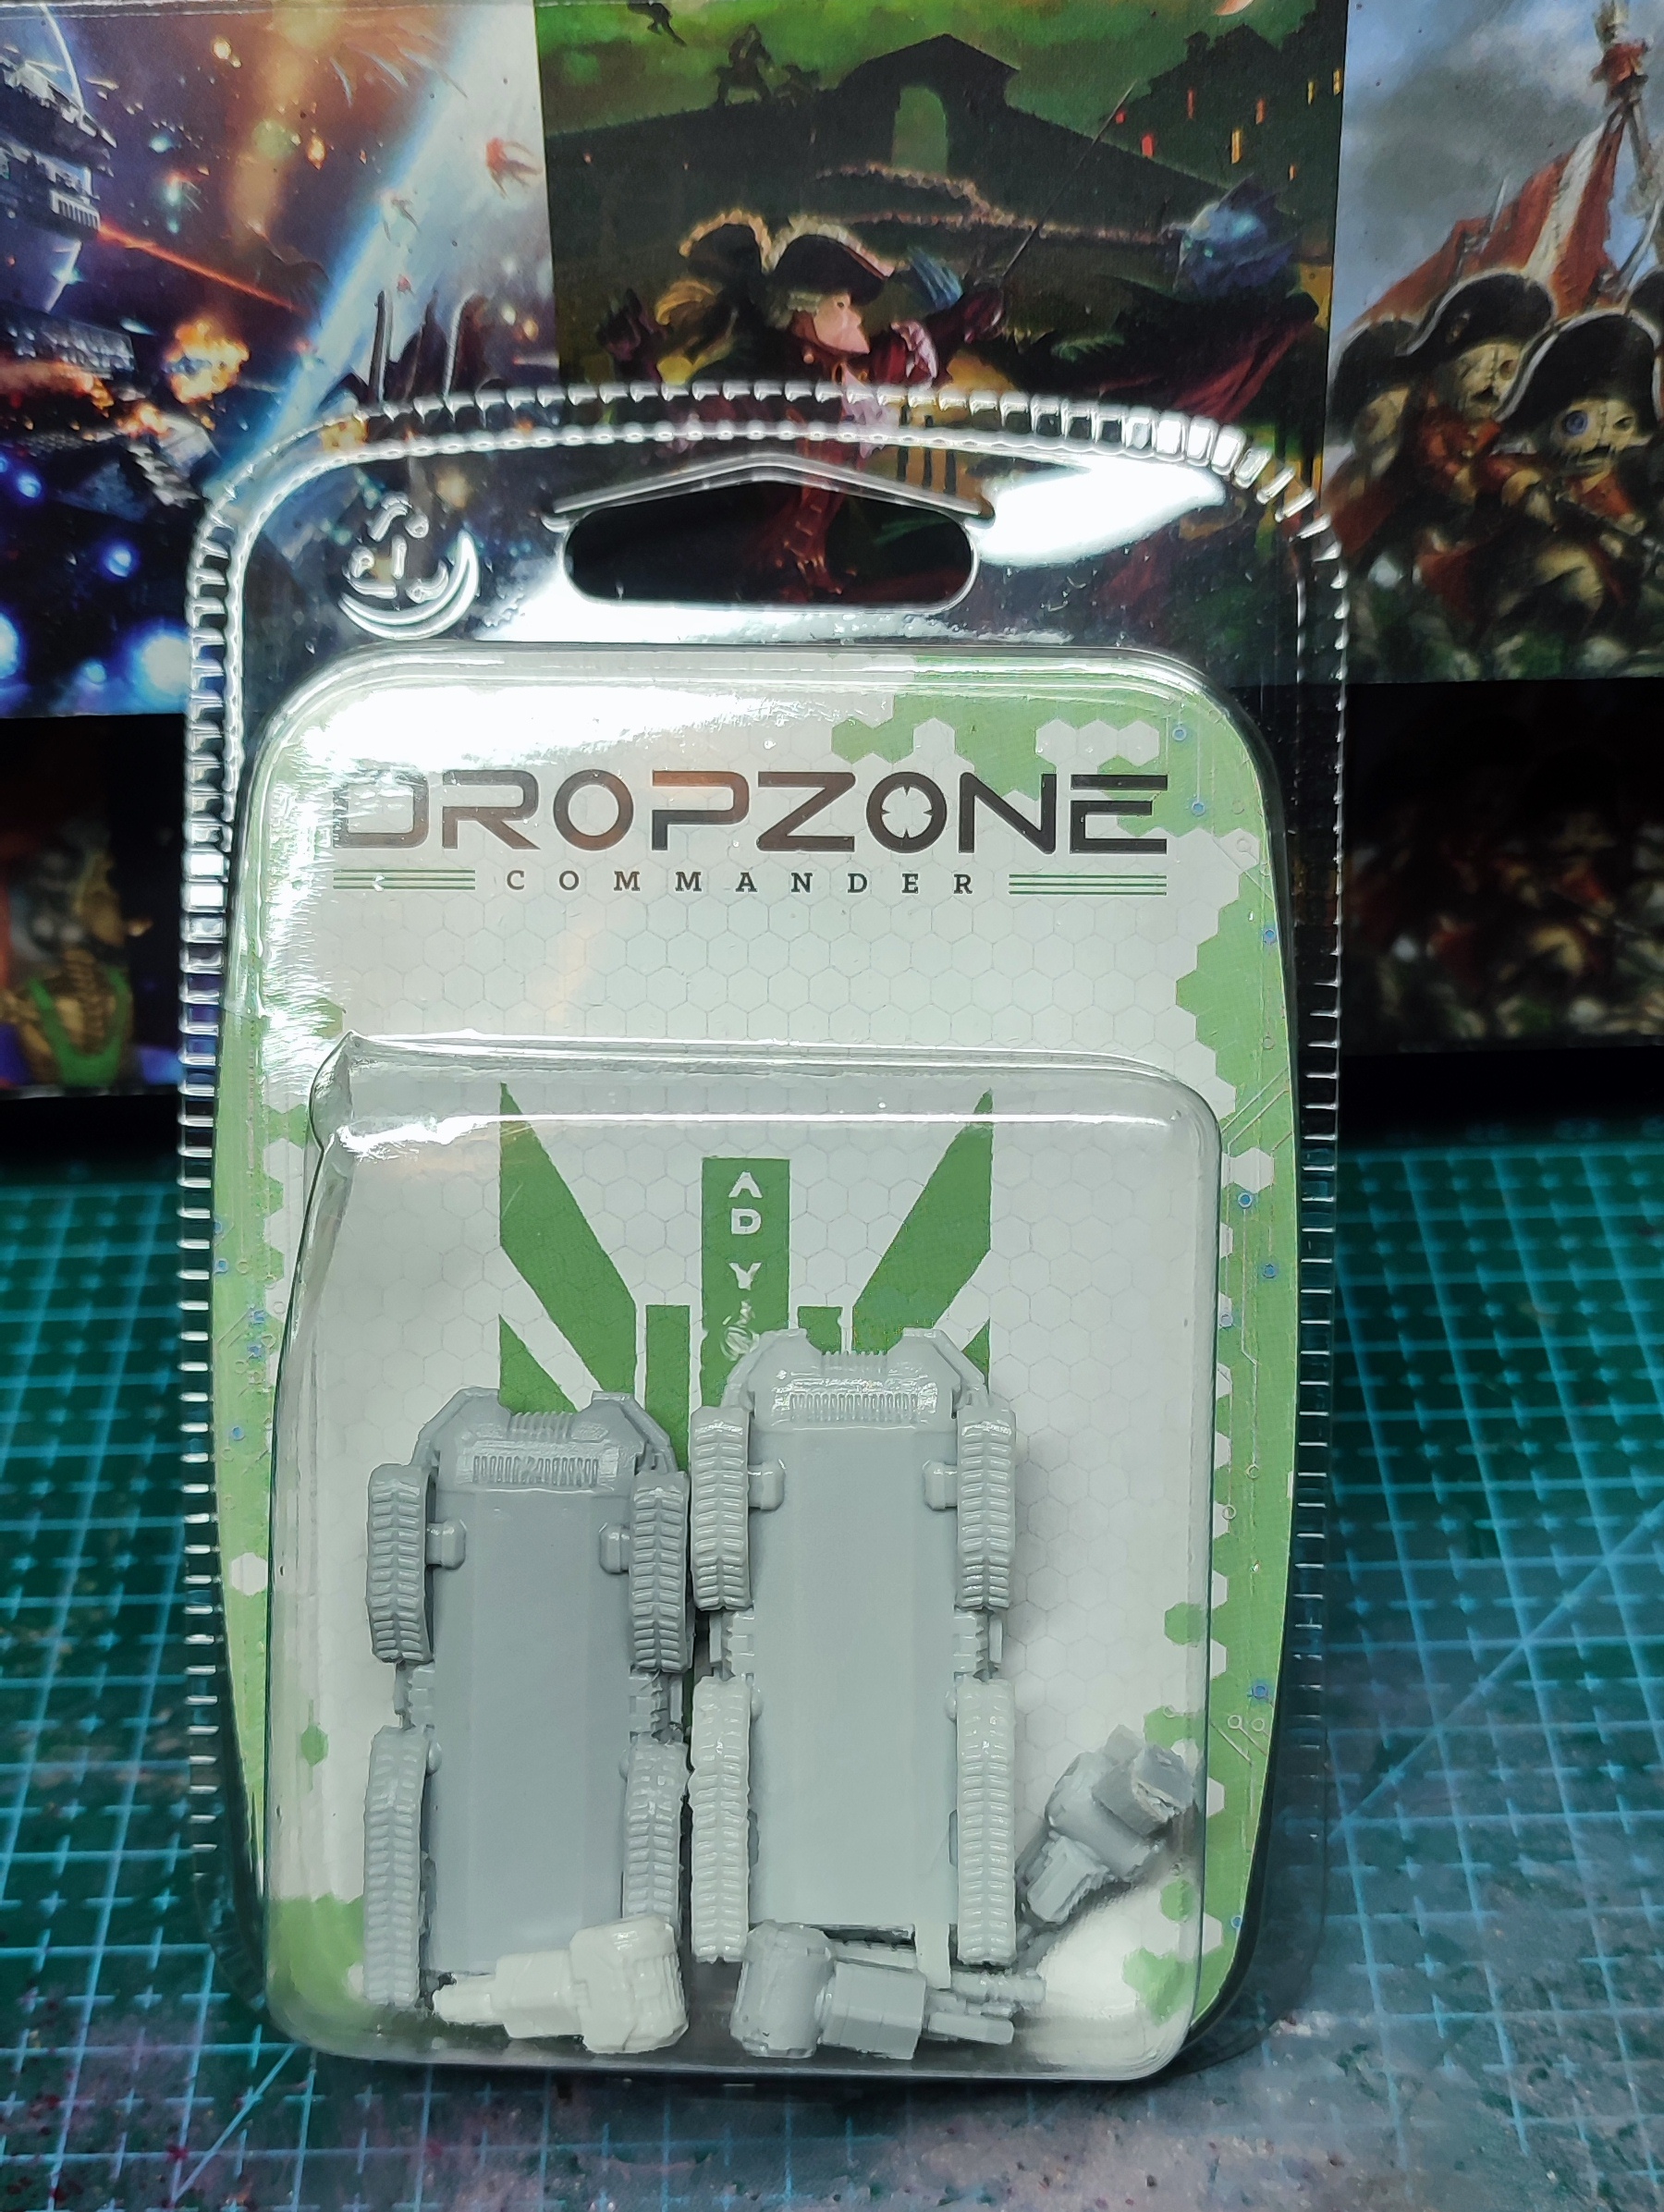
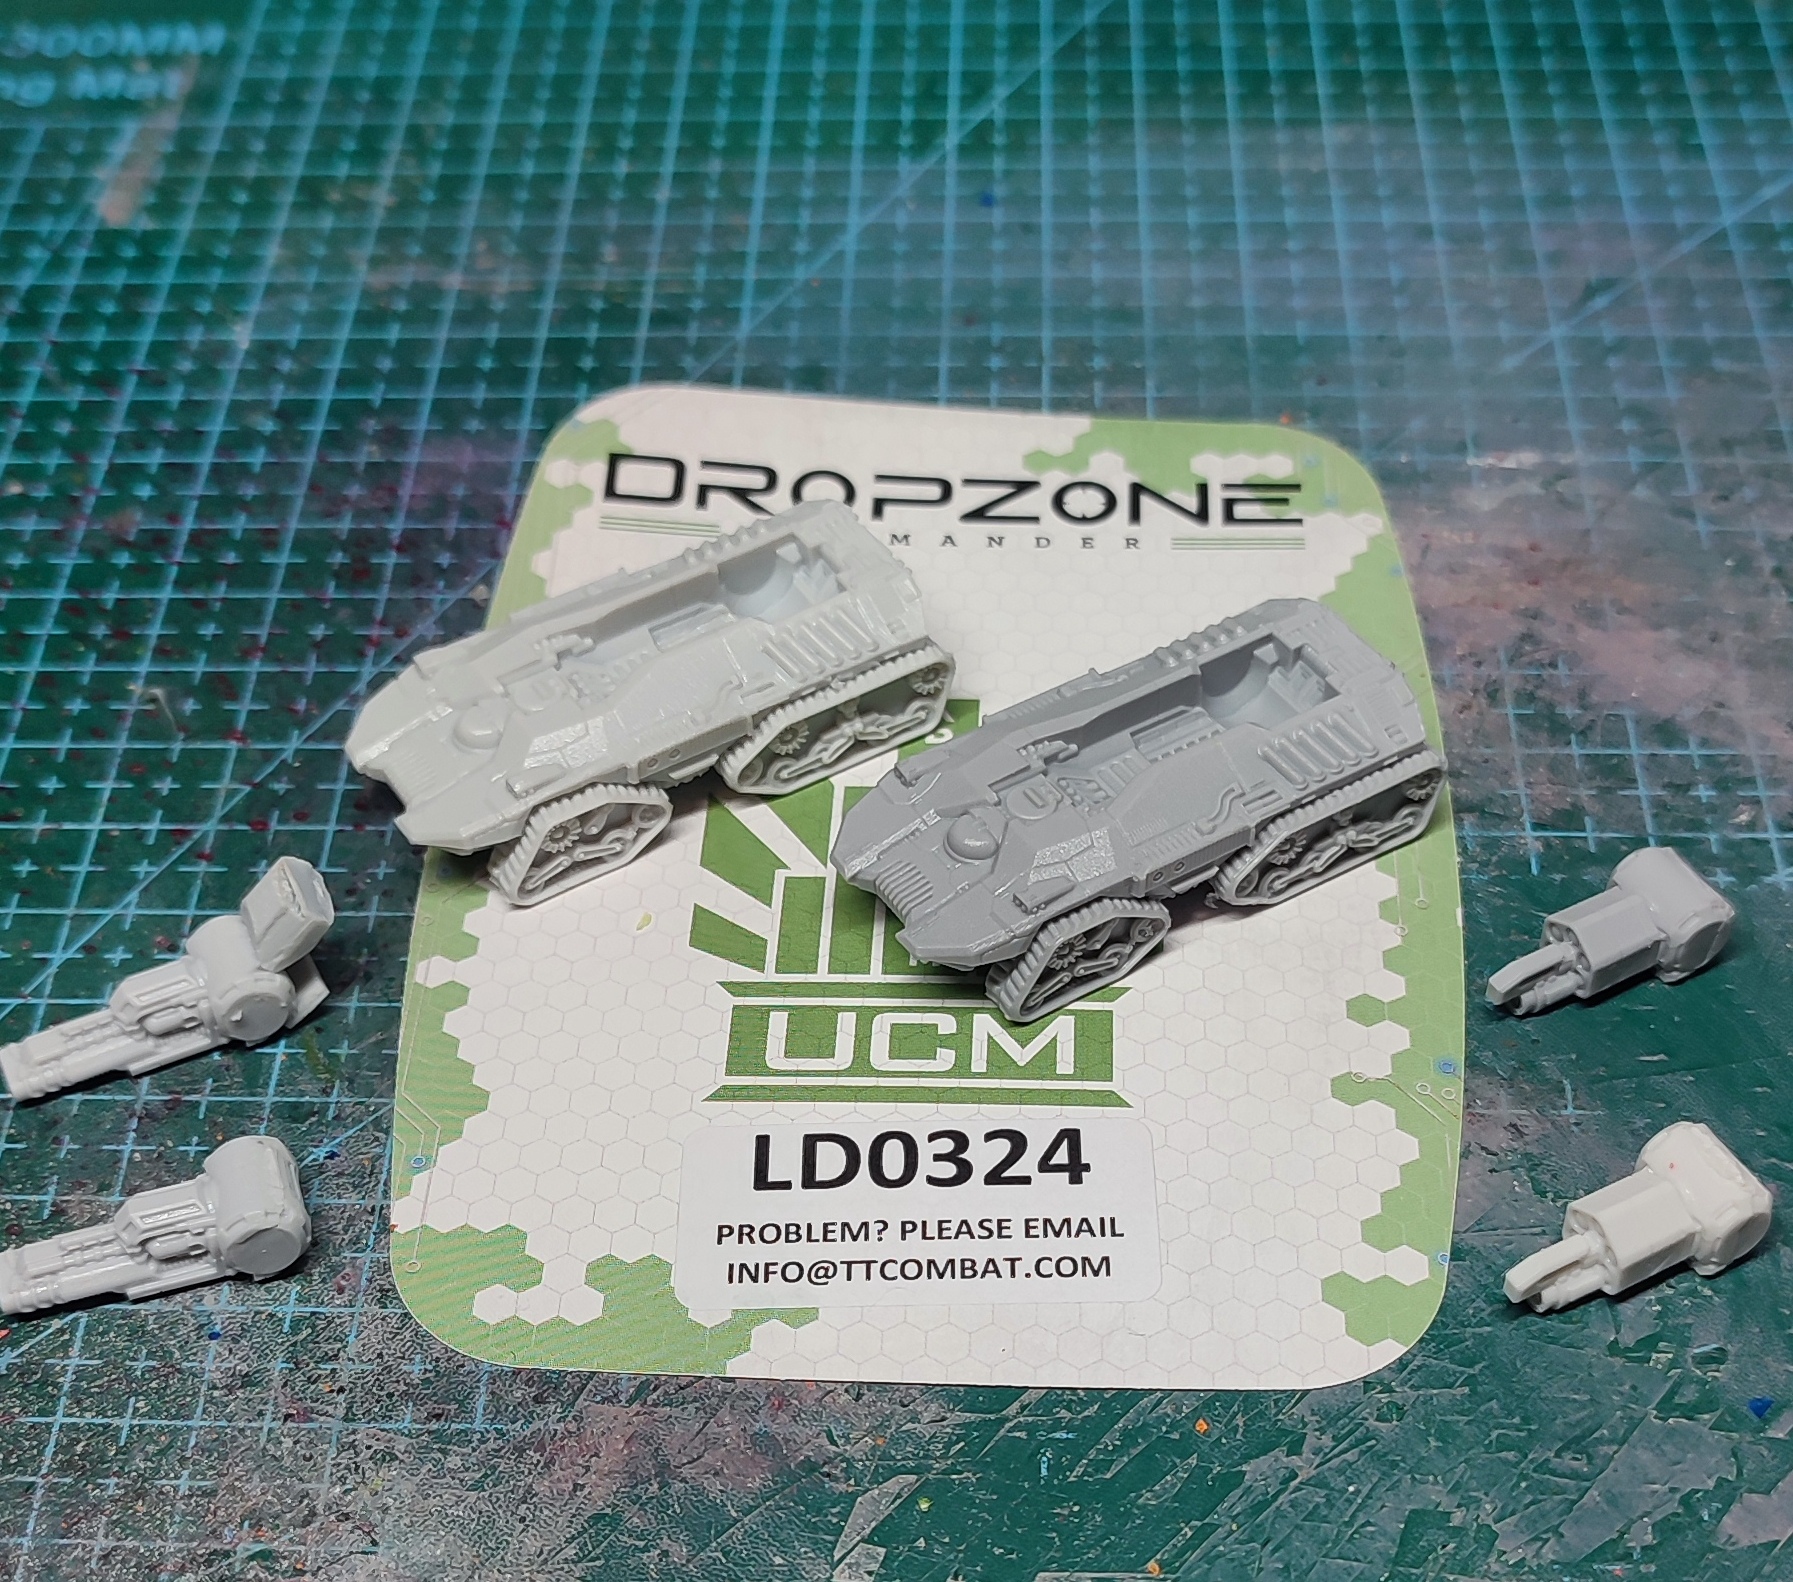
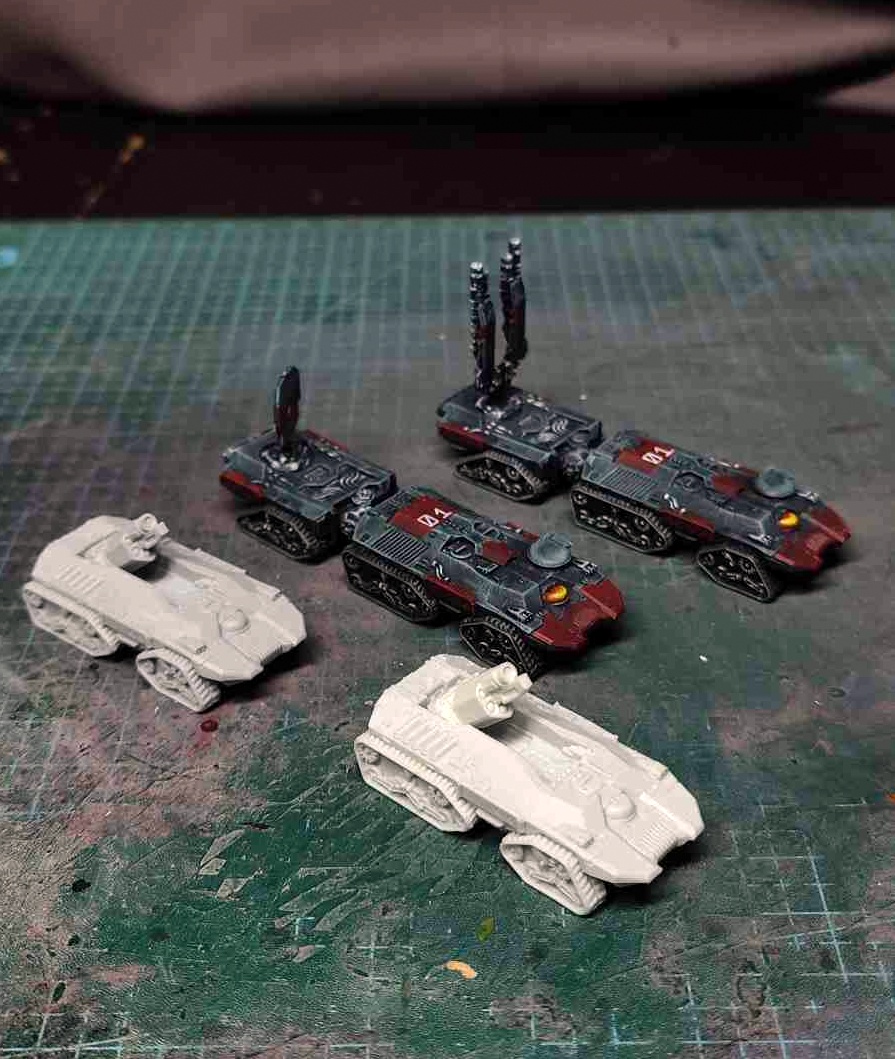
The first thing you’ll notice is that resin models generally come in far fewer pieces. Unlike plastic, these are cast in a mould, which means what would in plastic need a lot of small parts instead forms a handful of chunky, high detail parts in a resin model. You can see my pair of UCM Grizzly Mortars are a single piece per vehicle, with only the poseable mortars themselves as separate parts.
Once you’ve got the models out, do a quick check that you have all the parts. Simple kits like these Grizzlies don’t come with or need instructions, and it’ll be fairly obvious if you’re missing something, but larger kits like the Dropfleet Dreadnoughts or Dropzone Behemoths have construction guides on the resources pages of their respective games at TTCombat.com.
Once you’re happy you have all the parts, go through them and clip off the resin “gates.” These are the hefty chunks of resin that connect to the models, and are the channels into which the liquid resin was poured in the casting process. Resin is quite soft, so you can clip these off and clean up the contact points with your normal clippers and hobby knives. If the gate is on a visible area, you may also want to sand down the contact point afterward. Remember to wear a mask or respirator when sanding resin, or at very least do it in a well ventilated room – resin dust is not something you want in your lungs!
Next, inspect each piece carefully. Resin allows for very fine detail, but the nature of the process can sometimes result in some issues:
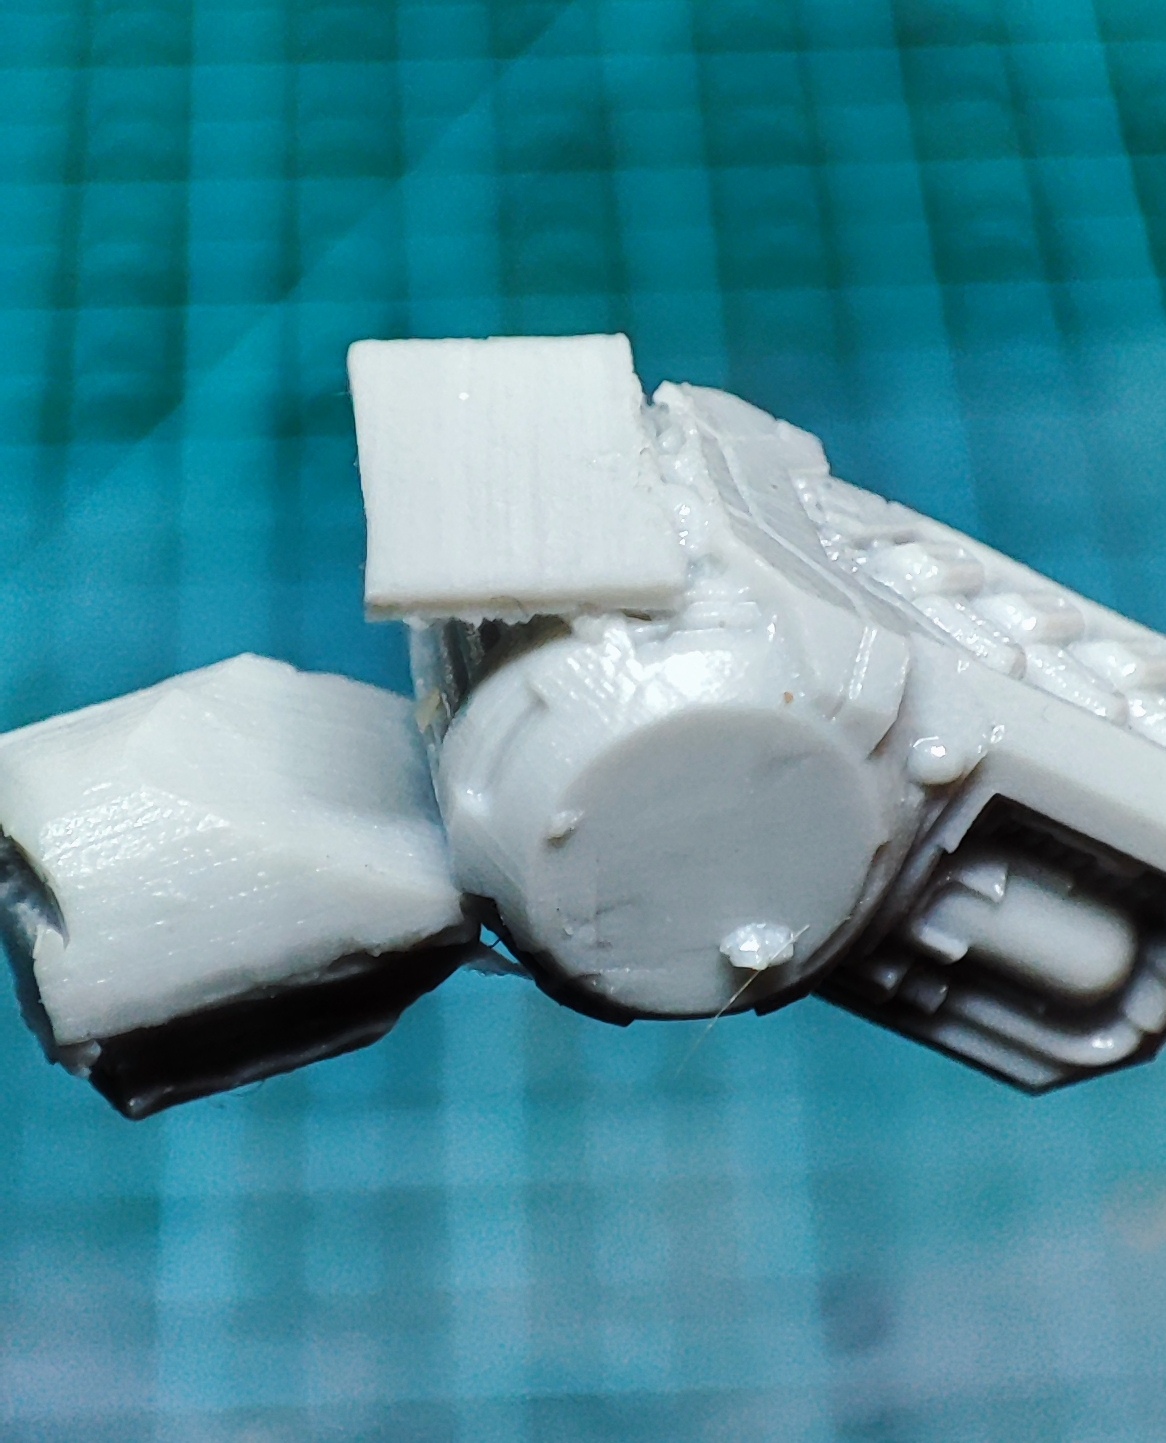
- “Mould slips” are where the mould has, well, slipped during the casting process. This can result in some parts of the model being misaligned, which leads to a seam forming across a part of the model.
- Sometimes air bubbles can form in the resin.
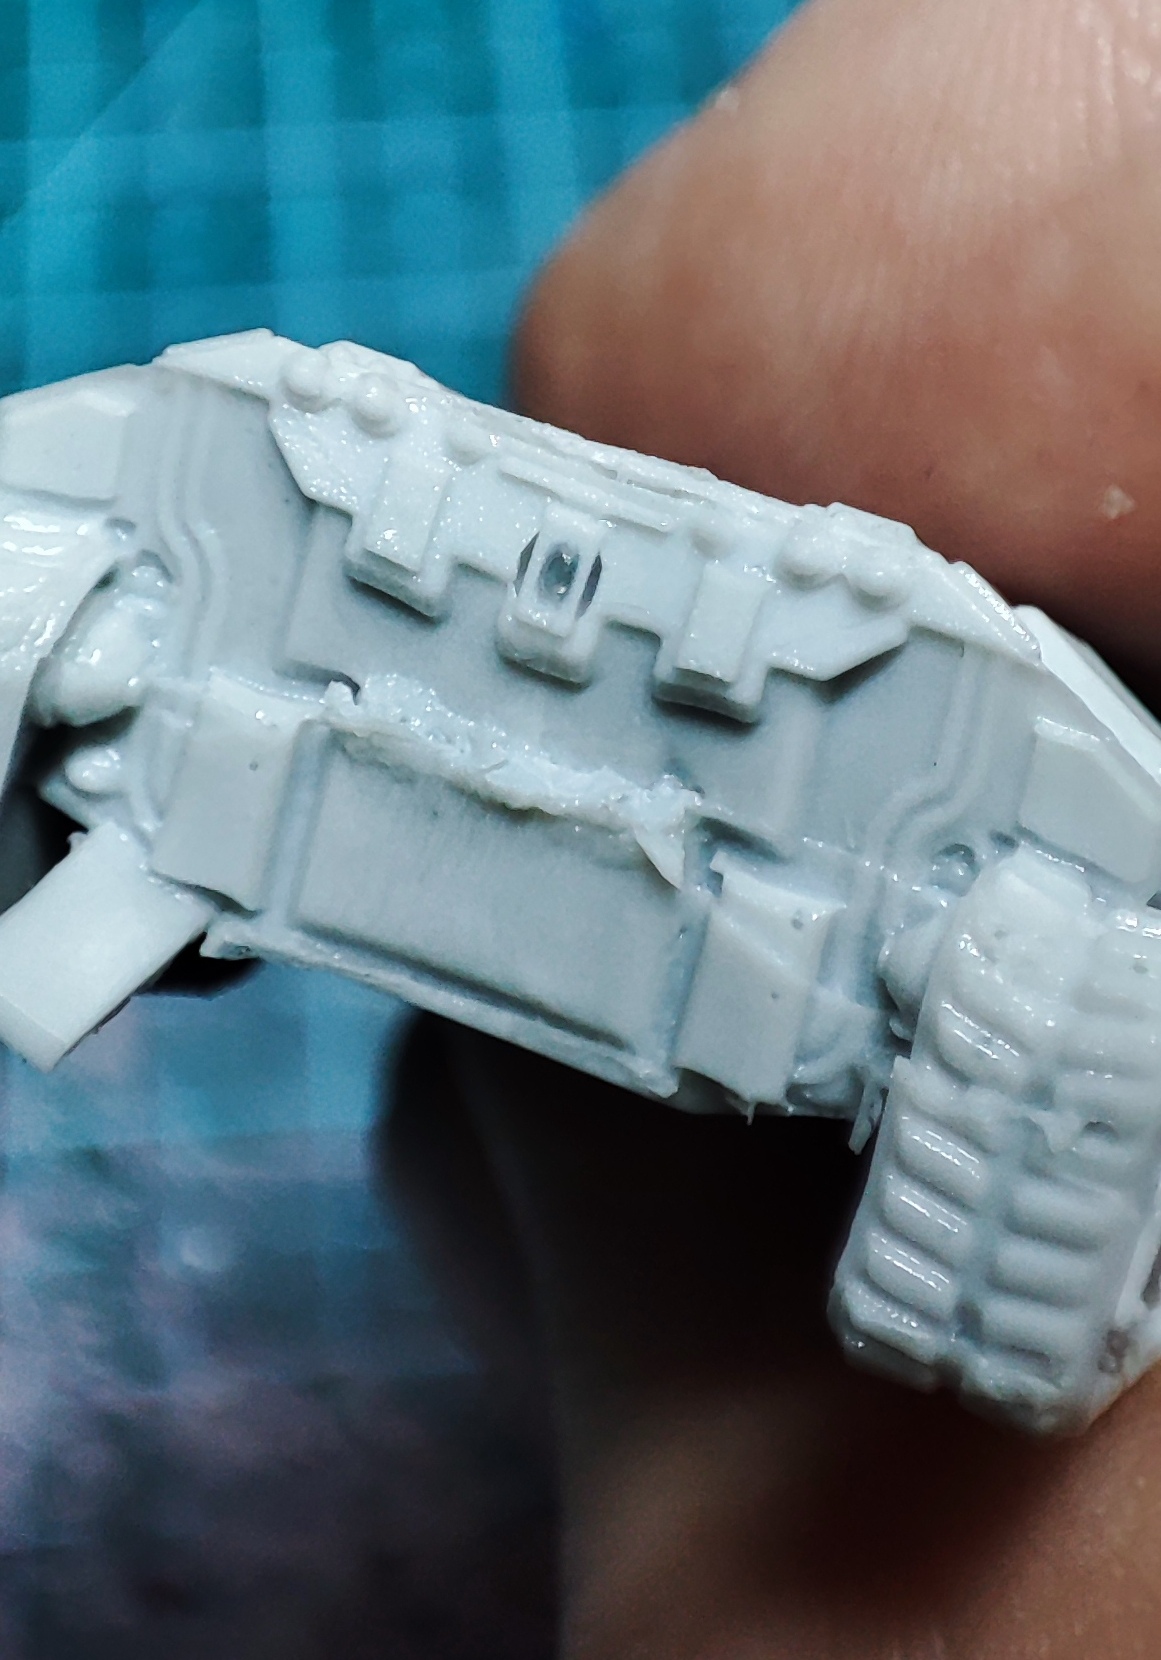
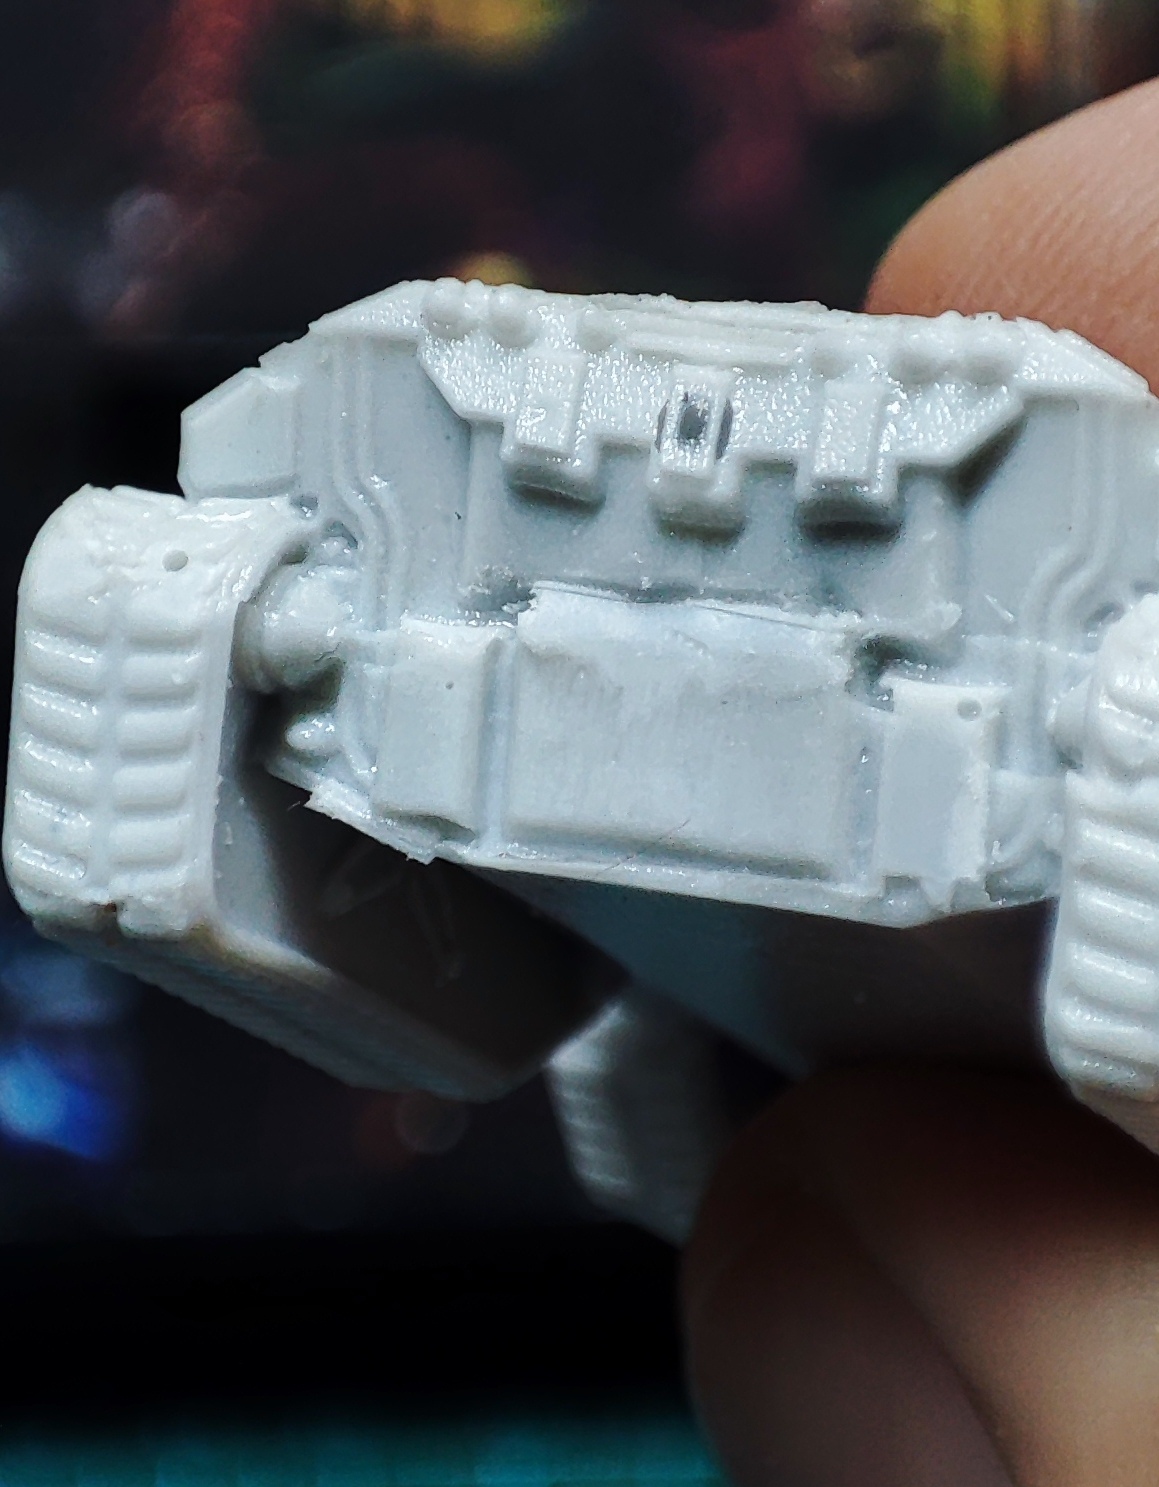
Mould slips can vary by severity. Sometimes they’ll be in unobtrusive places where they honestly don’t matter at all, and if they form on a flat part of the model you can fix them easily enough with a craft knife and some careful scraping, followed by sanding.
Air bubbles can also be filled in with green stuff, modelling putty or my favourite method, UV resin, which again, you can sand down easily once it’s cured.
Always see if you think you can fix any minor defects yourself first, but if you have any issues, you can email info@ttcombat.com. Each resin kit will have a code on the packaging, with TTCombat’s email address as well – just get in touch quoting the code and with photos of the issues.
In this case, I was able to clean up most of the issues with this Grizzly with a knife and some sanding. The photo looks a little rough, but remember this is a macro photo of the rear end of a tiny model!
Air bubbles will get cleaned up at a later stage. When handling the models, you’ve probably noticed that they feel a bit greasy, or look shiny. This is the mould release agent, which the moulds are coated in so the model comes out easily. This stuff needs to come off before assembly or priming, or you’ll find your paint won’t stick to the models – there’s nothing worse than having your wonderful paintjob flake off when handling the model, so don’t skimp on this!
There are lots of methods for cleaning resin models. Some people swear by scrubbing the models with a toothbrush dipped in isopropanol, but you might not have this chemical to hand and it can make resin rubbery if you leave it immersed for too long. My method of choice is quite simple:
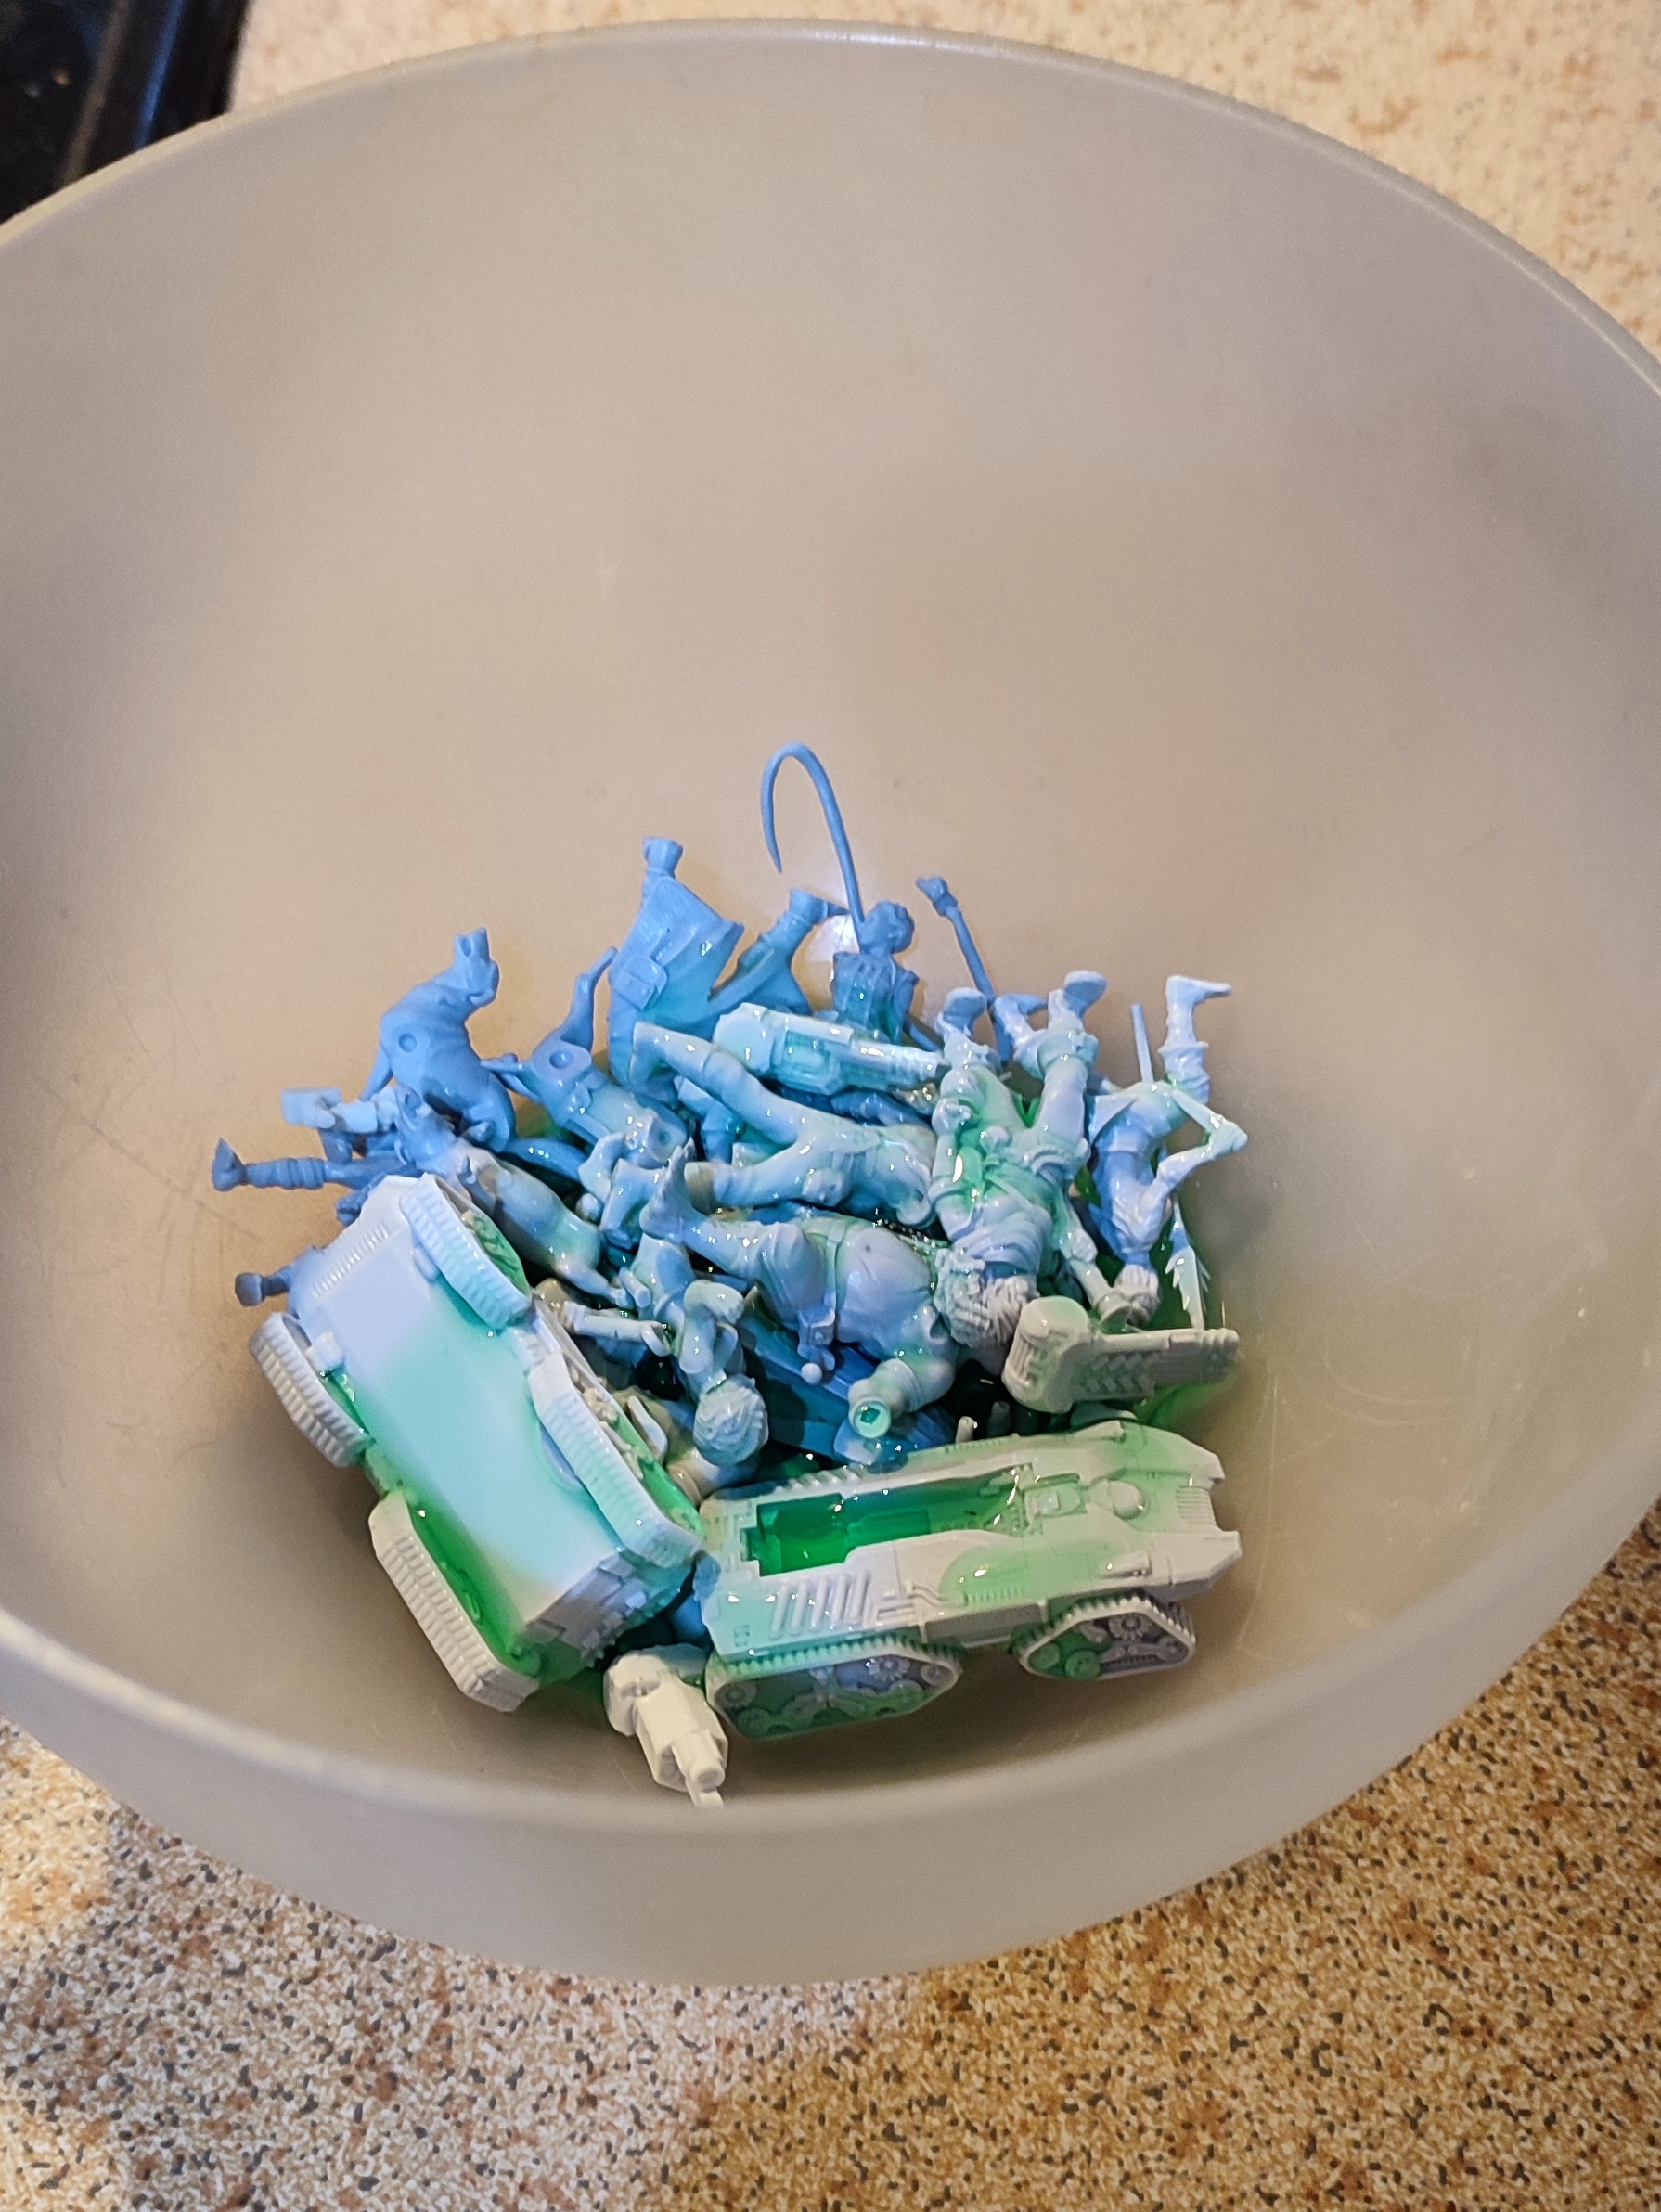
- Put the models in a bowl (you can see a gang of Carnevale dockworkers have joined my grizzlies in the gloop).
- Add a liberal amount of washing-up liquid / detergent. Any brand will do, and you can’t use too much.
- Add water so the models are fully immersed.
- Leave to sit for a while.
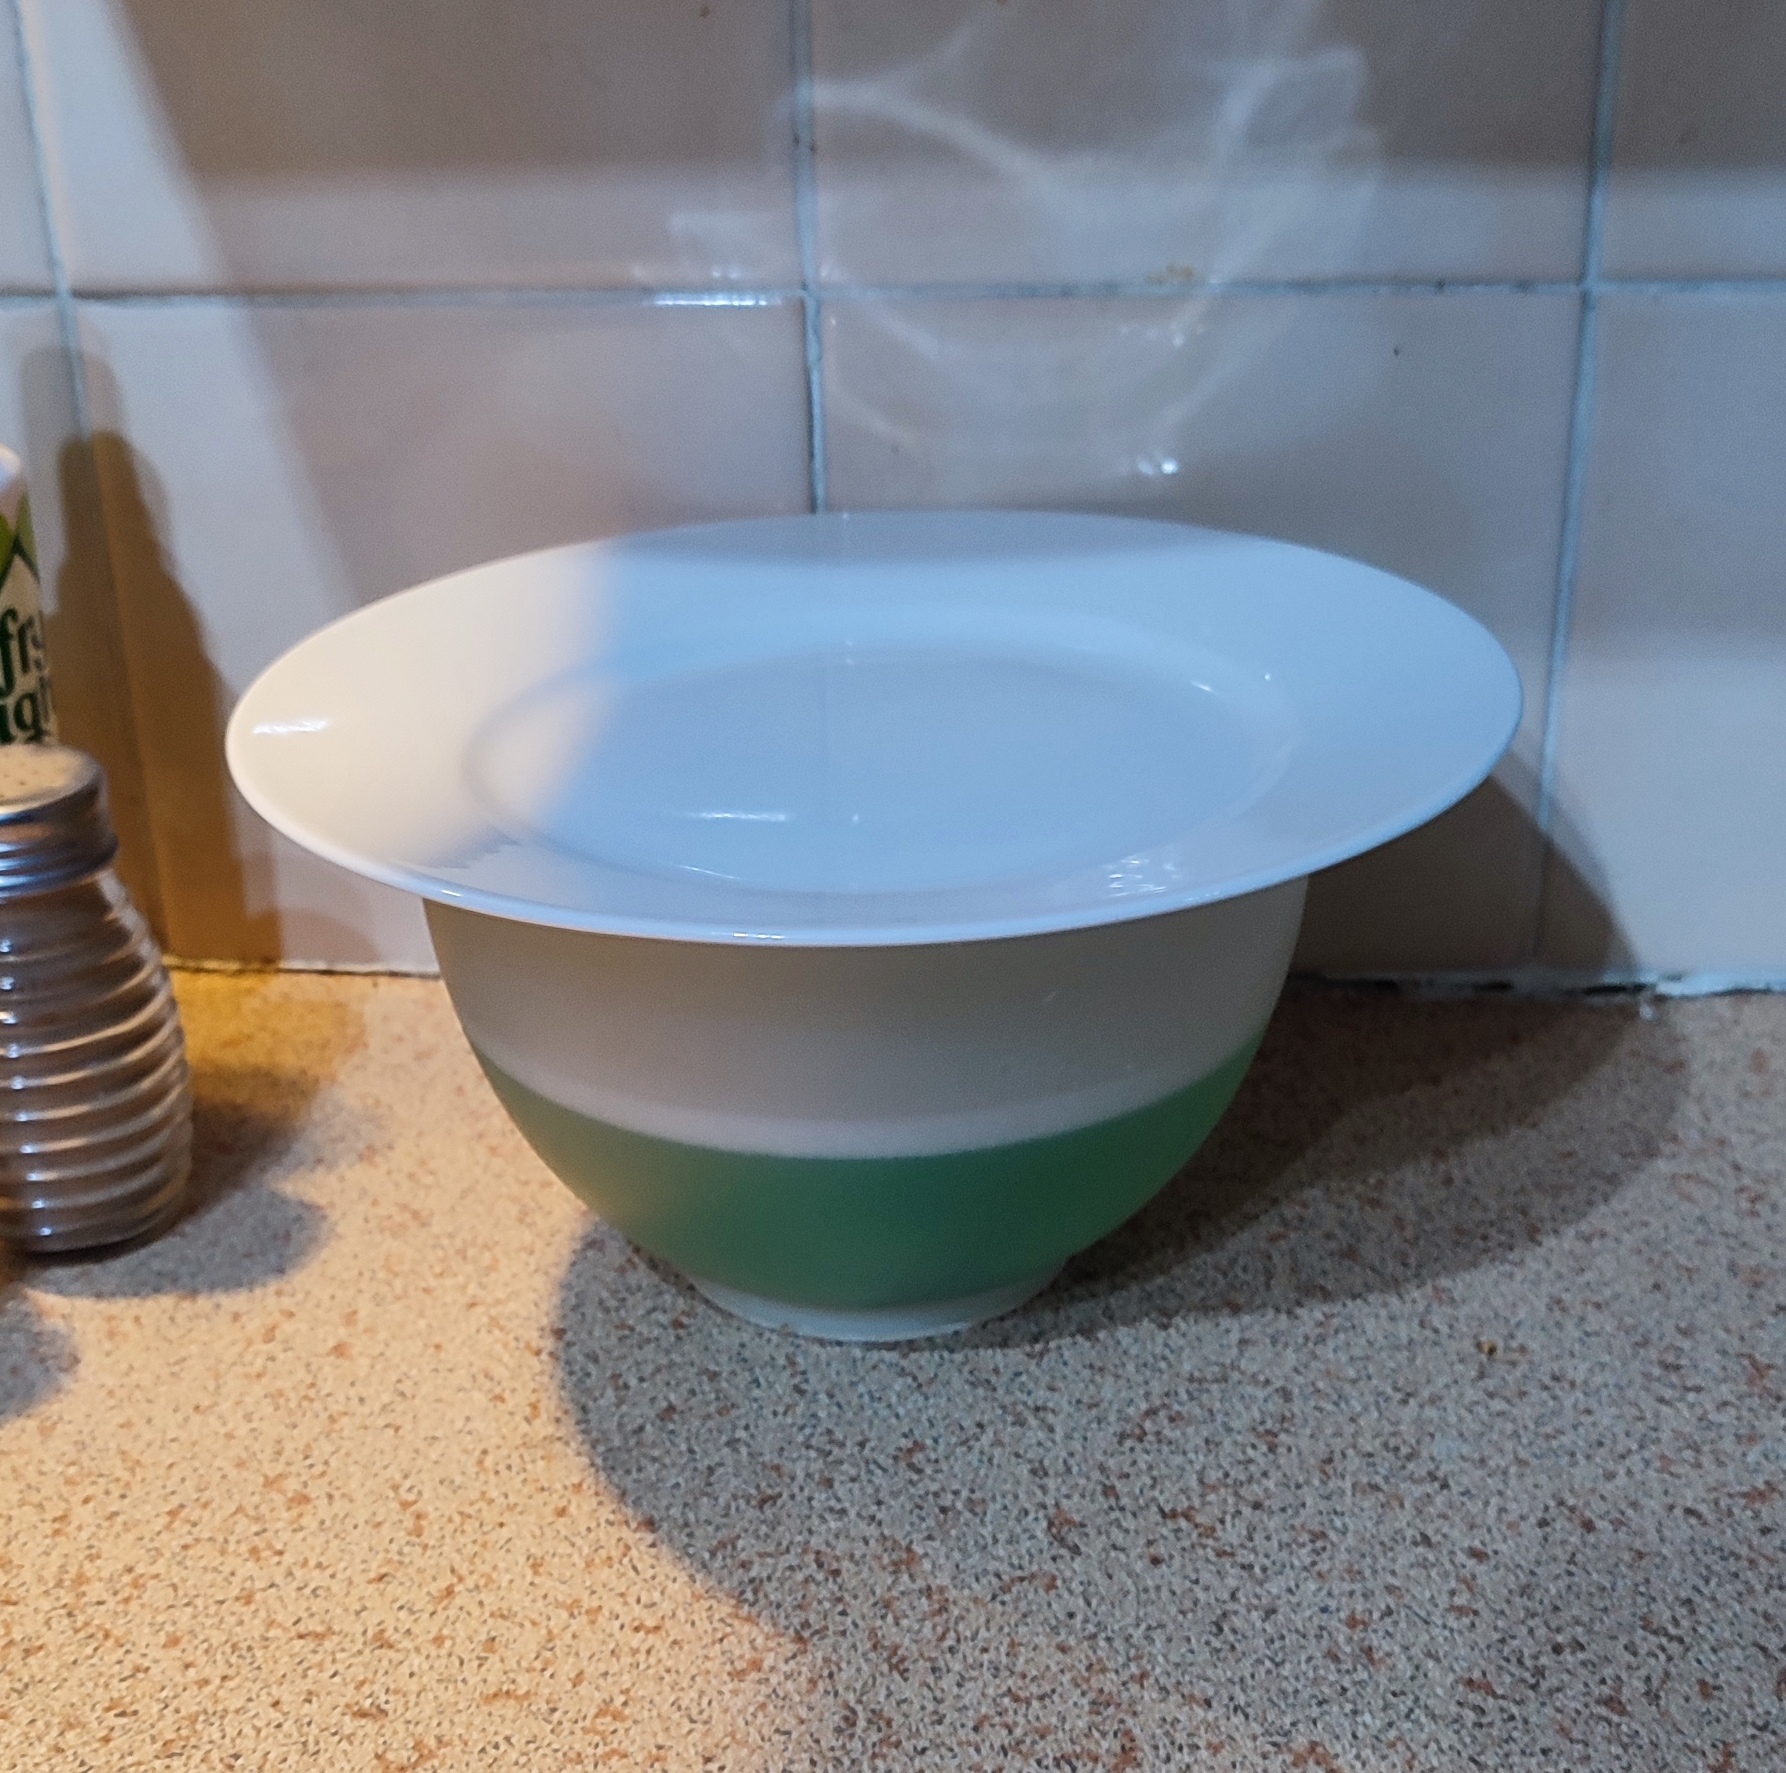 I’d usually let the models soak for about half an hour at least. You can’t really leave the models in too long – I tend to just put a plate over the bowl and then forget about it for a few days. Just make sure any family members know not to pour the contents down the sink!
Then it’s time to scrub the models. This is probably the most time-consuming part, especially as you want to ensure you get all that mould release agent off. I usually do mine in big batches. You’ll need a second bowl of clean water, and some stiff brushes for this – I use wire brushes, but an old toothbrush will do fine as well.
Fish out each piece, hold them in the clean water, and scrub. Be careful not to break any fragile bits, but other than that, you don’t need to worry about damaging the models – scrub the release agent off, rinse in the clean water, and lay out to dry. Rinse (literally) and repeat until you’ve cleaned everything.
Then you’ll want to glance over the pieces once they’re dry, and check if they still have that sheen. If they’re clean they should look and feel it – if they still feel greasy or shine as if wet, chuck them back in the washing up liquid and go again. Some really stubborn pieces might need you to do this a few times, but trust me, it’s better than the alternative.
Once the pieces are clean, it’s finally assembly time! You’ll need to use superglue for this, as plastic cement won’t do anything. Test-fit the pieces first, then glue them together, and admire your work.
At this point you’ve maybe got a couple more things to do before paint. You might have a few gaps and visible air bubbles still, which can be filled easily with green stuff, modelling putty or UV resin.
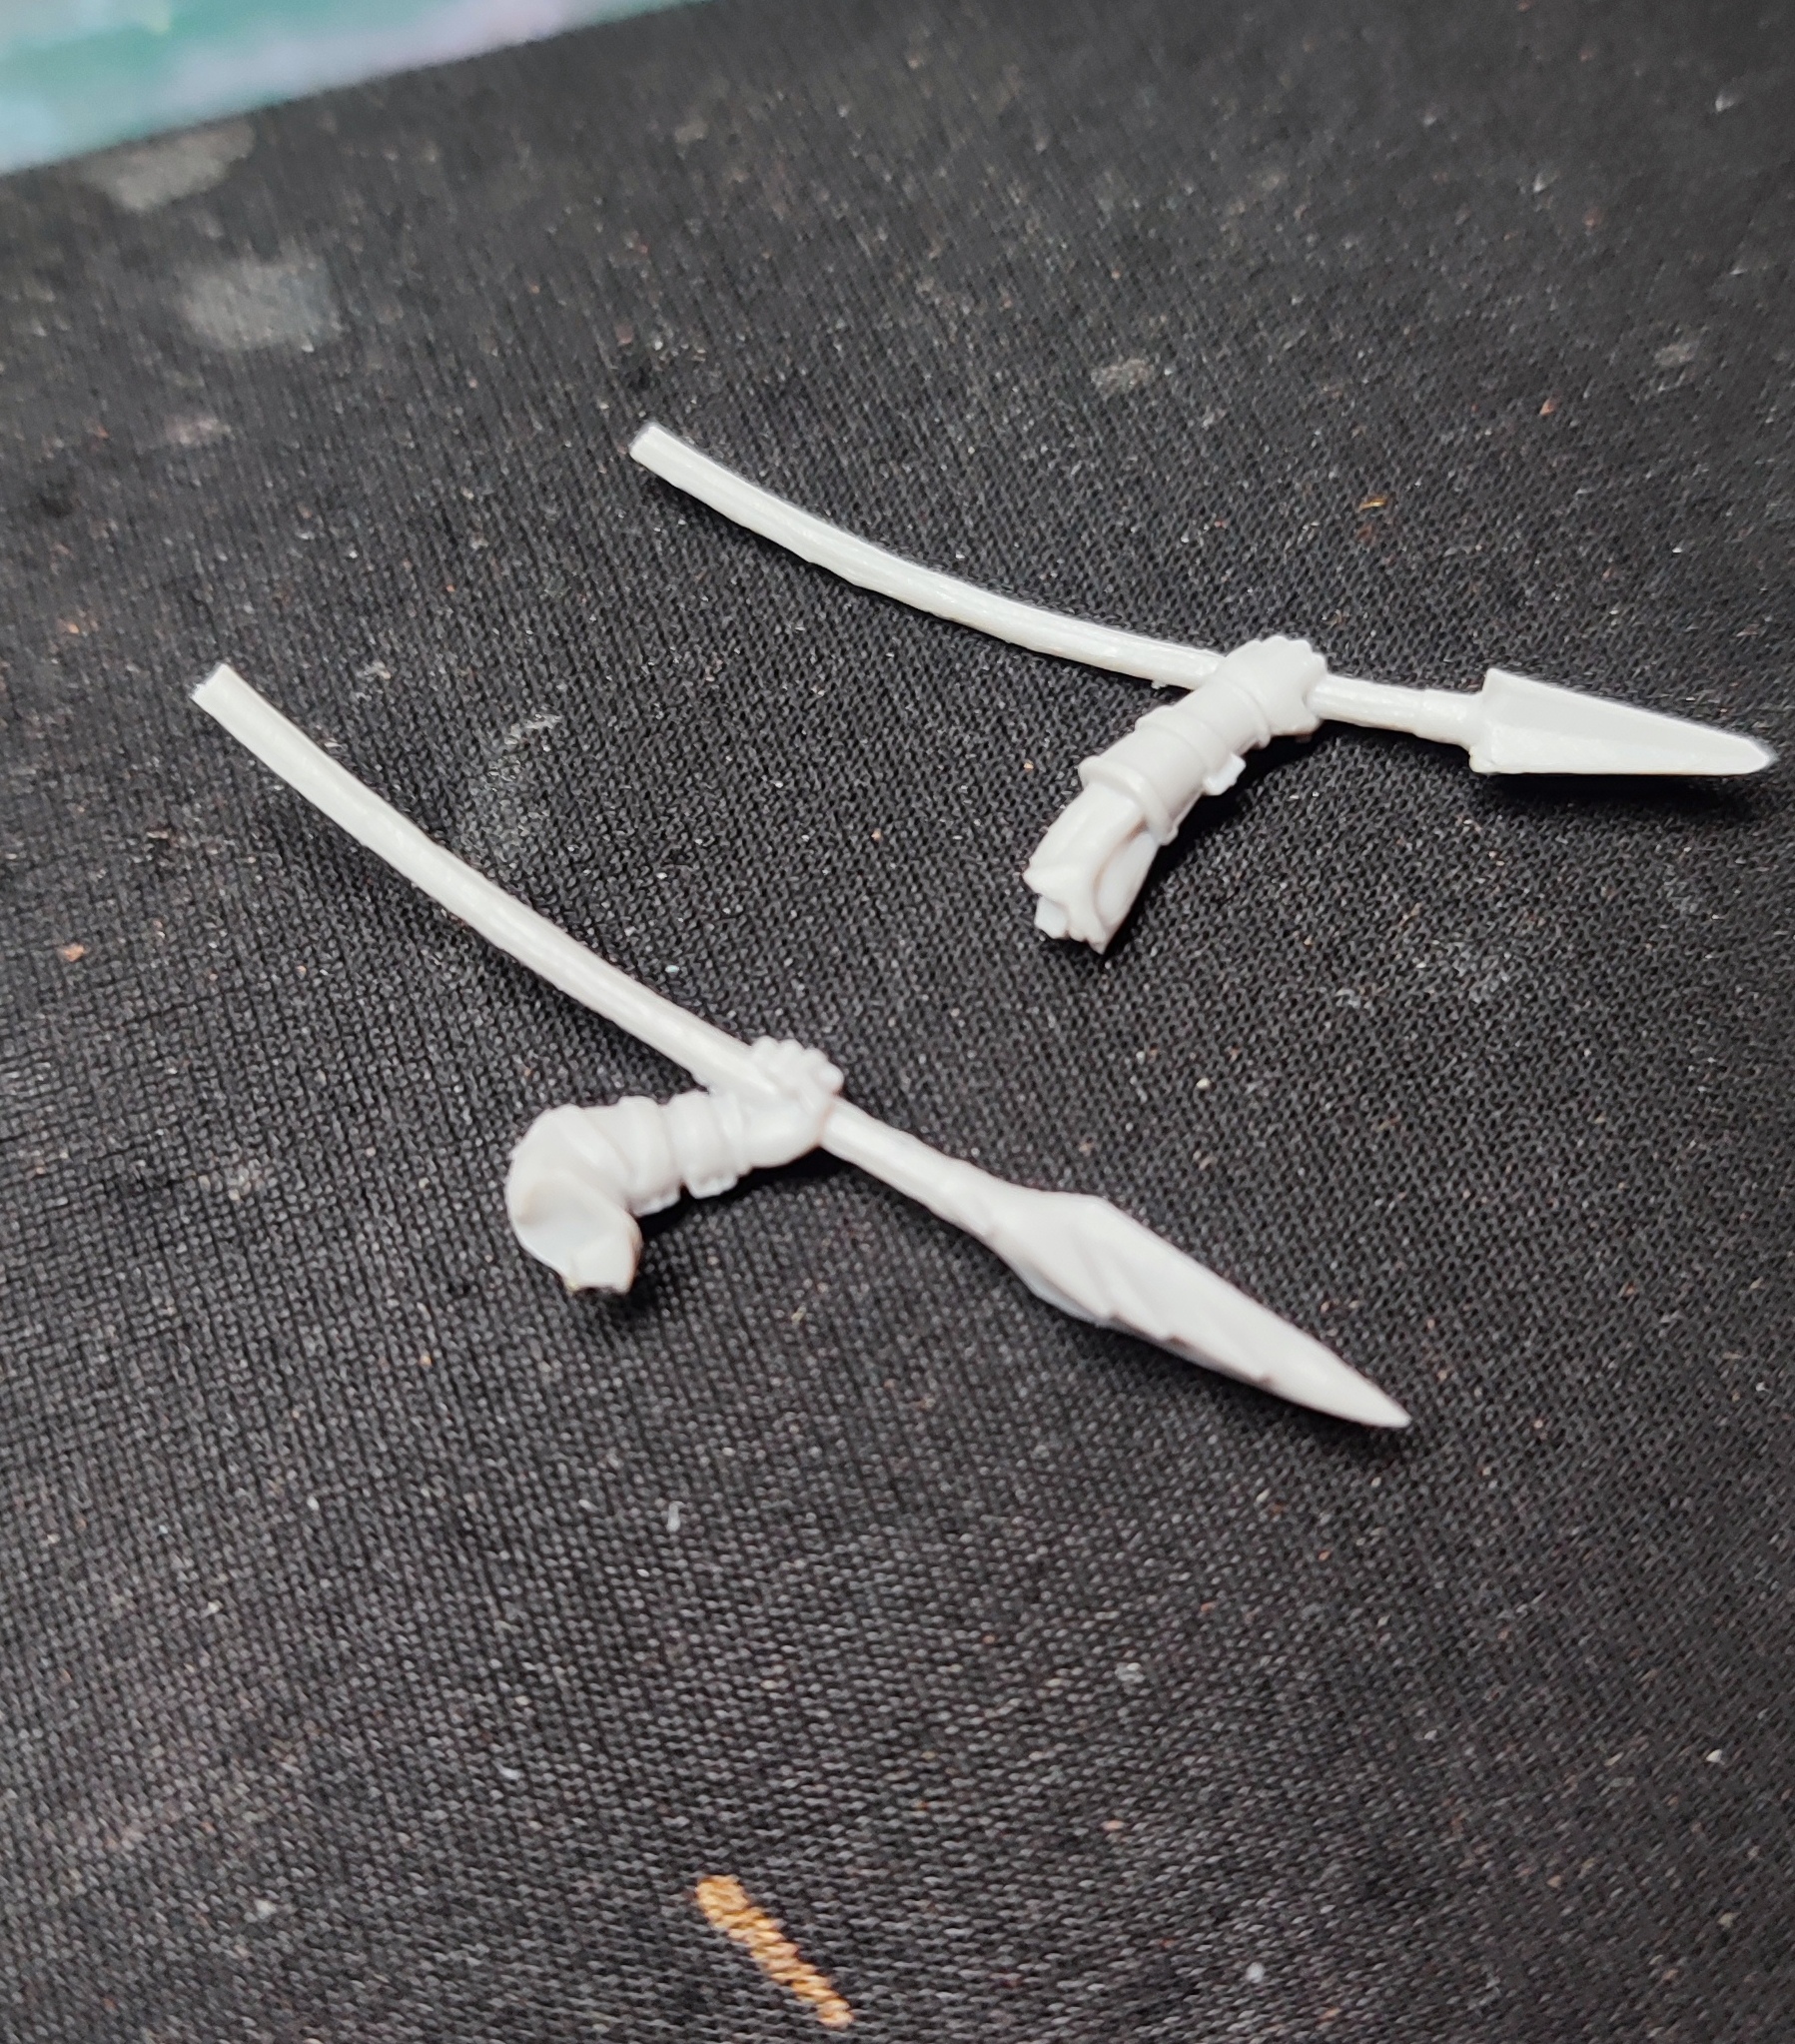
You might also have some bent parts that need straightening. This is most noticeable for stuff like gun barrels, spears etc which look very odd if not straight.
Fortunately this is really easy to sort. Some people use hairdryers, but I’ve found a hot-and-cold water approach works best (plus you get to feel like you’re quenching your forged model like a blacksmith). Simply grab two cups of water, one recently boiled and one cold. You want the first one hot, but not fresh out of the kettle – let it stand for a minute or two.
Carefully holding the bent piece, with pliers if necessary, dip it in the hot water for about five to ten seconds. The heat will very quickly make the piece soft, so take take it out and quickly straighten the piece – you can use your fingers for this, or press it into a ruler or flat surface if necessary. Then quickly dunk it in the cold water and let it stay there for at least 20-30 seconds. The cold water will rapidly cool it back down again and it’ll go back to being rigid, but in its new shape!
Interestingly, hot and cold water won’t really affect a paintjob, so you can do this with painted models in a pinch. I’ve had it where some of my models have warped when we’ve had really hot weather, and have been able to sort them out with this approach without affecting the paint whatsoever.
From here on it’s just like any other model – get it primed, get it painted and play with it. The only other thing you might want to do is varnish the models once they are painted as, even if thoroughly cleaned, paint can chip off resin more easily than plastic.
I tend to varnish the models with gloss varnish first, as that gives a really nice hard coat to protect the paint. I then apply a matt varnish over the top, although that’s a matter of taste – it will dull down any metallics you’ve used. If you don’t want that, you may need to forego one or both varnishes.
And that’s it! Resin models can seem scary when coming to them from just plastic kits, but they’re not that bad. If you can do the cleanup stage in efficient batches, I don’t even think they take much longer to prep and assemble than plastic.
Have fun, and share any tips or tricks you have for working with resin in the comments!
Alex


