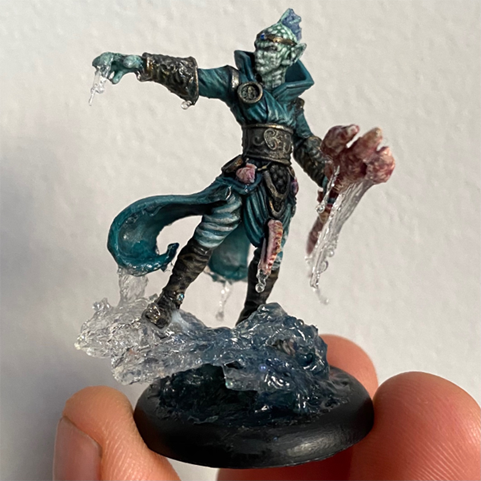
Turns out it’s easy to create water effects in Carnevale…
Have you ever looked across the tabletop and been envious of your opponent’s miniatures? We’ve all been there and there’s no shame in that. Yet, thanks to today’s guest writer, we can make your Carnevale miniatures the envy of your friends. Jon Berenguer-Webb AKA Mr look at me and my fancy Rashaar has kindly written up his process for creating amazing miniatures.
The following is written by Jon BW.
Ever since I picked up the Carnevale starter set back in 2020, I’ve been striving to create dynamic water effects for the Rashaar. After all, how many other skirmish games have such a prevalence of water as Carnevale has?? Creating water effects isn’t something I’d ever attempted before, and it represents a unique modelling challenge.
After scouring the internet for blogs and articles about water effects, and then trying many of them out, these are the things I still use and some guidance on how I use them to create dynamic effects.
Blister Plastic
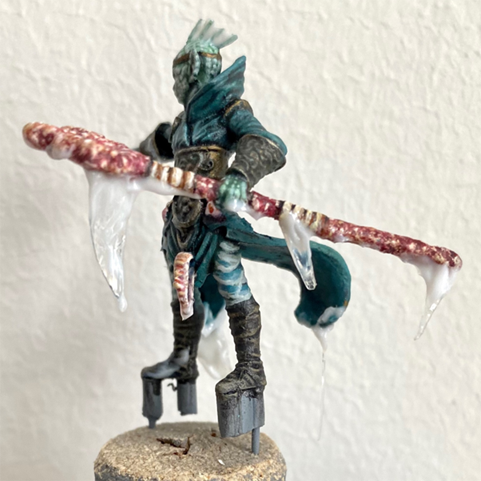
You know that clear packaging that your models come in? Save it, because that can be used to form the basic shapes of waves, splashes and sheets of running water. Cut small triangular shapes, bend it slightly (you can use a hair dryer to warp it too) then glue that to your bases or model to form the base of your water.
Transparent Thread
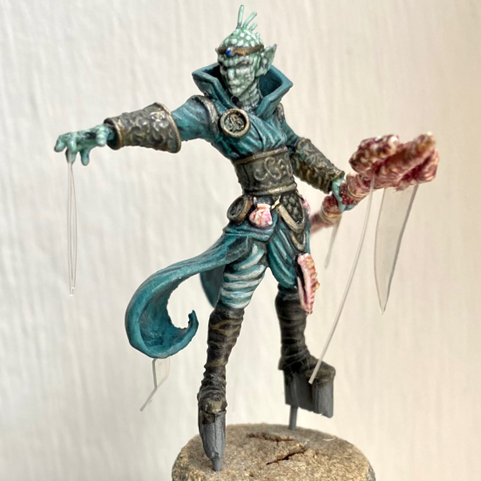
I use a 0.3mm transparent thread to add finer drips, droplets and smaller portions of splashes. Again, just cut off a small section and glue in place ready for the water texture.
Vallejo Water Texture
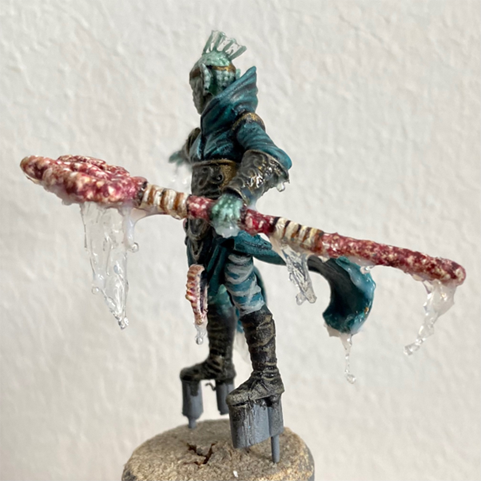
This is what I use the most out of everything and is for creating small splashes, waves, texture and droplets. It looks like a thick white PVA glue when you put it on but dries clear, as long as you don’t apply it too thick! Use an old paint brush or cocktail stick to dab it on and shape it, but nothing thicker than about 1-2mm or it will dry cloudy. It can then take up to 24 hours to dry. It doesn’t like cold conditions, but you can speed up drying time by placing your model near a radiator or on a window sill, just be wary of too much heat as it can soften your resin miniature too!
2 Part Resin
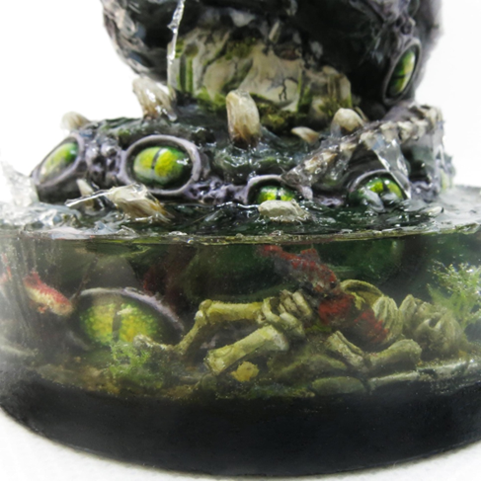
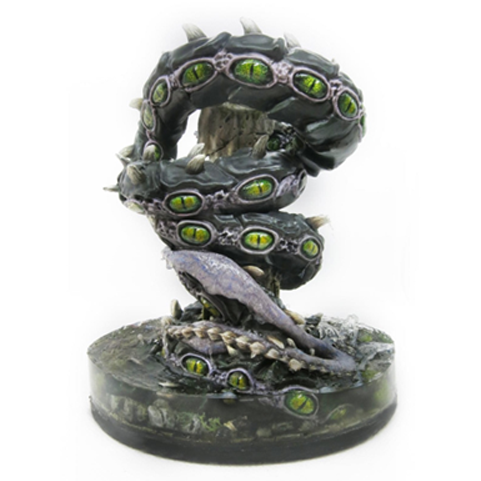
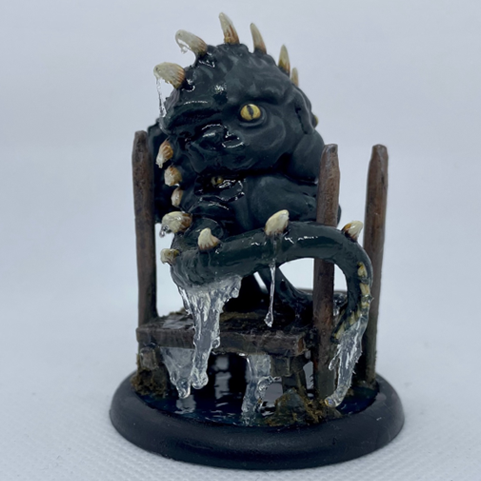
For large scenic bases and boards you’ll need to use 2 part resin. You need to be precise when mixing your quantities and prepare well, sealing the whole base to ensure no resin leaks out. I used this for the base of my Morgraur but it’s messy and time consuming so unless it’s a large project I now use UV resin.
UV Resin
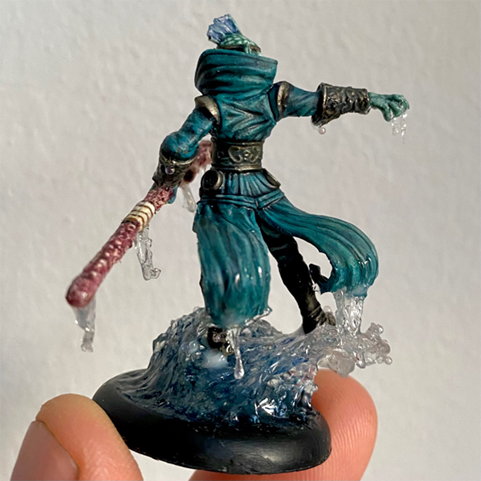
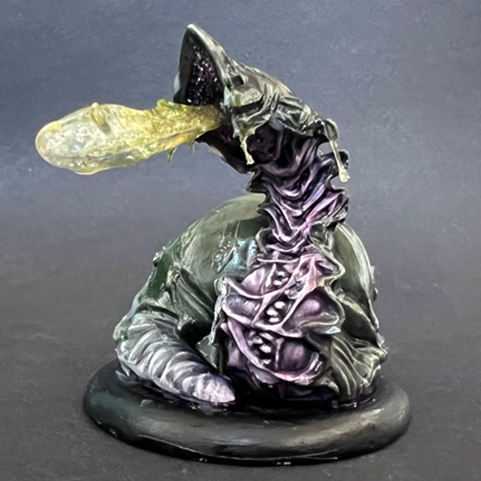
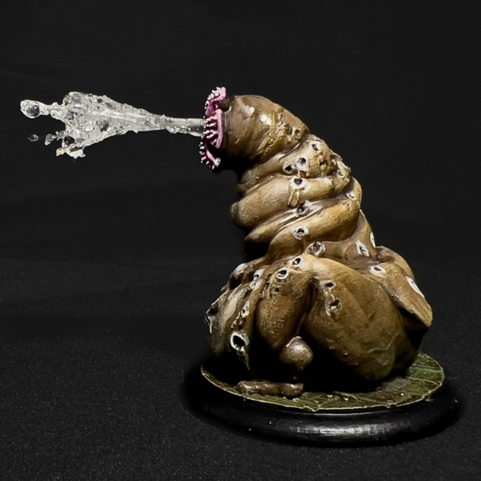
This stuff is a game changer. For large resin bases (such as on my Morgraur) I would use 2 part resin but this is messy and time consuming. UV resin is amazing as it sets instantly once you shine the UV light on it. You can’t get small details and texture with it but for building up shapes I add it to the blister plastic and transparent thread then shine the torch to set it in place. You can build up large areas very quickly, using either as the basis of the structure. This is how I created the water gush from the Salaacia and the Mucas burst from the Myxin.
Snow Flock
If you’re wanting to create seafoam on the crest of a wave then mixing together snow flock and water texture creates a great effect for this. I haven’t done this much as you don’t get giant foamy waves in Venetian Canals but if you want to try it, it looks great!
Painting Water Effects
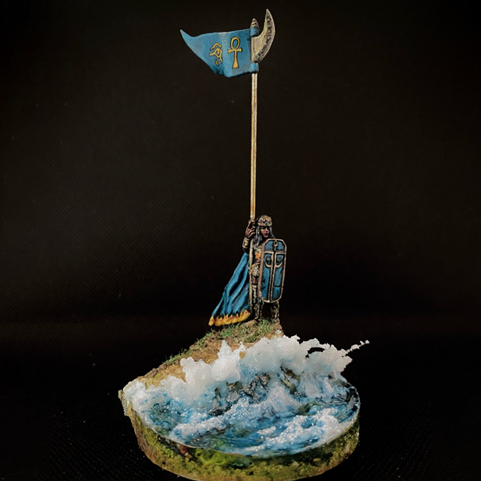
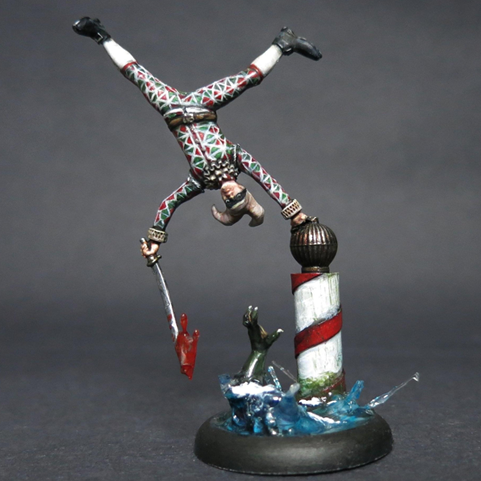
I’ve been asked a few times if you can paint water effects once they’re done, and yes you can! I’ve tended to thinly glaze the water effects with either inks or paint mixed with glaze medium. This will tint the water effect but maintain some translucency, as can be seen with my Myxin’s mucas burst, Harlequin’s blood slash and the water for my Elf with crashing wave.
Other Examples
That’s it! A huge thank you to Jon for taking the time to go over this process. Make sure you send us photos of your miniatures when you attempt your own water effect bases.
